- Collections User Guide
- Maintenance for Collections
- Product Definition Maintenance
- Create Product Definition
3.13.1 Create Product Definition
This topic describes the systematic instruction to create product definitions.
- On Home screen, click Cash Management. Under Cash Management, click Collections.
- Under Collections, click Maintenance. Under Maintenance, click Product Definition.
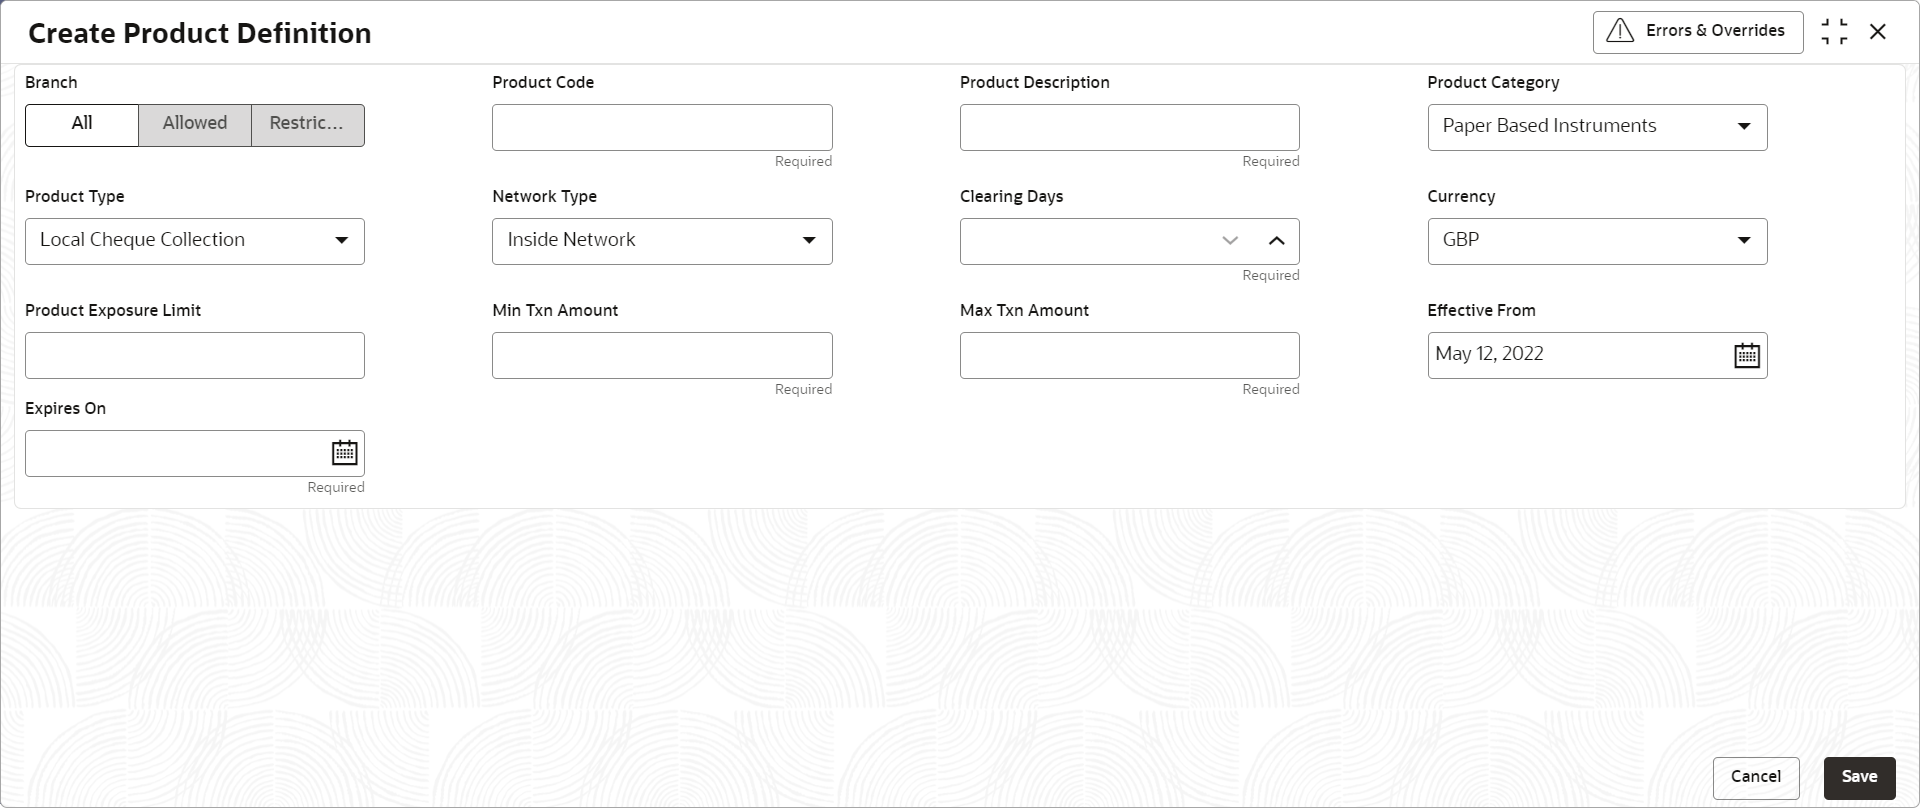
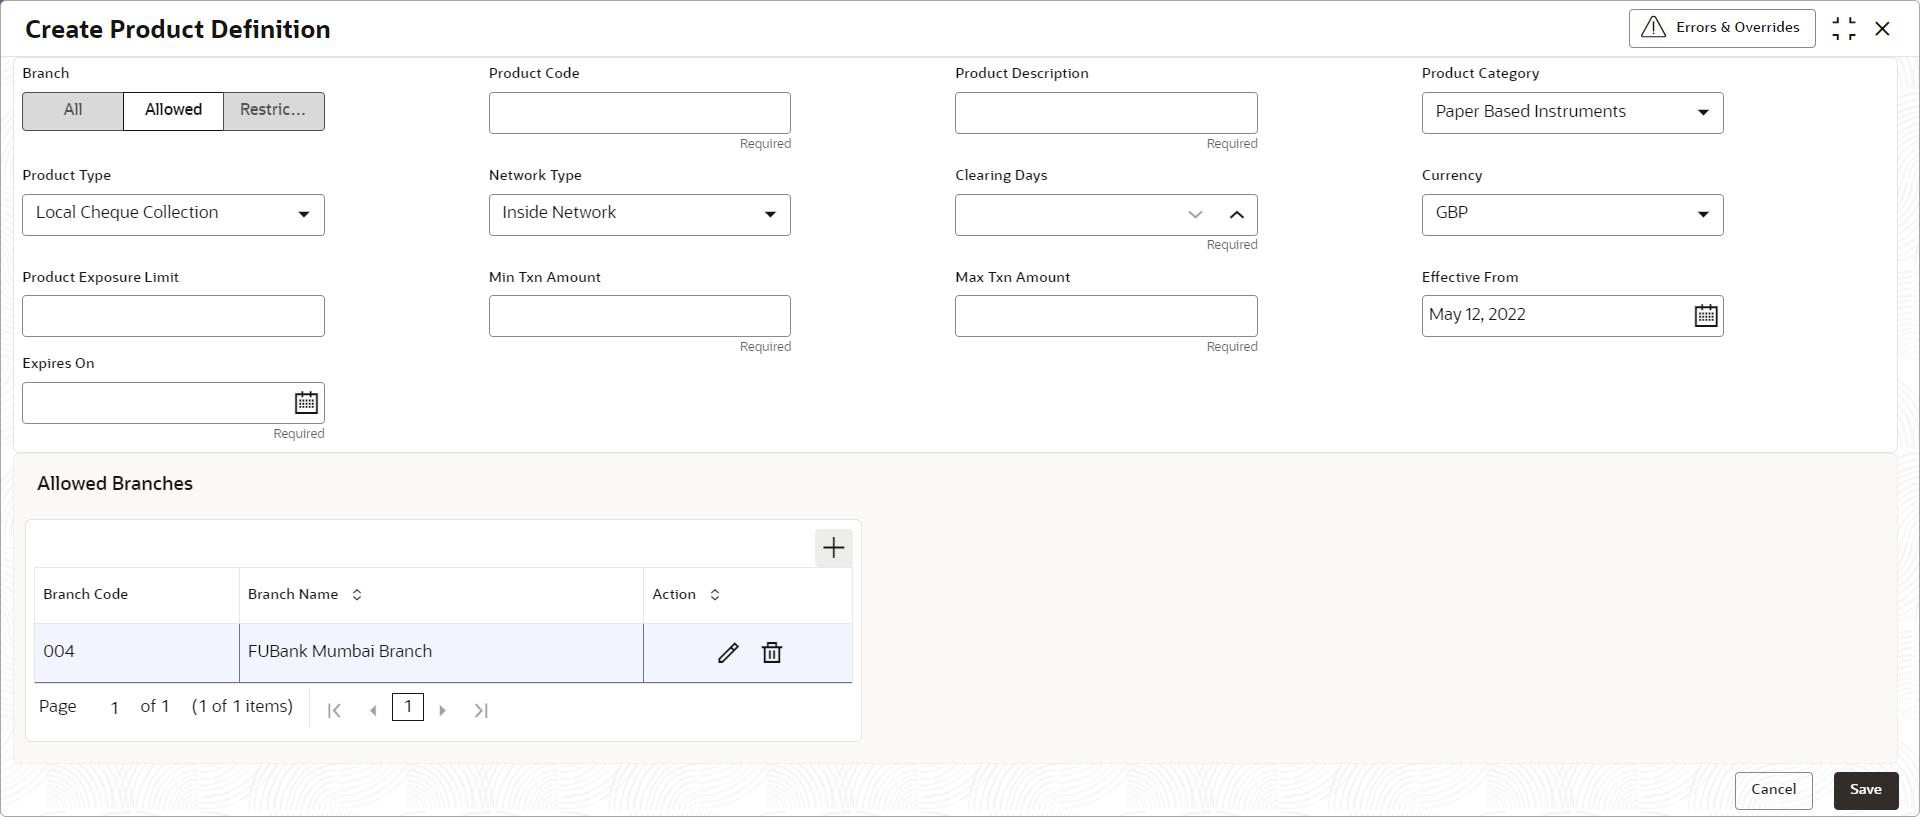
- Under Product Definition, click Create Product Definition.The Create Product Definition screen displays.If the Branch option is selected as Allowed, the Create Product Definition - Allowed Branches screen displays.
Figure 3-46 Create Product Definition - Allowed Branches
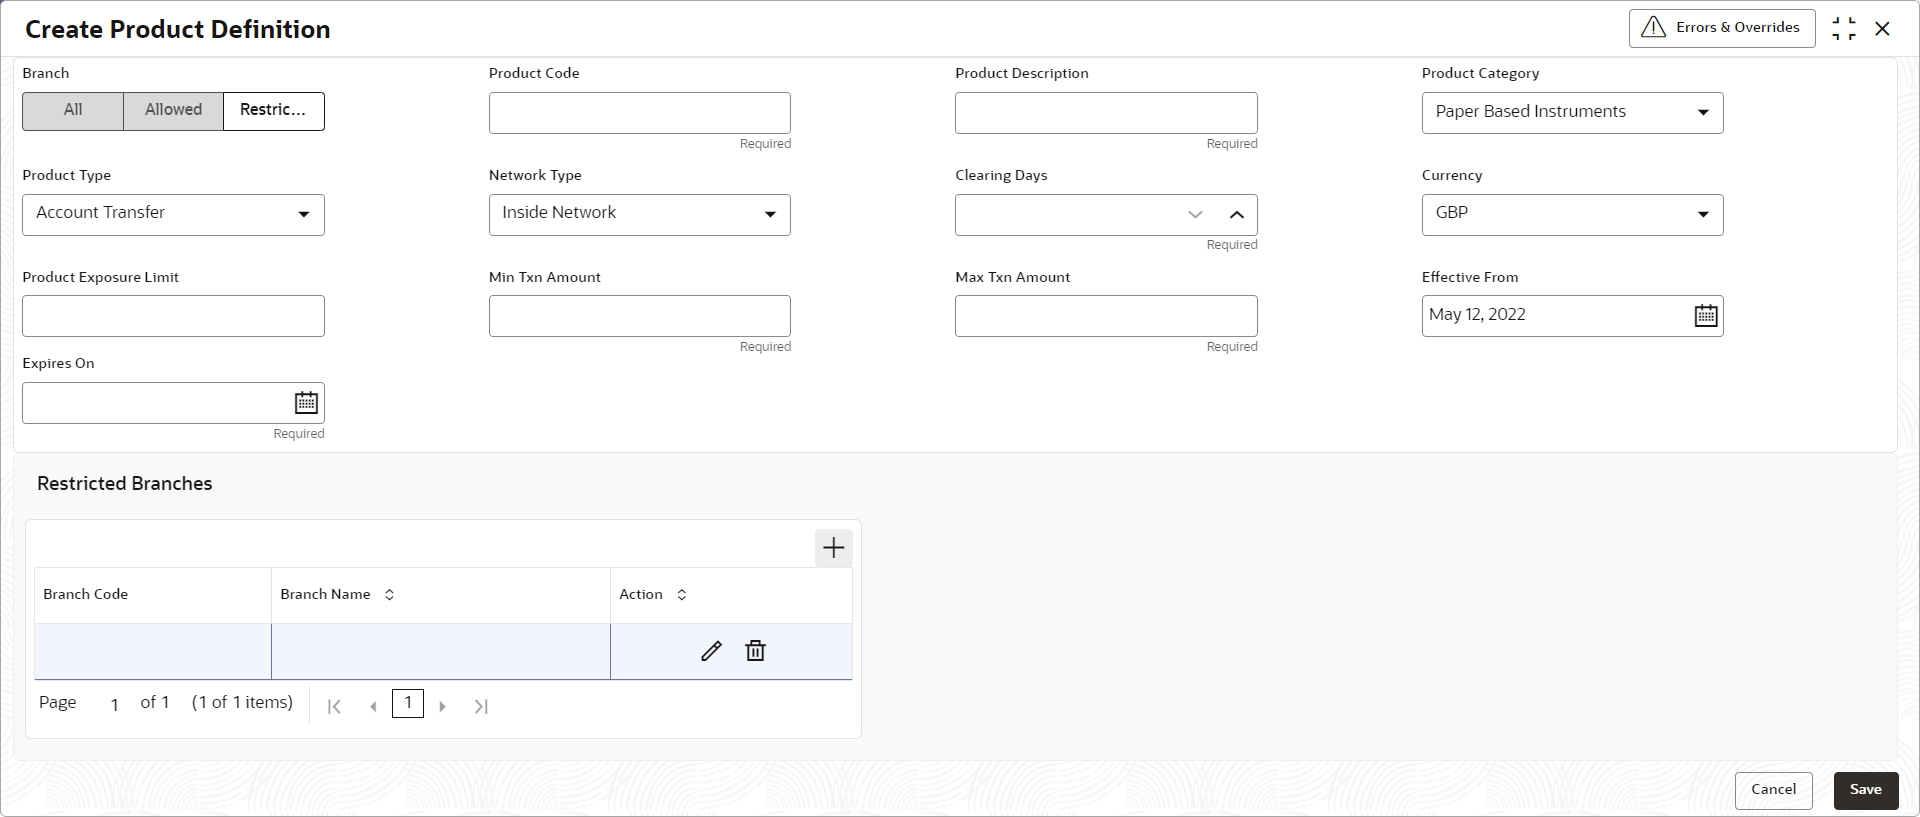
If the Branch option is selected as Restricted, the Create Product Definition - Restricted Branches section displays.Figure 3-47 Create Product Definition - Restricted Branches
- Specify the fields on Create Product Definition screen.For more information on fields, refer to the field description table.
Note:
The fields marked as Required are mandatory.Table 3-26 Create Product Definition - Field Description
Field Description Branch Select the applicable option how the branches has to be selected. The options are:- All
- Allowed
- Restricted
Product Code Specify a unique alphanumeric code for the product. This field cannot be modified once authorized.
Product Description Specify a name and description for the product. Product Category Select the category of the product, whether ‘Paper Based’ or ‘Cash’. This field cannot be modified once authorized.
Product Type Select the type of product from the following: - Local Cheque Collection
- Outstation Cheque Collection
- Account Transfer
Network Type Select the network type to define the network used by the bank for clearing. This field is applicable only to the Paper Based Instruments category.
This field cannot be modified once authorized.
Clearing Days Specify the number of days within which clearing should be completed. This field is applicable only to the Paper Based Instruments category.
Currency Select the currency to be considered for the product. Product Exposure Limit Specify the maximum exposure limit of the bank for the product. The exposure limit for a product is utilized on booking of the cheque, and released on realization of the cheque. The product exposure limit cannot be a negative value.
Min Txn Amount Specify the minimum transaction amount required for the product. Max Txn Amount Specify the maximum transaction amount allowed for the product. Effective From Click the calendar icon to select the date from when the product should take effect. Expires On Click the calendar icon to select the date on which the product expires. Allowed Branches Select the allowed branches for the product defined in the table grid. Branch Code Click the Search icon to view and select the applicable branches only for which the product defined should be available. Note:
The user can select only the branches for which the access is granted.Branch Name Displays the name of the selected branch. Restricted Branches Select the restricted branches for the product defined in the table grid. Branch Code Click the Search icon to view and select the applicable branches only for which the product defined should be restricted. Note:
The user can select only the branches for which the access is granted.Branch Name Displays the name of the selected branch. - In the Allowed/Restricted Branches table grid, perform the following actions:
- Click Add icon to add the new row.
- Under Action column, click Edit icon to select the branch for the selected row.
- Under Action column, click Delete icon to delete the row.
- Click Save to save the record and send it for authorization.
Parent topic: Product Definition Maintenance


