- Collections User Guide
- System Parameters
- View System Parameters
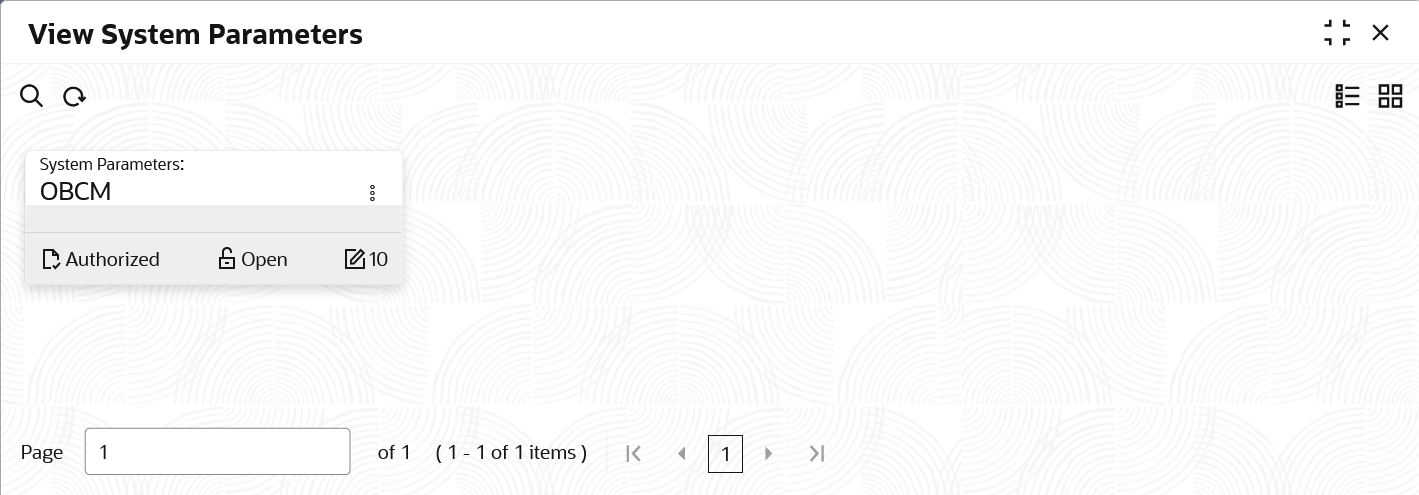
2.1 View System Parameters
This topic describes the systematic instruction to view, modify, or authorize the day zero system parameters for Oracle® Banking Cash Management.
A tile is present for each record that has been created. The bottom
portion of each record-tile displays the following:
- The status, whether Authorized, Unauthorized, or Rejected
- Open or Closed
- The number of times the record has been submitted by the Maker added.
Specify User ID and Password, and login to Home screen.
- On Home screen, click Cash Management. Under Cash Management, click System Parameters.
- Under System Parameters, click View System Parameters.The View System Parameters screen displays.
- Filter the records in the View screen:
- Click Search icon to view the filters. The user can filter the records by Authorization Status and Record Status.
- Select the required filter criteria and click Search to filter the records.
- Click Reset to reset the filter criteria.
- Click Refresh icon to refresh the records.
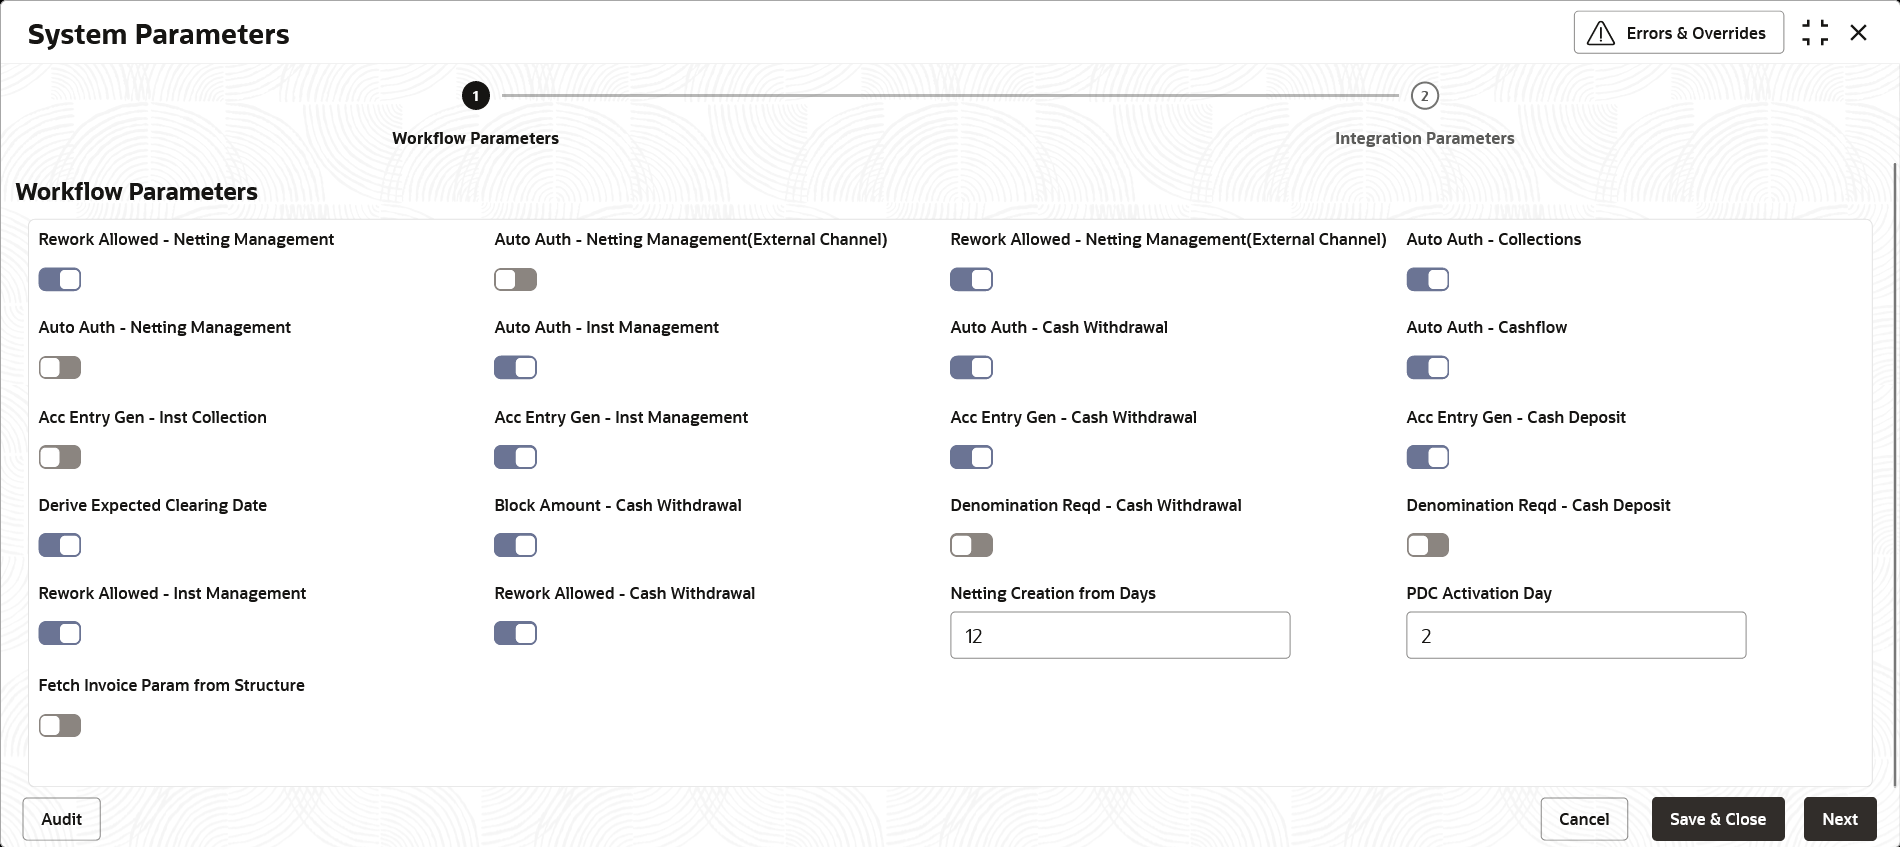
- Click Options icon and select Unlock to modify the records.The System Parameters - Workflow Parameters screen displays.
Figure 2-2 System Parameters - Workflow Parameters
- On Workflow Parameters tab, select the toggles to configure the workflow parameters.For more information on fields, refer to the field description table.
Table 2-1 Workflow Parameters - Field Description
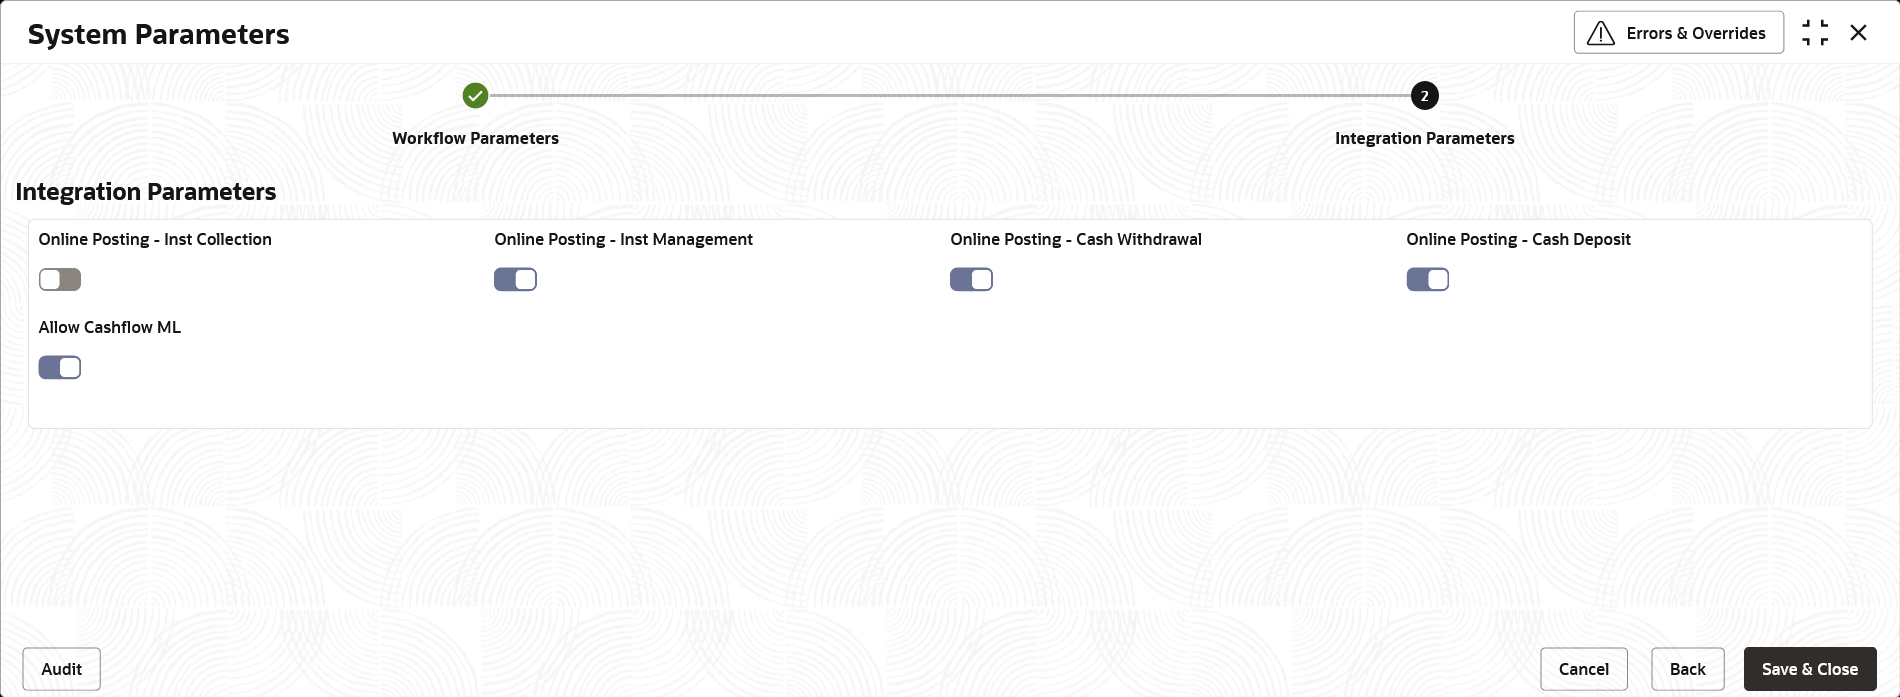
Field Description Rework Allowed - Netting Management(External Channel) Select the toggle switch to enable or disable the rework for the rejected netting management through the external channel. Auto Auth - Collections Select the toggle switch to enable or disable the auto authorization of the instrument collections. Auto Auth - Netting Management Select the toggle switch to enable or disable the auto authorization of the netting management. Auto Auth - Netting Management(External Channel) Select the toggle switch to enable or disable the auto authorization of the netting management through the external channel. Rework Allowed - Netting Management Select the toggle switch to enable or disable the rework for the rejected the netting management. Auto Auth - Inst Management Select the toggle switch to enable or disable the auto authorization of all the actions performed by the maker in Instrument Management. Auto Auth - Cash Withdrawal Select the toggle switch to enable or disable the auto authorization of the cash withdrawal. Auto Auth - Cashflow Select the toggle switch to enable or disable the auto authorization of the cash flow transactions. Acc Entry Gen - Inst Collection Select the toggle switch to enable or disable the generation of accounting entries through the Instrument Management/Instrument Collection workflow. Acc Entry Gen - Inst Management Select the toggle switch to enable or disable the generation of accounting entries through the Instrument Management workflow when the Instrument Status is marked as Realized or Return. Acc Entry Gen - Cash Withdrawal Select the toggle switch to enable or disable the generation of accounting entries through the Cash Withdrawal workflow. Acc Entry Gen - Cash Deposit Select the toggle switch to enable or disable the generation of accounting entries through the Cash Deposit workflow. Derive Expected Clearing Date Select the toggle switch to enable or disable the derivation of the expected clearing date for an instrument sent for clearing. Block Amount - Cash Withdrawal Select the toggle switch to enable or disable whether the request has to be sent to the core system for blocking/earn marking the Cash Withdrawal amount. Denomination Reqd - Cash Withdrawal Select the toggle switch to enable or disable whether the denomination section to be mandatory/non-mandatory in Cash Withdrawal screen. Denomination Reqd - Cash Deposit Select the toggle switch to enable or disable whether the denomination section to be mandatory/non-mandatory in Cash Deposit screen. Rework Allowed - Inst Management Select the toggle switch to enable or disable the rework for the rejected instruments in Instrument Management. Rework Allowed - Cash Withdrawal Select the toggle switch to enable or disable the rework for the rejected Cash Withdrawal transactions. Netting Creation from Days Specify the number of days prior to the Current Business Date from when the netting transactions has to be fetched. PDC Activation Day Specify the number of days prior to the instrument date to activate the Post Dated Cheque for processing. - Click Next button.The System Parameters - Integration Parameters screen displays.
Figure 2-3 System Parameters - Integration Parameters
- On Integration Parameters tab, select the toggles to configure the integration parameters.For more information on fields, refer to the field description table.
Table 2-2 Integration Parameters - Field Description
Field Description Online Posting - Inst Collection Select the toggle switch to enable or disable the online posting of the financial transactions related to the Instrument Collection/Instrument Management in accounting system. Online Posting - Inst Management Select the toggle switch to enable or disable the online posting of the financial transactions related to the Instrument Management in accounting system when the Instrument Status is marked as Realized or Return. Online Posting - Cash Withdrawal Select the toggle switch to enable or disable the online posting of the financial transactions related to the Cash Withdrawal in accounting system. Online Posting - Cash Deposit Select the toggle switch to enable or disable the online posting of the financial transactions related to the Cash Deposits in accounting system. Allow Cashflow ML Select the toggle switch to enable or disable the population of cashflow based on AI/Machine learning. - Click Options icon and then select any of the following options:
- Authorize – To authorize or reject the record. Authorizing/Rejecting requires necessary access rights.
- Optional: Click View to view the record details.
- Select the record and click Approve to approve the record.
- Select the record and click Reject to reject the record. Specify the relevant comments in the pop-up window that appears, and click Confirm.
- View – To view the record details.
- Authorize – To authorize or reject the record. Authorizing/Rejecting requires necessary access rights.
Parent topic: System Parameters


