2.3.4 Liquidating Fee Components

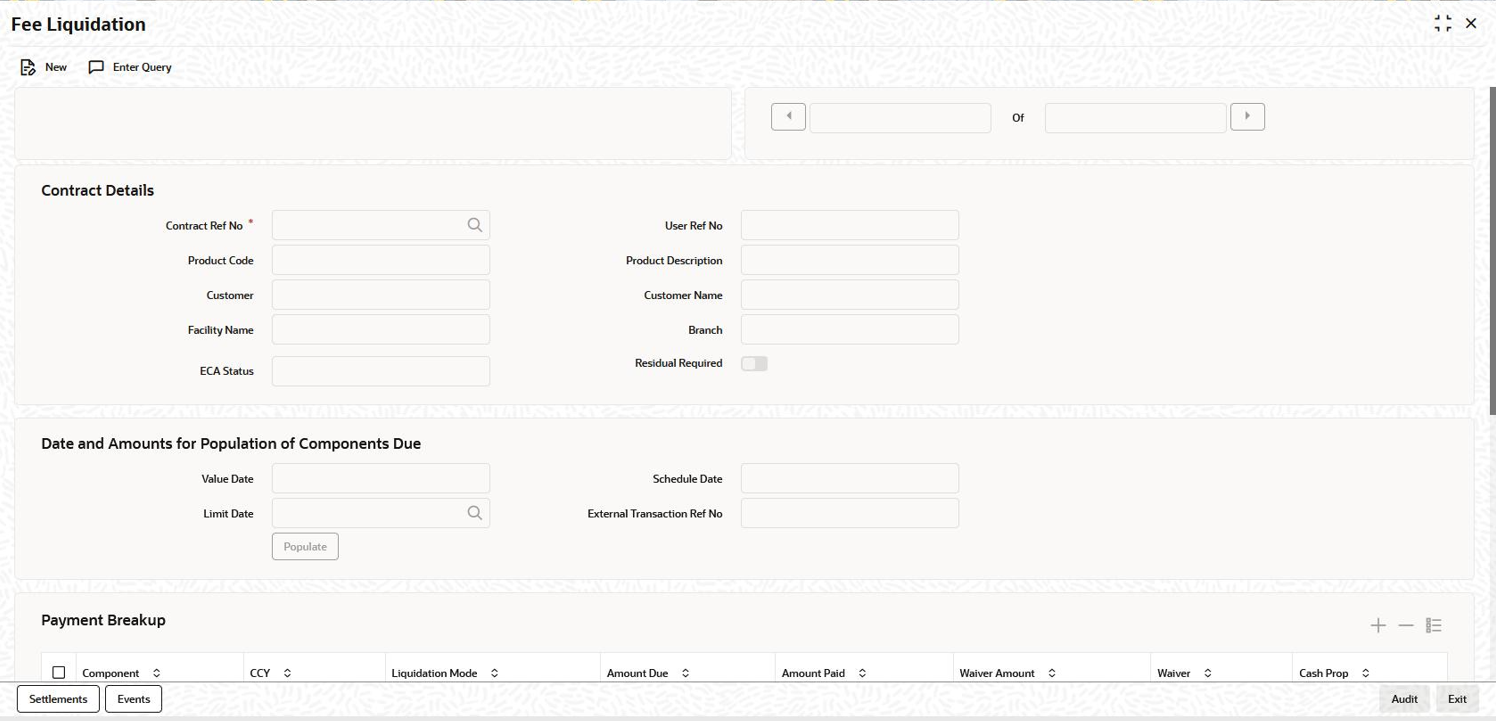
You can manually liquidate the fee schedules defined for fee components in the Fee Liquidation screen. You can liquidate even future dated schedules through this screen.

You can view manual and auto liquidation fee details here. You can query and view the fees that are reversed either by manual or auto fee liquidation method.

Specify the User ID and Password, and login to Homepage.
  1. On the Homepage, type OLDFEELQ and click next arrow.
    The Fee Liquidation screen is displayed.

    Note:

    The fields which are marked in asterisk red are mandatory fields.
  2. To liquidate a fee component schedule, do the following:
    1. Select the contract for manual liquidation.
    2. Click on the new button - Click New from the menu. The Value Date and Limit Date displays the current system date. The accounting entries for liquidation is passed as of the value date.
    3. You can change the value date, if required. However, if you specify a back valued date, it cannot be earlier than the last schedule that was paid. The date you capture here is the date on which liquidation occurs.
    4. You can also change the limit date. This date indicates the date upto which you want to make the payment. This may include future schedules as well as unpaid past schedules. Again, a back valued limit date should not be earlier than the last liquidation date. In addition, you can specify a limit date beyond the contract maturity date.
    5. After capturing the value date and the limit date, click the Populate button. The system displays all the components which are due till the limit date (both unpaid past and future schedules till the limit date). The following details are displayed in the Payment Breakup section of the screen:
      • Component
      • Currency
      • Mode of liquidation
      • Amount Due
    6. The Payment Breakup section of the screen displays the component-wise schedule breakup. The following details are displayed here:
      • Due Date of each schedule defined for the component (upto the limit date).
      • Amount Due for each due date
      • Pending Amount Due (= Amount Due)
    7. Select Cash Prop box to indicate that the below component is for cash payment during fee liquidation:
      • Facility Fee
      • Commitment Fee
      • Stand by LC Fee
    8. Commercial LC fee, you can select the Cash Prop flag only if the fee component which is getting liquidated is maintained in the static table. Otherwise the flag is not allowed to be selected.
    9. Capture the amount you want to pay for a component in the Amount Paid field. This amount may be less than or equal to the Amount Due.
    After capturing the Amount Paid, click the Allocate button. The system allocates the amount against each schedule and update the Amount Paid against each schedule in the Payment Breakup For – (Component Name) section of the screen.

    You can perform selective liquidation of the fee components as the payment happens, if required. For this, you need to specify the amount in the Amount Paid field for the fee component which needs to be liquidated. The System liquidates only those components for which Amount Paid value is the same as Amount Due. You cannot perform partial payments here.

    For those components which are not part of the current fee liquidation, you need to specify the Amount Paid as zero.