5.19.2 Netting the Components
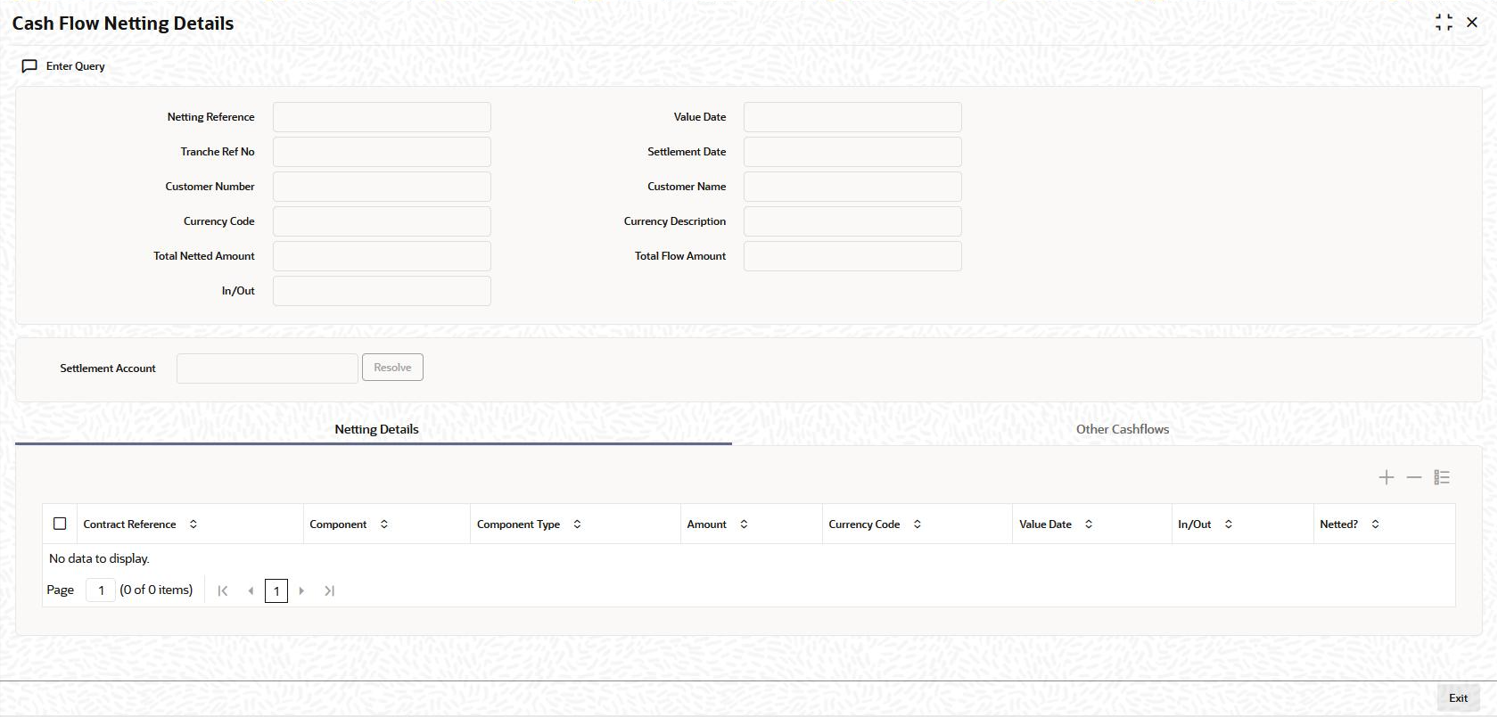
To net the components for a contract, select the contract from the summary screen and double-click on it. The Cash Flow Netting Details (LBDNETCF) screen is displayed, as shown below:
You can view the following details in the Netting Details tab of this screen:
- Transaction Reference Number
- Name of the component and the component type
- Amount and currency
- Value Date
- Cash Flow: In or Out
- Netted: If the Netting Preference is selected as All Components (specified in the Borrower Details sub-screen of the LB Tranche Contract Online screen), all the components appears in the netting queue. However, you have to confirm the netting manually. If you set the Netting Preference to Principal Only, then only the principal component is automatically confirmed for netting. You can check or uncheck the required contracts.
The Other Cashflows tab of the screen displays all contracts till date which need to be netted.
You can select the Netted option for these contracts if you want to net them along with the current contracts.
After selecting the contracts for netting (in the Netting Details tab of the screen), you have to click the Resolve button to continue. If pending cashflows are present in the Other Cashflows tab, system displays a message to indicate the same. The system displays a message to seek confirmation to resolve the selected contracts. Select OK in the message window to continue.
If netting is successful, system updates the FT Contract Details section of the screen with the following details:
- Reference number of the FT contract that gets created as a result of netting.
- Settlement Account used for netting.
Viewing the Events and Messages
You can also view the events and messages triggered for the contracts after netting the contracts. Click the Events from LB Tranche Contract Online screen to view the events Click Messages from Events screen to view the messages.Parent topic: Netting Cash Flows for a Tranche
