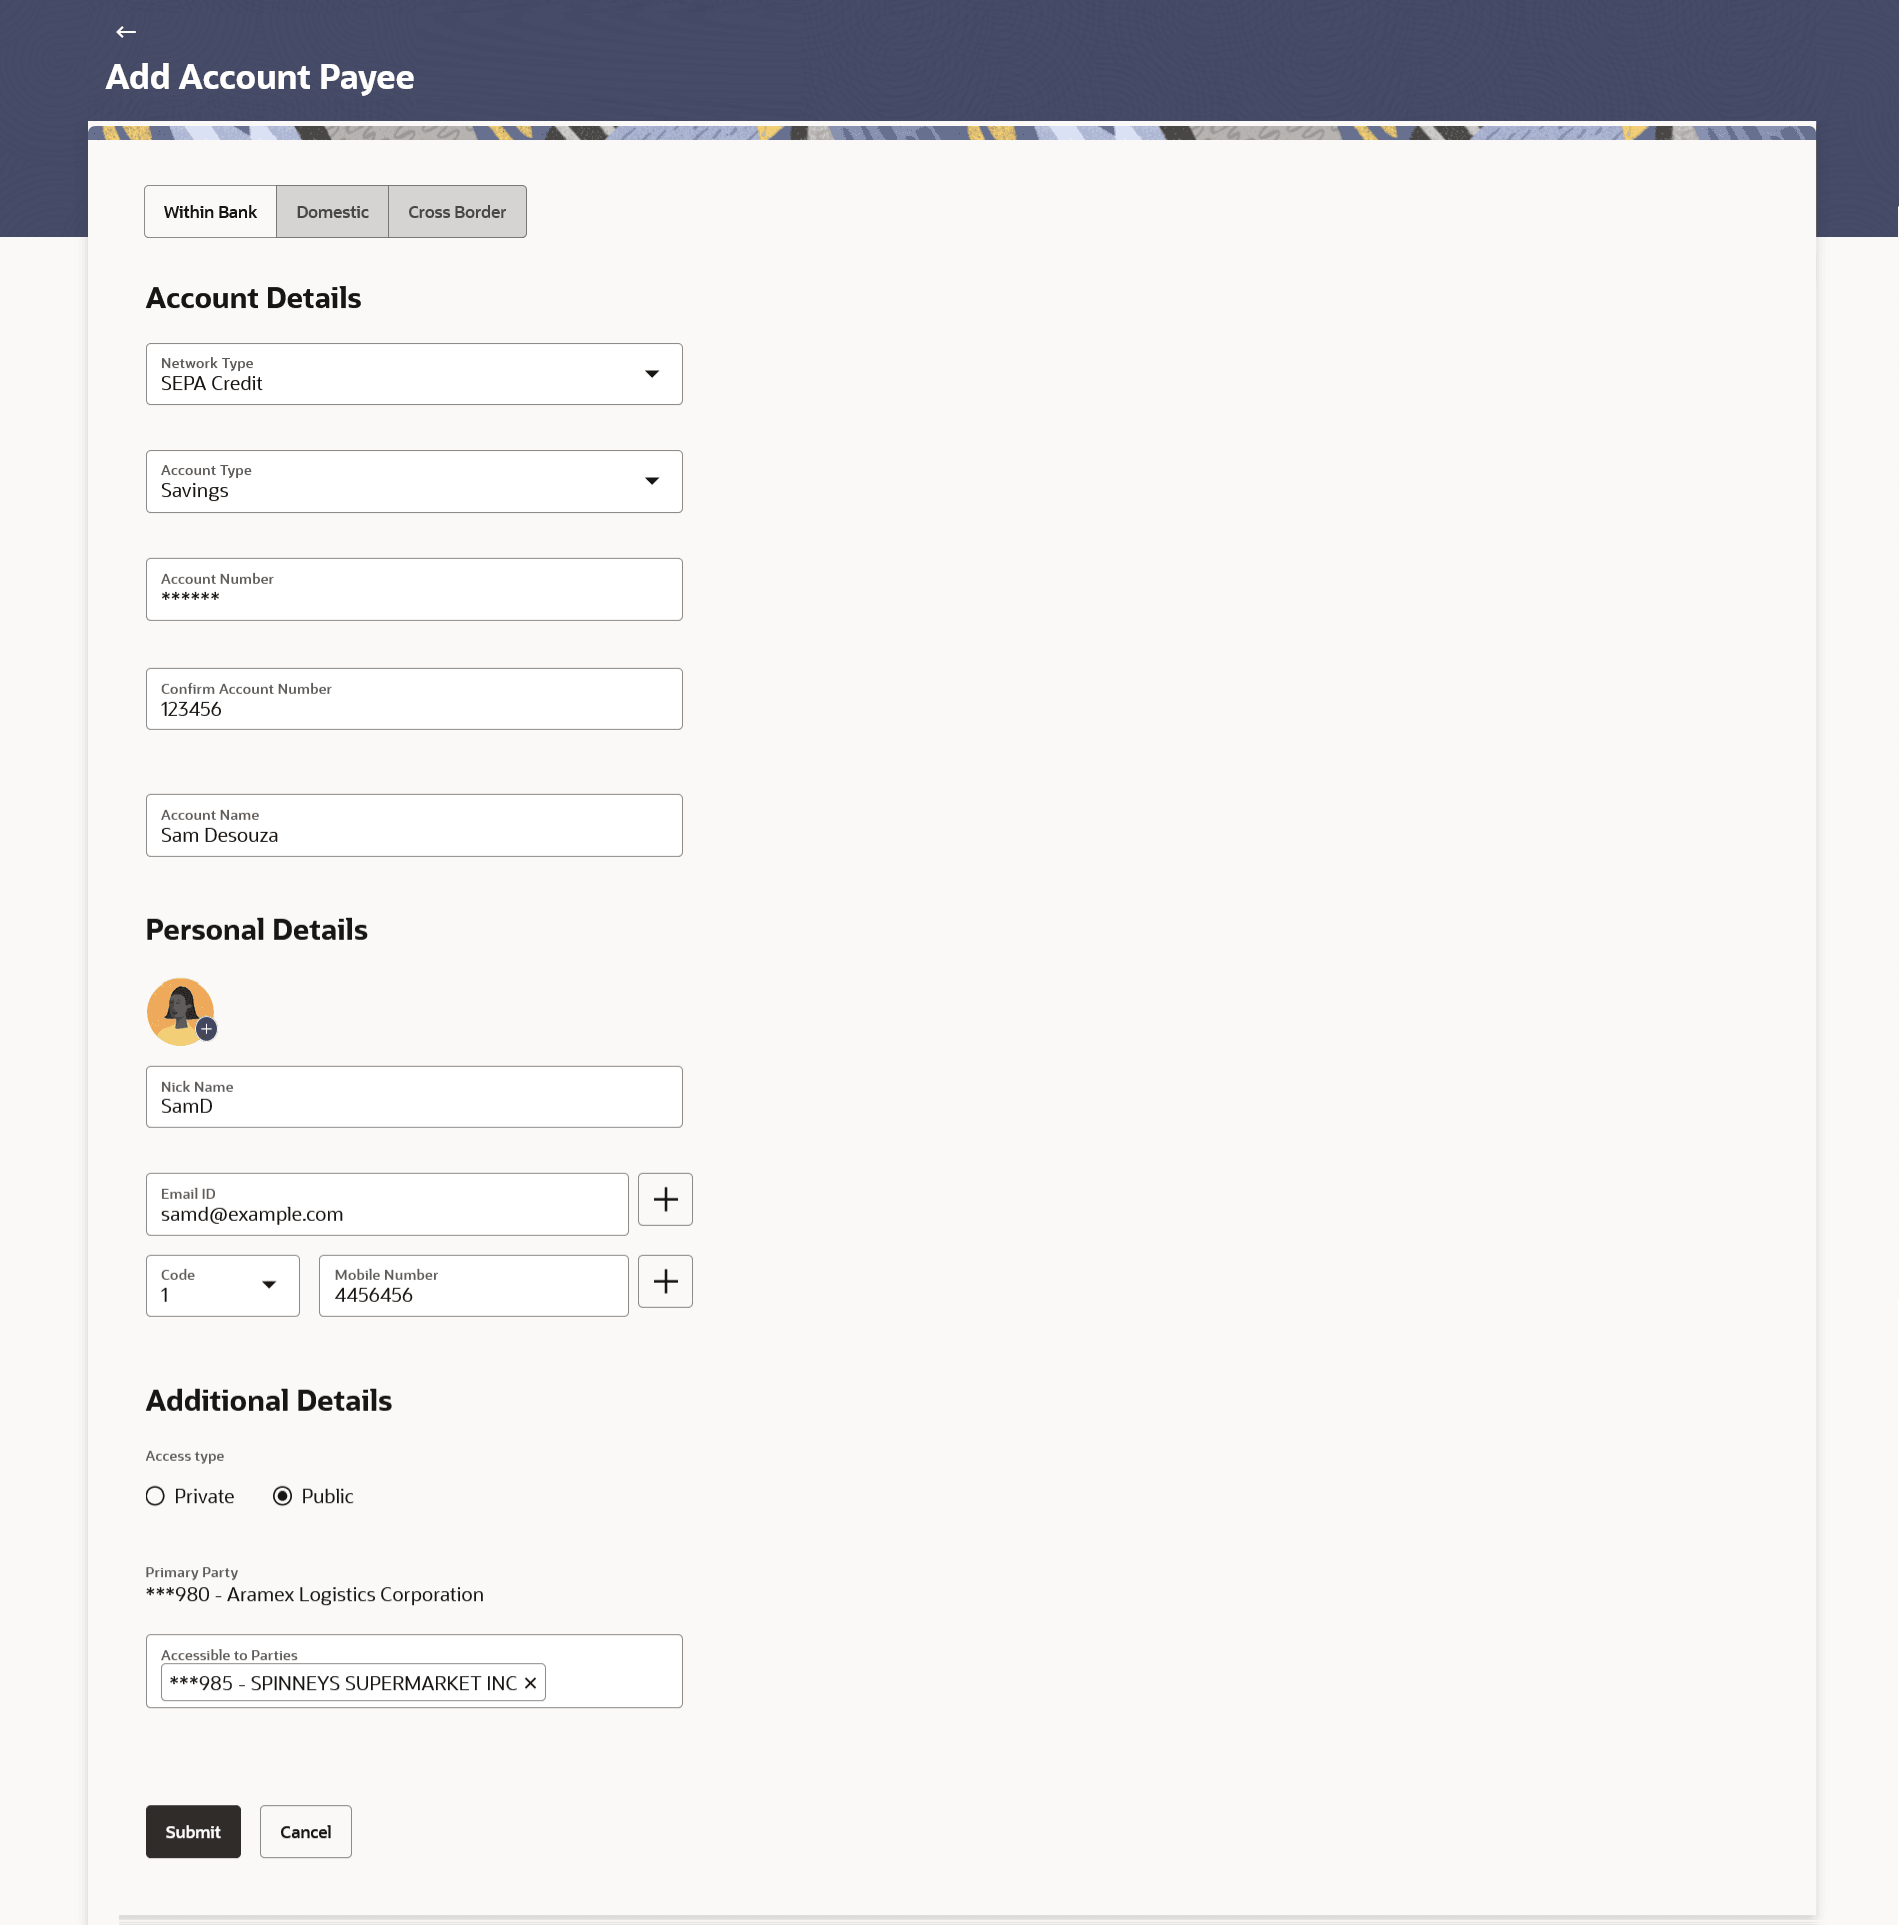
2.2.1 Add Payee - Within Bank Account
This topic provides the systematic instructions of the payee setup process, during which users have the option to categorize the payee as a Within Bank type.
Note:
In case of Within Bank Payees, only the Account Number of the payee is validated in the host system and not the Account Name.Figure 2-8 Add Payee – Within Bank Account
Note:
The fields which are marked as Required are mandatory.For more information on fields, refer to the field description table.
Table 2-4 Add Payee – Within Bank Account - Field Description
| Field Name | Description |
|---|---|
| Payee Type | Select Within Bank. |
| Account Details | |
| Account Number | Specify the account number of the payee. |
| Confirm Account Number | The user is required to re-enter the payee’s account number in this field. |
| Account Name | Enter the name of the payee as maintained against the payee’s bank account. |
| Personal Details | |
| Upload Photo | Select this option to upload a profile photo against the payee.
Following actions are available on the + icon:
This option will only appear if no photo has been uploaded against the payee. Note:
|
| Nickname | Specify a nickname to be assigned to the specific account of the payee for the purpose of easy identification. |
| Email ID | Email address of the payee.
Note:
|
| Additional Details | |
| Access Type | Specify the access type to be assigned to the payee.
The options are:
|
| Primary Party | The primary party associated to the user.
The primary party users will always have access to the payee if it’s Public. |
| Accessible to Parties | Accessible parties associated to the user.
During payee creation a corporate user can define the parties within his GCIF to whom this payee will be accessible, if the payee is public. The primary party users will always have access to the payee if it’s Public. |
Parent topic: Add Account Payee
