1.10 Collateral
This topic describes the section of the application form related to collateral and its details.
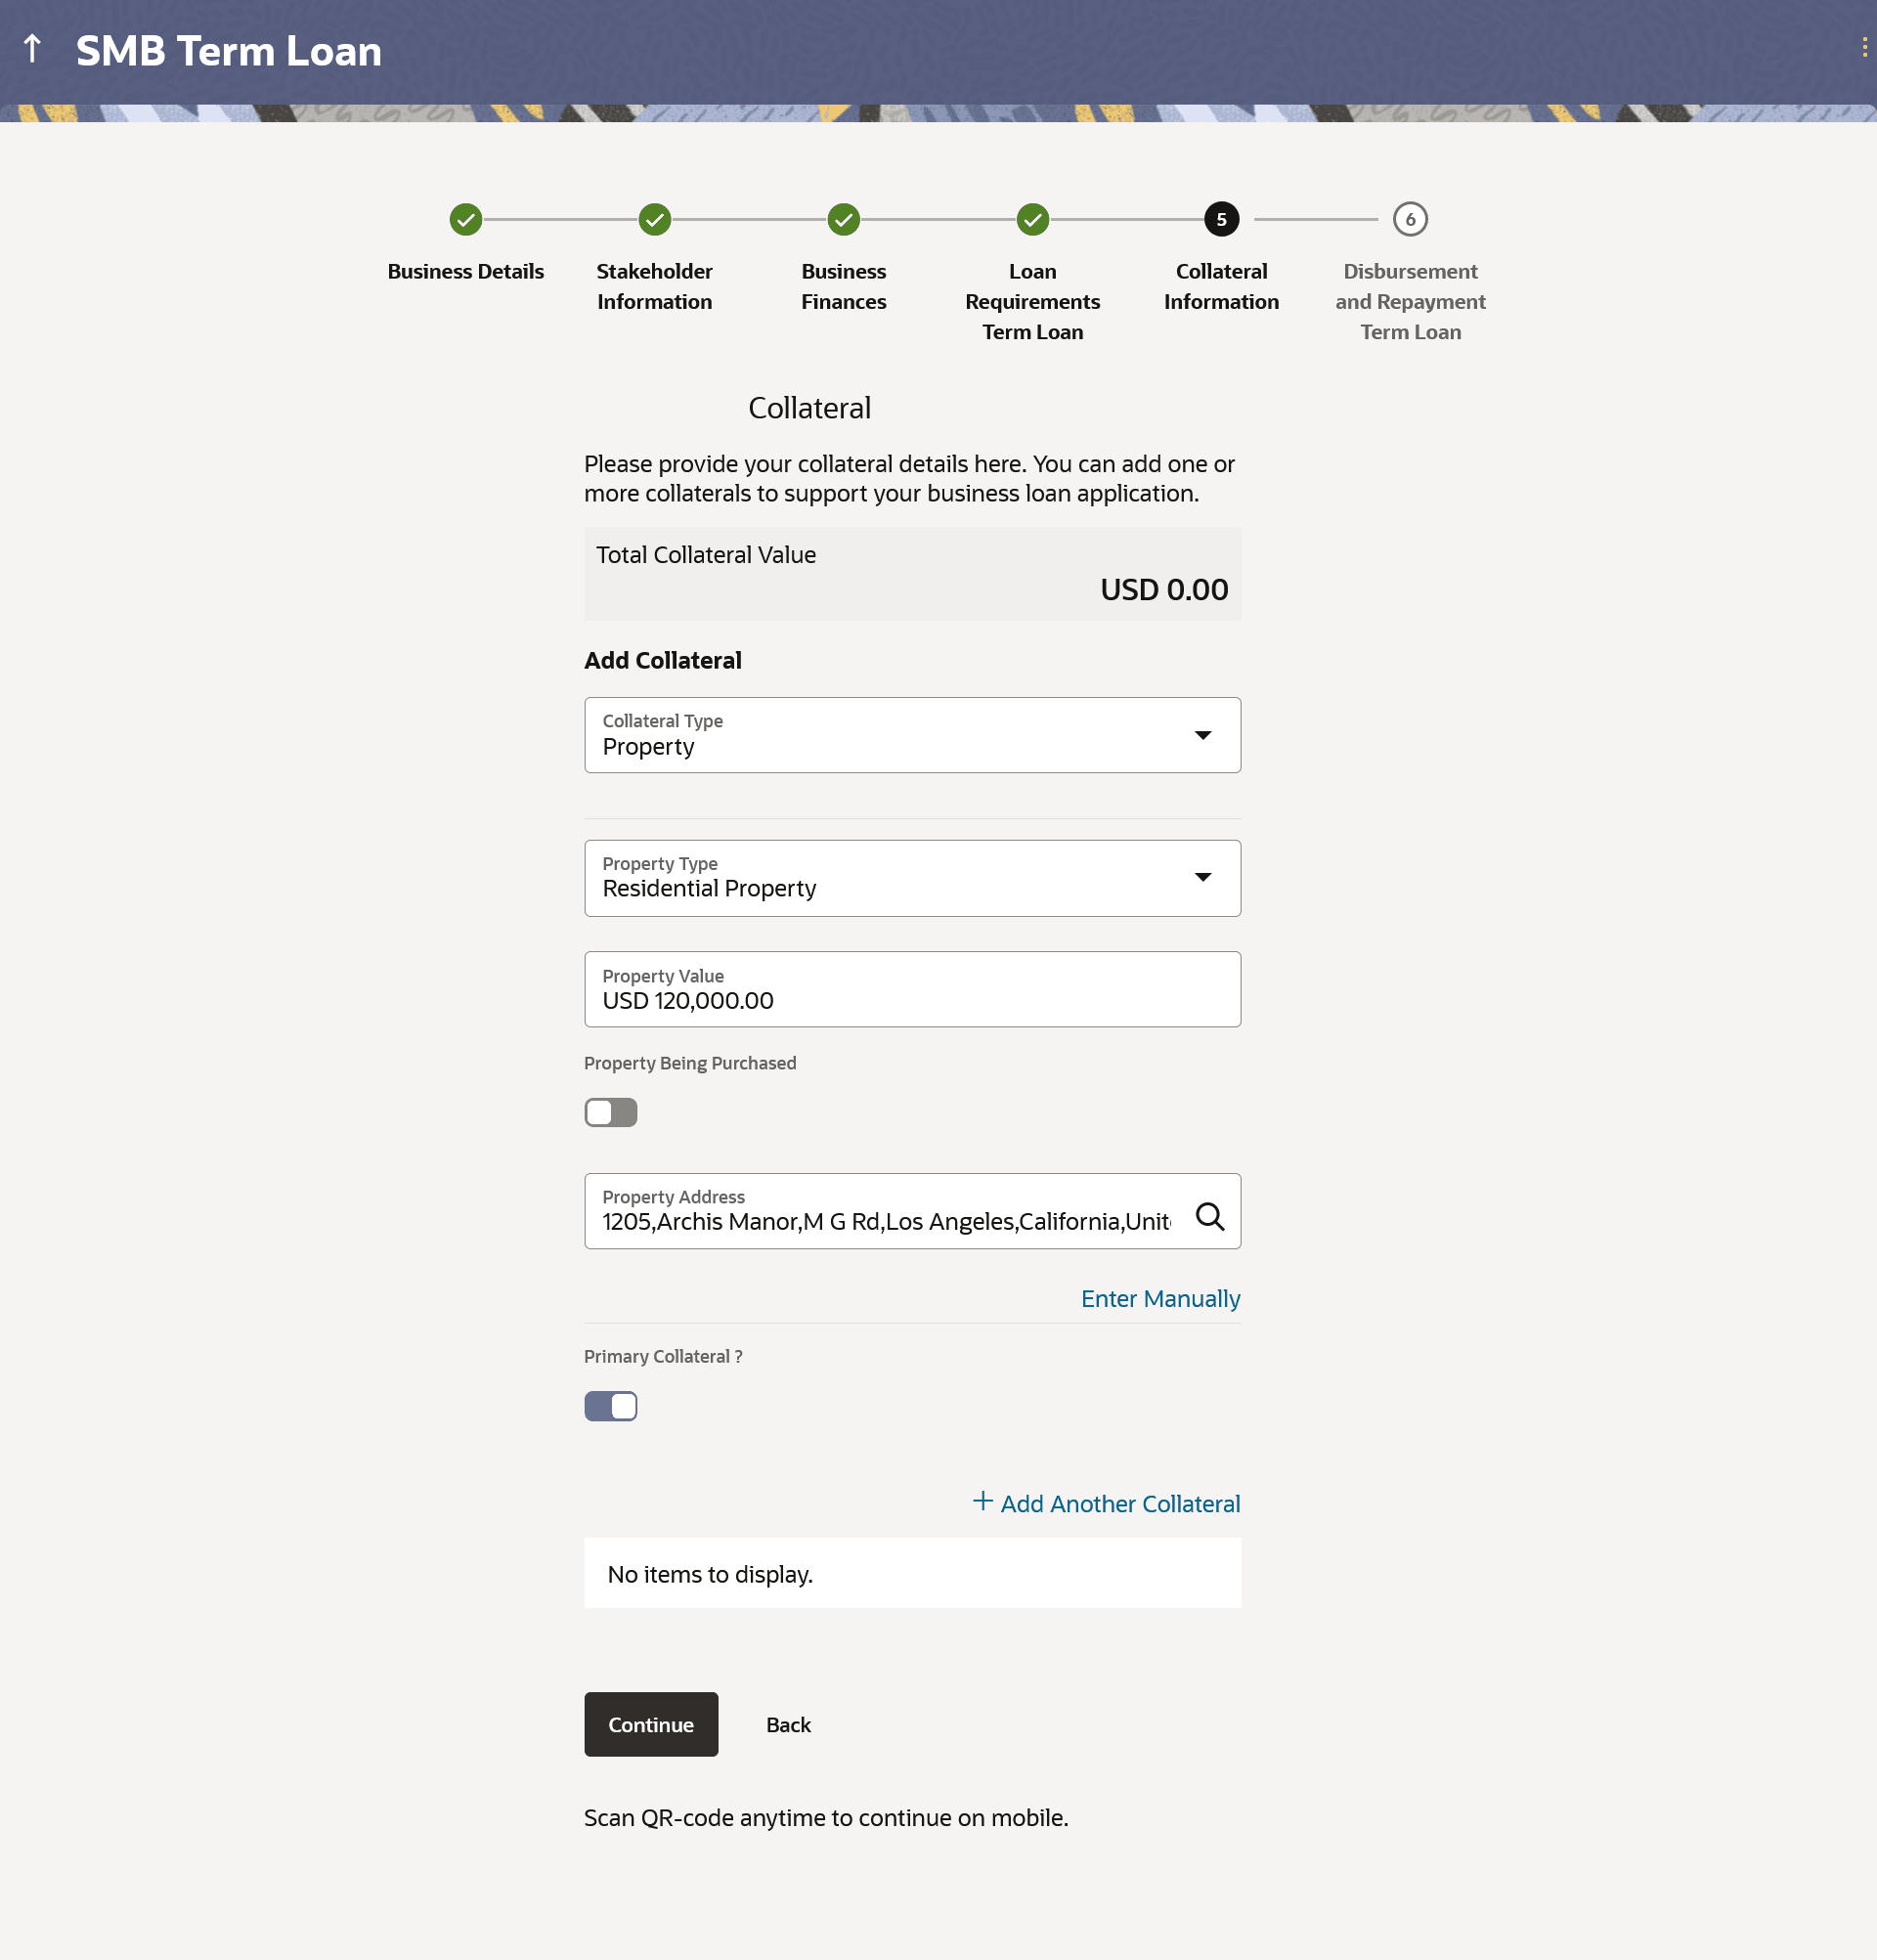
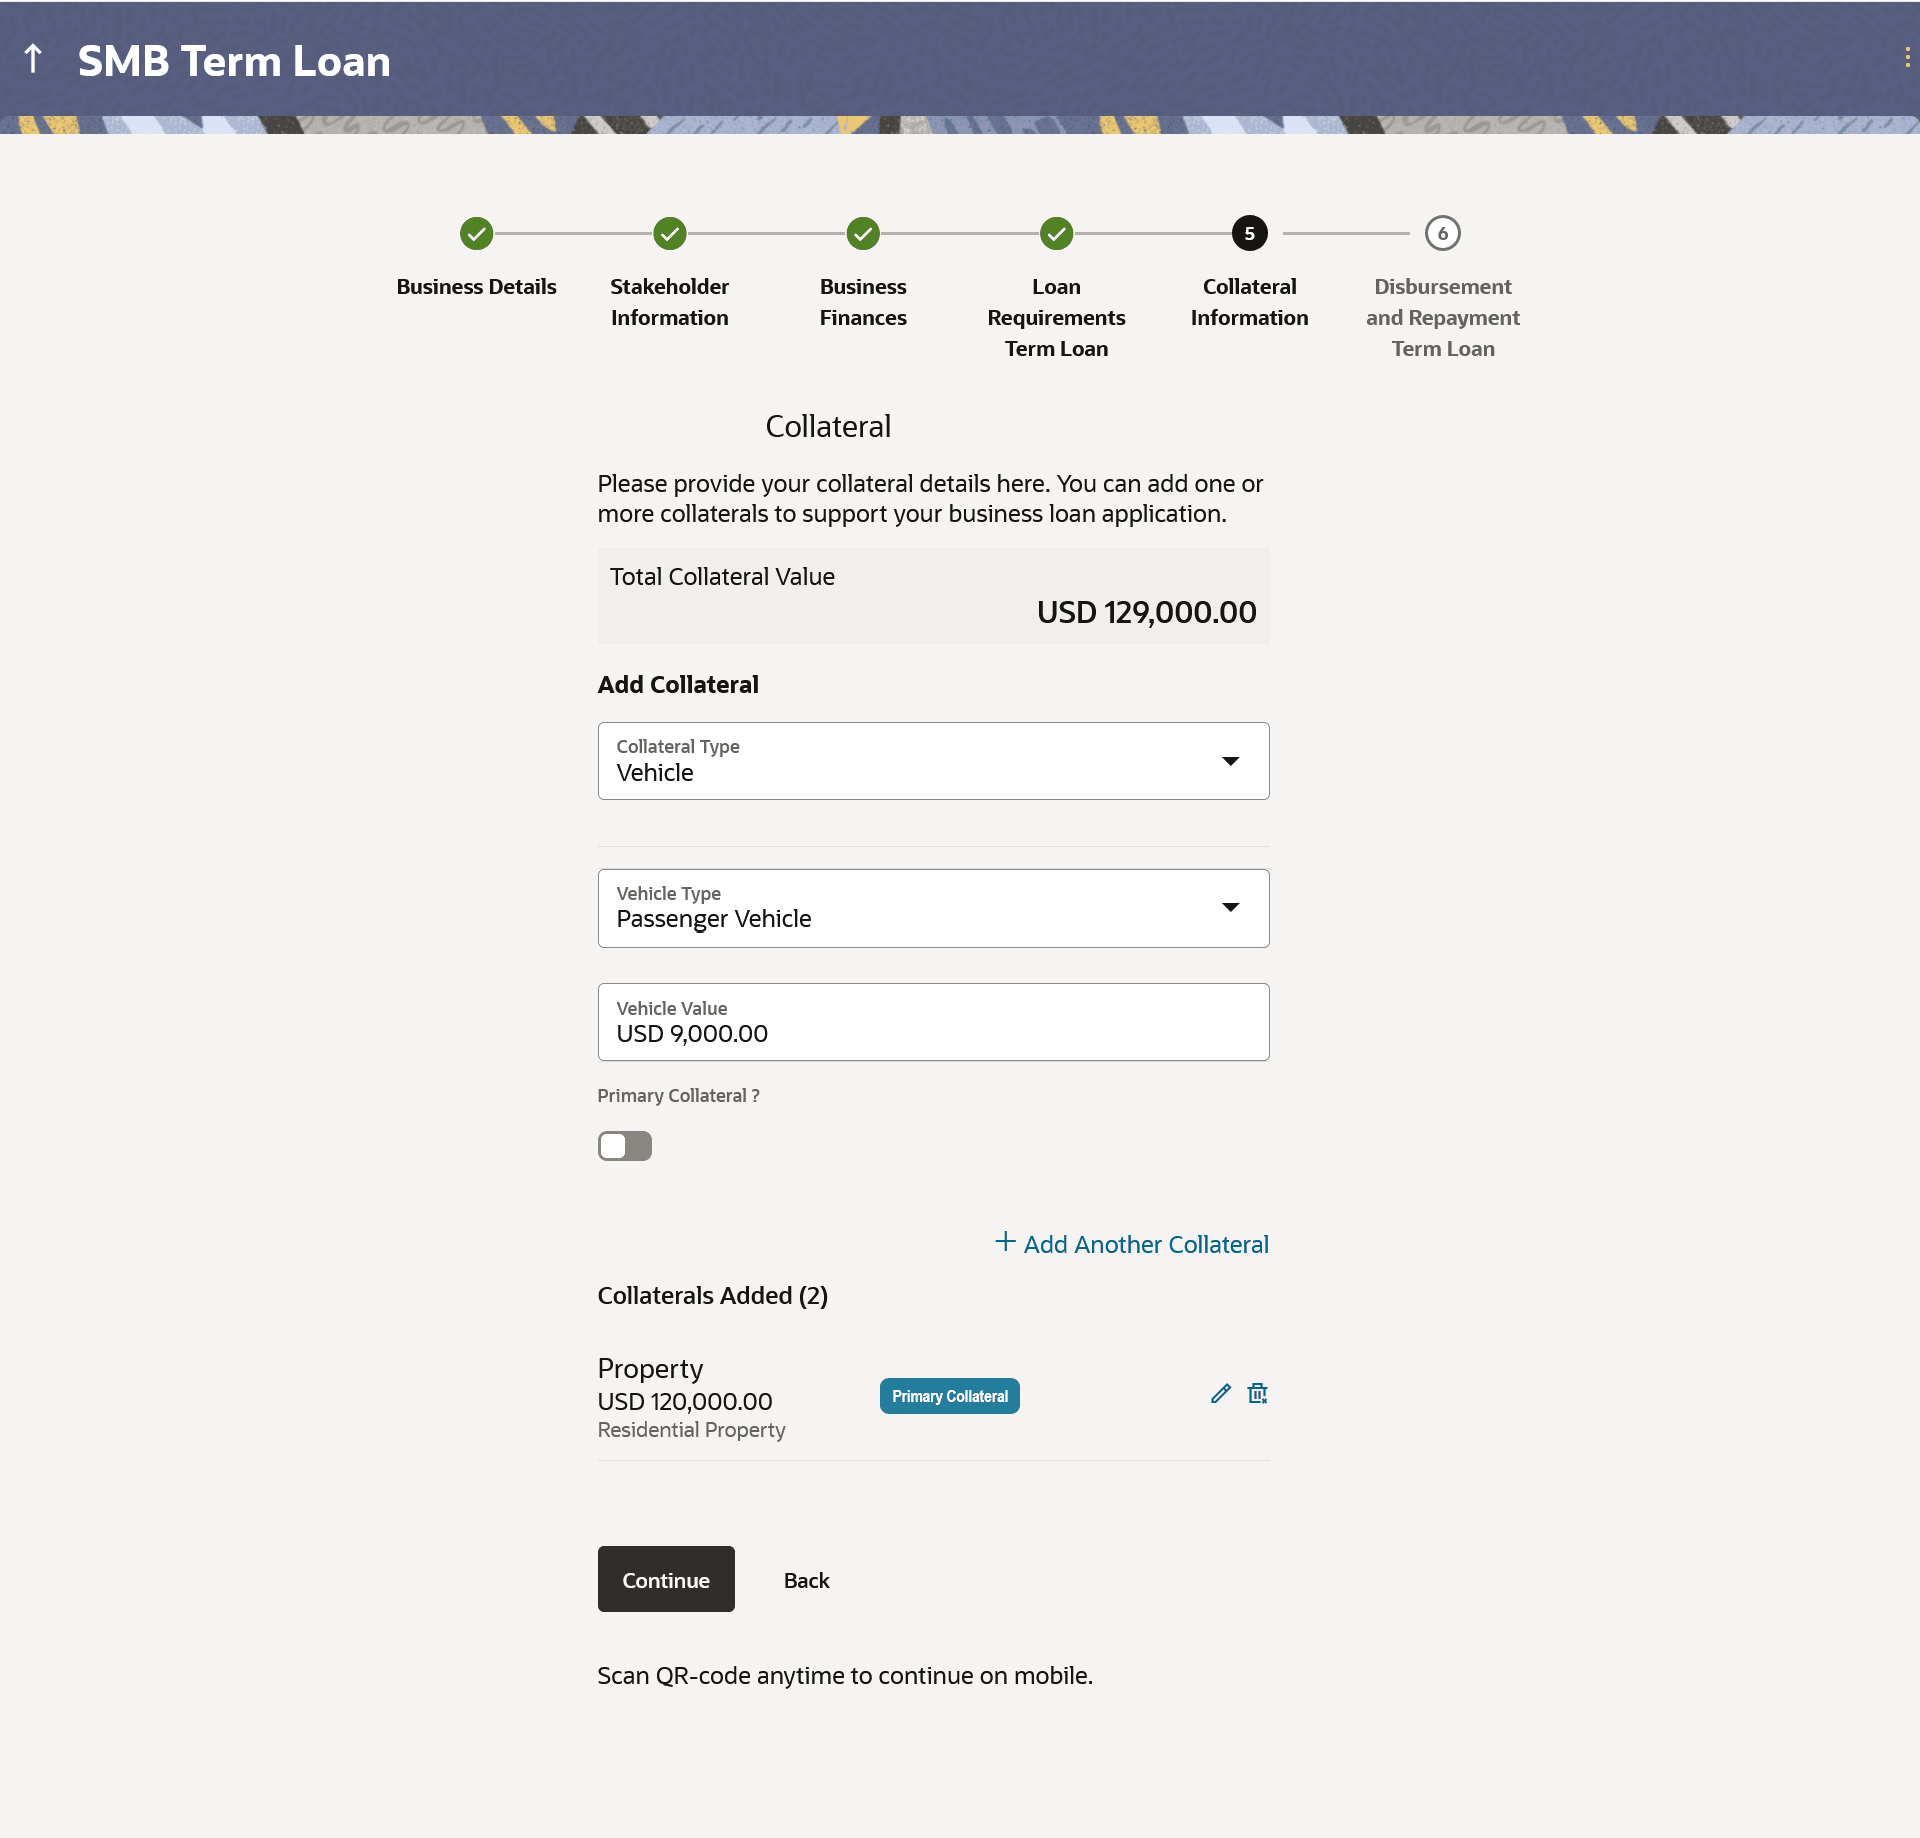
Since business loans are secured loans, the loan application forms will contain a section in which the applicant can specify information pertaining the collateral that can be used against the loan. You can add multiple collateral records, as required. The value displayed below Total Collateral Value will keep getting updated as and when a new collateral record is added or deleted. It will be mandatory to tag one collateral as that which is to be considered as the primary collateral.
Figure 1-19 Collateral
Figure 1-20 Additional Collateral
Note:
The fields which are marked as Required are mandatory.For more information on fields, refer to the field description table.
Table 1-20 Collateral - Field Description
| Field Name | Description |
|---|---|
| Collateral Type |
The type of collateral being defined. The options are:
Note: Deposits will only appear in the list, for existing business applications. |
| The following fields are applicable if the Property option is selected in the Collateral Type drop-down list. | |
| Property Type |
The type of property being added as collateral. The options are:
|
| Property being purchased? |
Identify whether the property being added as collateral is being purchased i.e. the loan is being applied to purchase the property. The options are:
|
| Property Value | The current market value of the property. |
| Property Address | The address of the property. |
| Property Address Overlay |
This overlay is displayed when you click on the Click Here link available under the Property Address field. On this overlay, you can enter your address line by line. |
| House/Unit Number | The house or unit number of the property being added as collateral. |
| Building Name | Enter the building name of the property being added as collateral. |
| Street | Specify the street address of the property being added as collateral. |
| Locality | Specify the locality in which the property being added as collateral, is located. |
| Zip Code | Enter the zip code of the property being added as collateral. |
| City | The city in which the property being added as collateral, is located. |
| State | The state in which the property being added as collateral, is located. |
| Country | The country in which the property being added as collateral, is located. |
| The following fields are applicable if the Vehicle option is selected in the Collateral Type drop-down list. | |
| Type of Vehicle |
The type of vehicle being added as collateral. The options are:
|
| Vehicle Value | The estimated value of the vehicle. |
| The following fields are applicable if the Precious Metal option is selected in the Collateral Type drop-down list. | |
| Value of Precious Metal | The estimated value of the precious metal. |
|
The following fields are applicable if the Deposits' option is selected in the Collateral Type drop-down list. Note: This option will only be provided if the applicant is an existing business customer |
|
| Select Term Deposit |
Select any of the term deposits mapped to the business' customer ID. All the active term deposits as mapped to the business' customer ID as maintained in the host system will be displayed and available for selection. |
| Maturity Date | The maturity date of the term deposit. |
| Available Term Deposit Amount | The amount of term deposit that is available for linkage. |
| Amount to be Linked | The amount to be linked as collateral. |
| The following fields are applicable if the Bonds option is selected in the Collateral Type drop-down list. | |
| Type of Bond |
The type of bond being added as collateral. The options are:
|
| Bond Value | The estimated value of the bond. |
| The following fields are applicable if the Stocks option is selected in the Collateral Type drop-down list. | |
| Value of Stocks | The estimated value of the stocks. |
| The following fields are applicable if the Life Insurance option is selected in the Collateral Type drop-down list. | |
| Insurance Value | The estimated value of the insurance. |
| The following fields are applicable if the Accounts Receivable option is selected in the Collateral Type drop-down list. | |
| Type of Accounts Receivable |
The type of accounts receivable being added as collateral. The options are:
|
| Account Receivable Value | The estimated value of the accounts receivable. |
| The following fields are applicable if the Inventory option is selected in the Collateral Type drop-down list. | |
| Type of Inventory |
The type of inventory being added as collateral. The options are:
|
| Inventory Value | The estimated value of the inventory. |
| Add another Collateral | Click on this link if you wish to capture details of another collateral. |
| Total Collateral Value |
Displays the total value of collateral i.e. the sum value of all collaterals mentioned. Note: Total Collateral Value must be greater than or equal to the Loan Amount being requested. |
Parent topic: Business Term Loans Application

