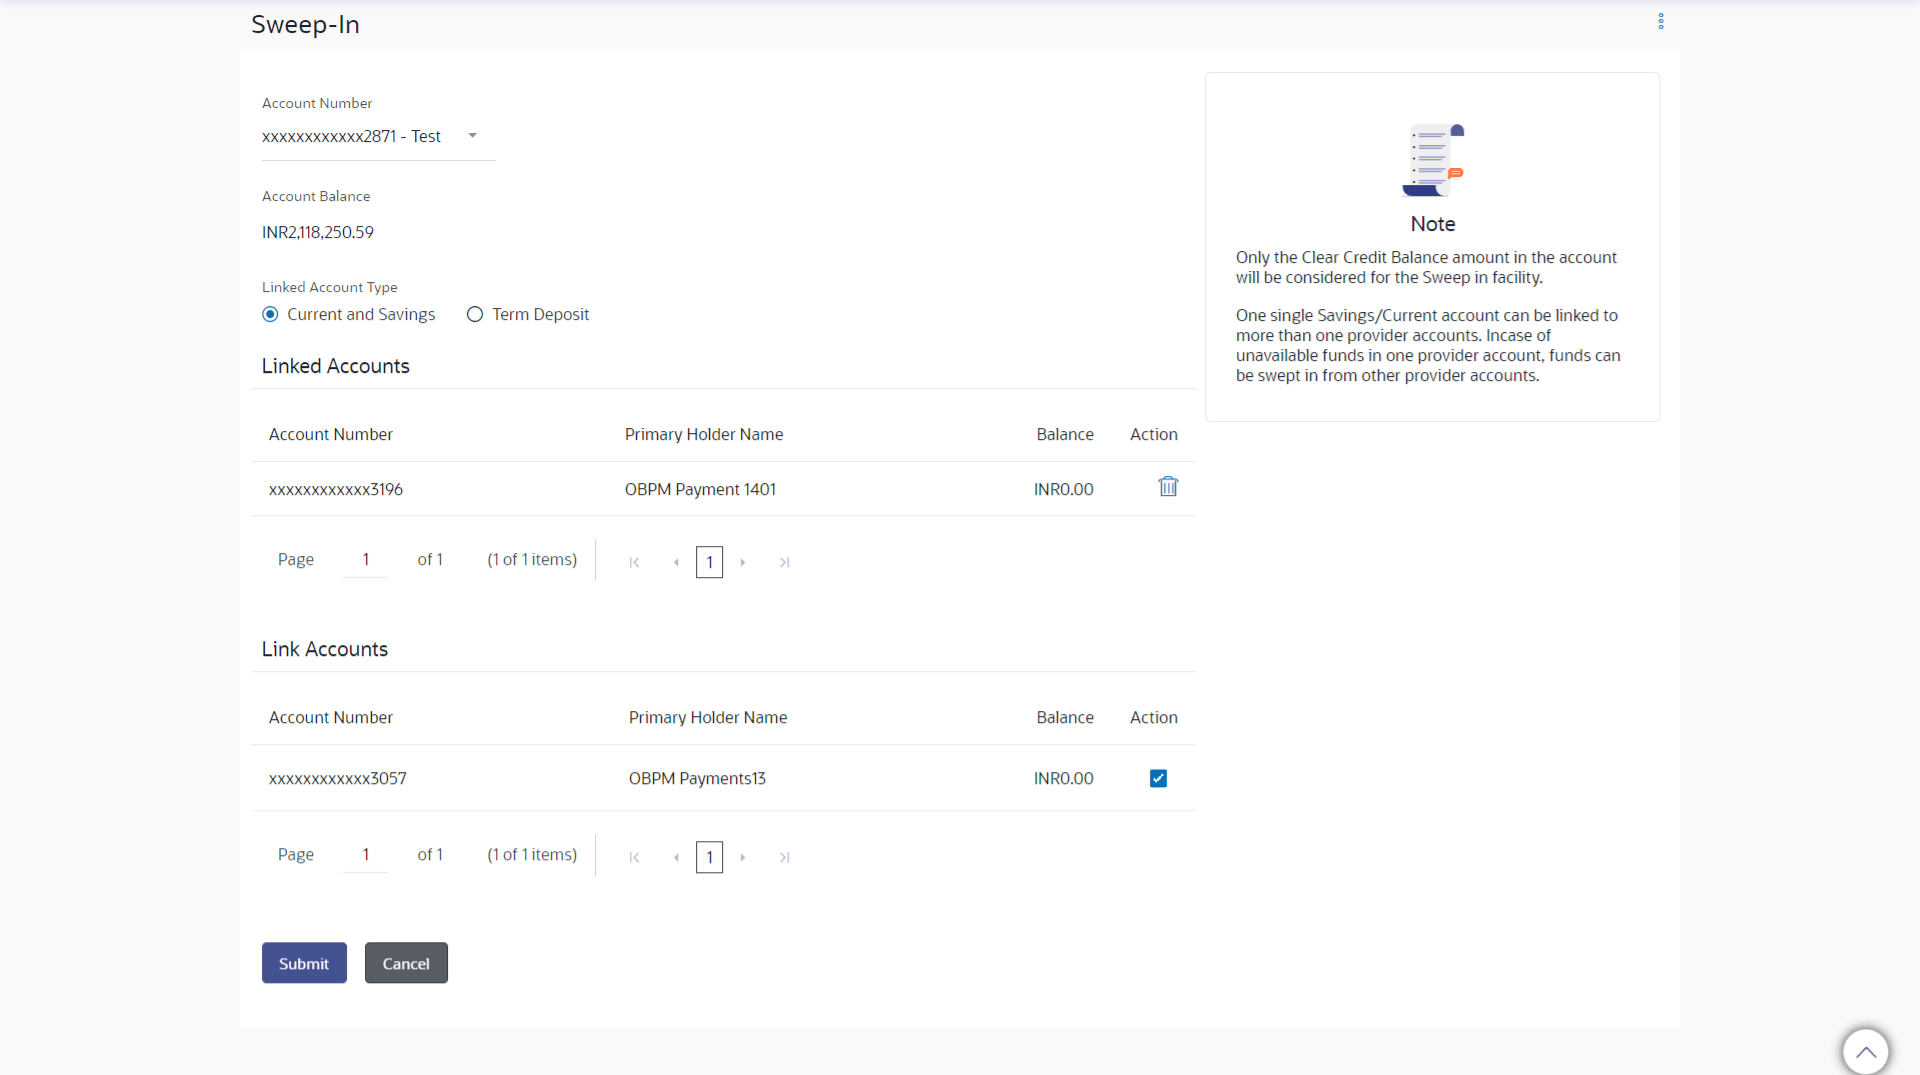
17.1 Sweep In - Add
This topic provides the systematic instructions for user to link his beneficiary Current and Savings account or Term Deposit accounts to his provider account to set up a sweep in facility.
Figure 17-3 Sweep In – Add – Current and Savings Note:
For more information on fields, refer to the field description table.
Table 17-2 Sweep In – Add – Current and Savings - Field Description
| Field Name | Description |
|---|---|
| Account Number | Select a sweep-in beneficiary account number from the list. |
| Account Balance | The net balance in the beneficiary account. |
| Linked Account Type | The option to select and view either Current or Savings account or Fixed Deposit account details. |
| Current and Savings |
The following fields appear for Current and Saving accounts. |
| Account Number | Current and Savings account number in masked format, that is linked as a provider account number for sweep-in facility. |
| Primary Holder Name | The name of the primary account holder. |
| Balance | The net balance of the account. |
| Action | The action to delete the linked account is displayed against each account. |
| Current and Savings – Add Sweep In | The following fields appear if the user clicks Add button. |
| Account Number | Current and Savings account number in masked format, that can be added as a provider account number for sweep-in facility. |
| Primary Holder Name | The name of the primary account holder. |
| Balance | The net balance of the account. |
| Action | The action to select the account number (s) that is to be linked. |
To add a new account as a sweep in:
Parent topic: Sweep-In
