2.1 Addition of new Region
This topic provides the systematic instructions to configure the region.
Region of the entity can be configured, and networks can be mapped for that particular region. One entity can have only one region.
- New regions are added to the
DIGX_RG_REGIONtable during configuration.Note:
For the purpose of illustration only, SEPA Region configurations have been taken as a sample in screenshots in all the steps that will follow.Screenshots are for illustrative purposes only. Content should not be replicated.
Table 2-1 DIGX_RG_REGION table
Column Name Significance ID Unique identifier for the region of the entity. Implementers can choose any value of their choice. We recommend keeping this value restricted to alphabets only.
NAME The name of the region STATUS Represents the Status of the region.
The possible values can be:
- ACTIVE
- INACTIVE
- DELETED
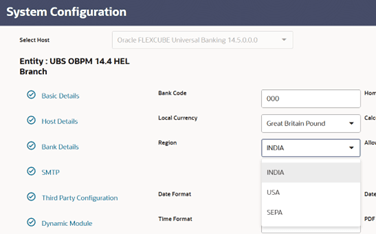
ENABLED Represents whether the Region is enabled or not VERSION Represent the version of the object After completing the steps, the configured region will appear in the System Configuration screen's Region drop-down (Navigation: from Menu, click Configuration, and then click Continue, and then select the entity as Bank Details).
The screenshot below shows where it will appear.
- Select the preferred region from the drop-down and save the
configuration.The region is gets added.
Parent topic: Adding a local Region
