1.20 Archive and Export
This topic describes the systematic instruction to Archive and Export option.
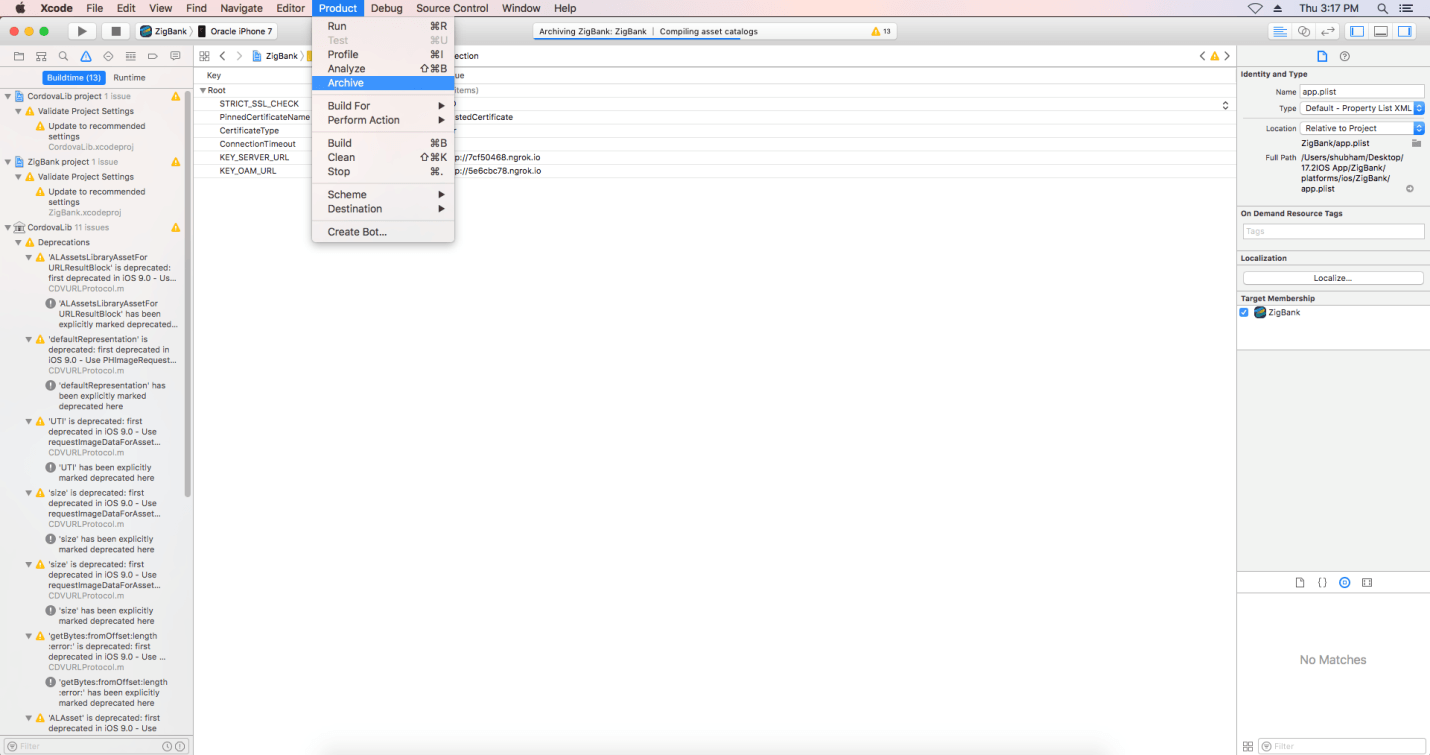
- In the menu bar, click on Product → Archive (Select Generic iOS
Device).
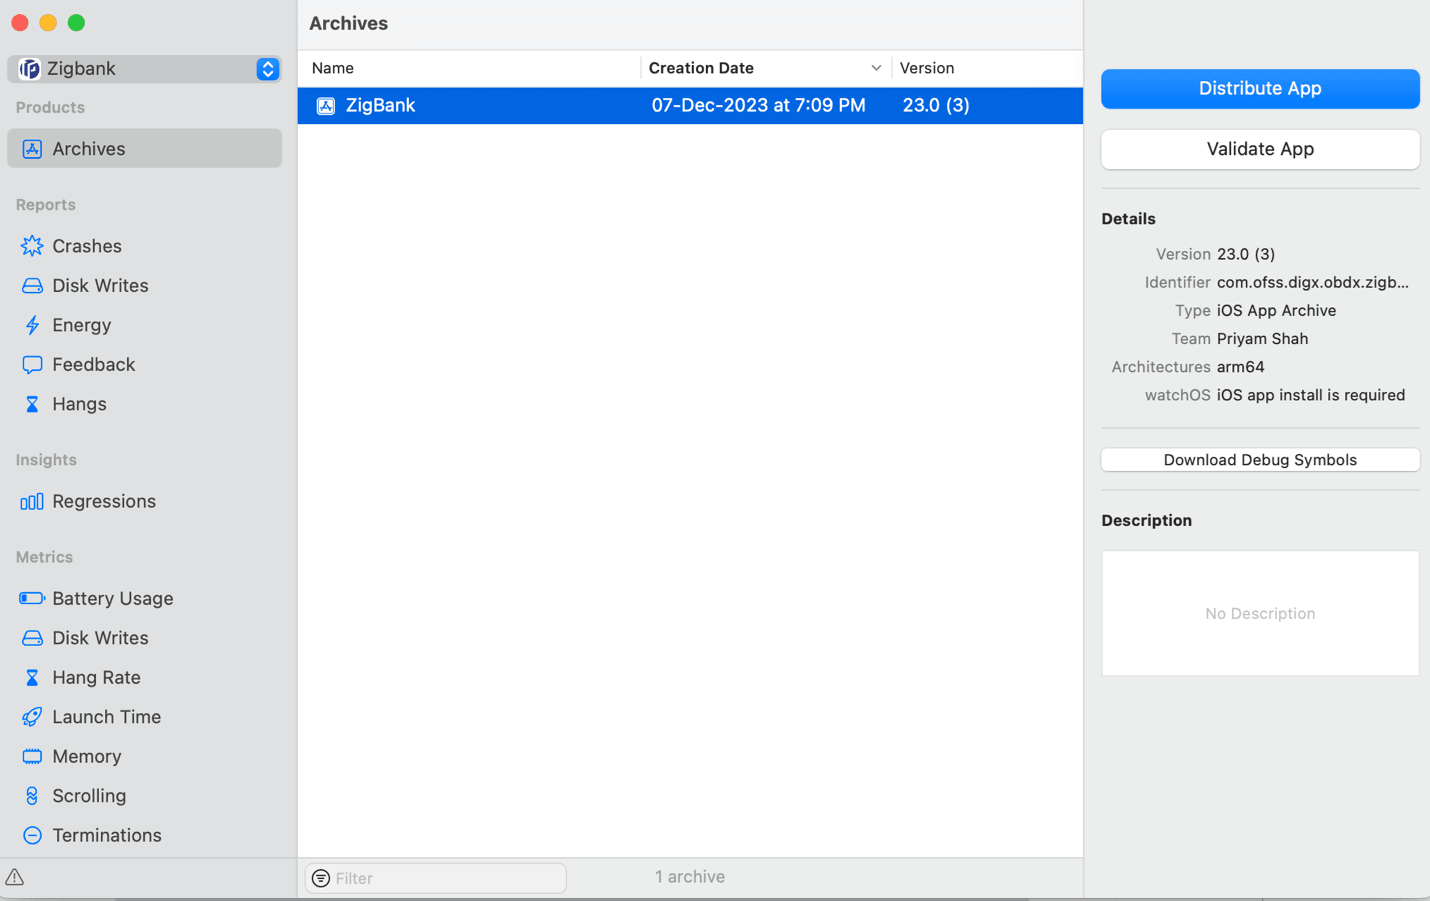
- After archiving has successfully completed. Following popup will
appears.
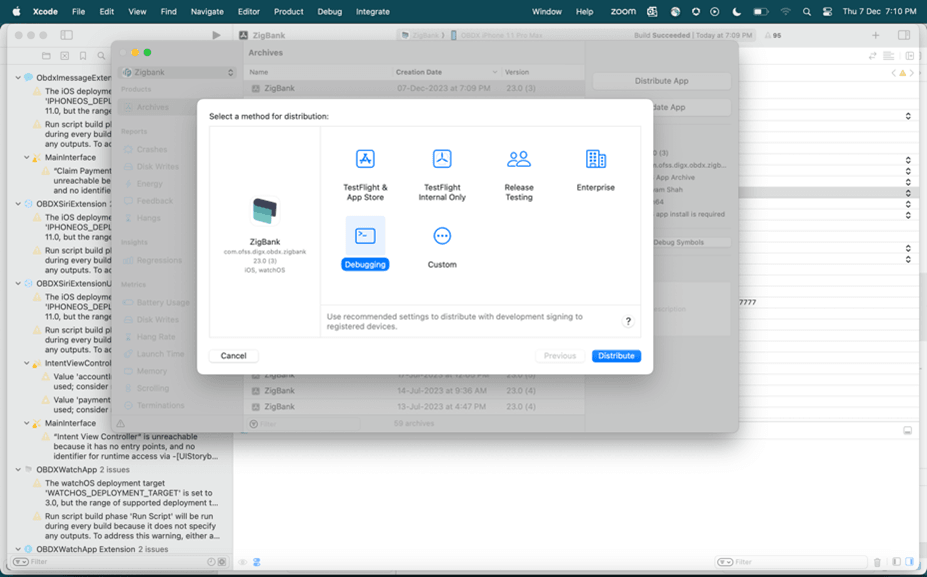
- Click on Distribute App in the right pane of the popup → select the
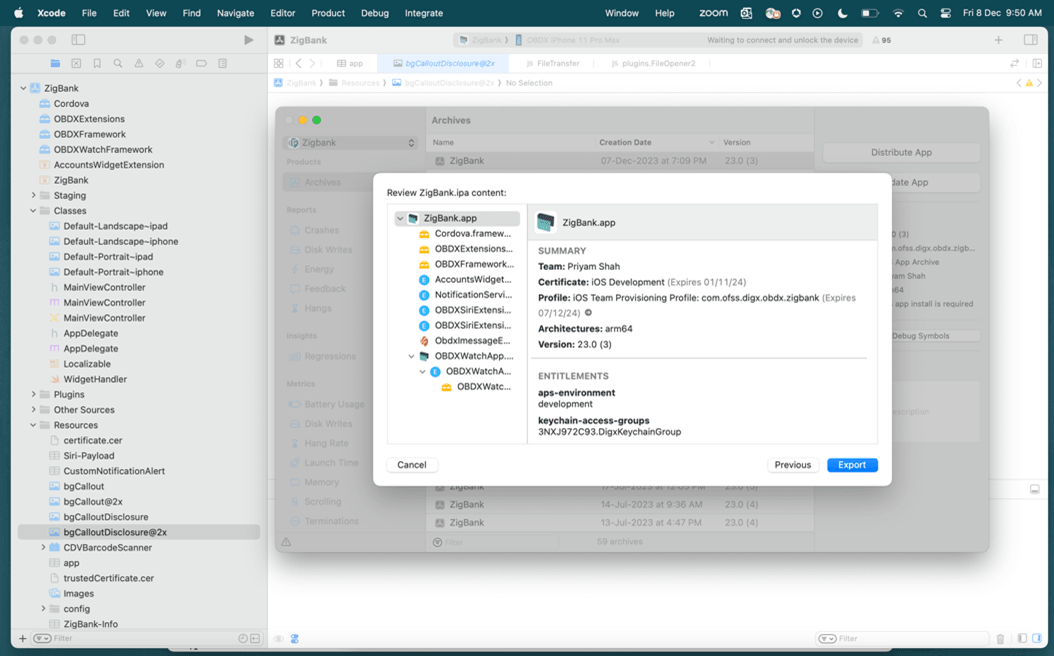
Method of Distribution → Select Distribute. Review the contents and click
on Export → Export and generate the. ipa
- There are multiple options for exporting, select according to what is needed.
- Debugging – this will create an ipa with development profile for internal testing.
- Release Testing – This will create an ipa with Ad Hoc distribution profile for adHoc testing.
- TestFlight Internal Only, TestFlight & AppStore- As the name suggests, this is for TestFlight and AppStore release.
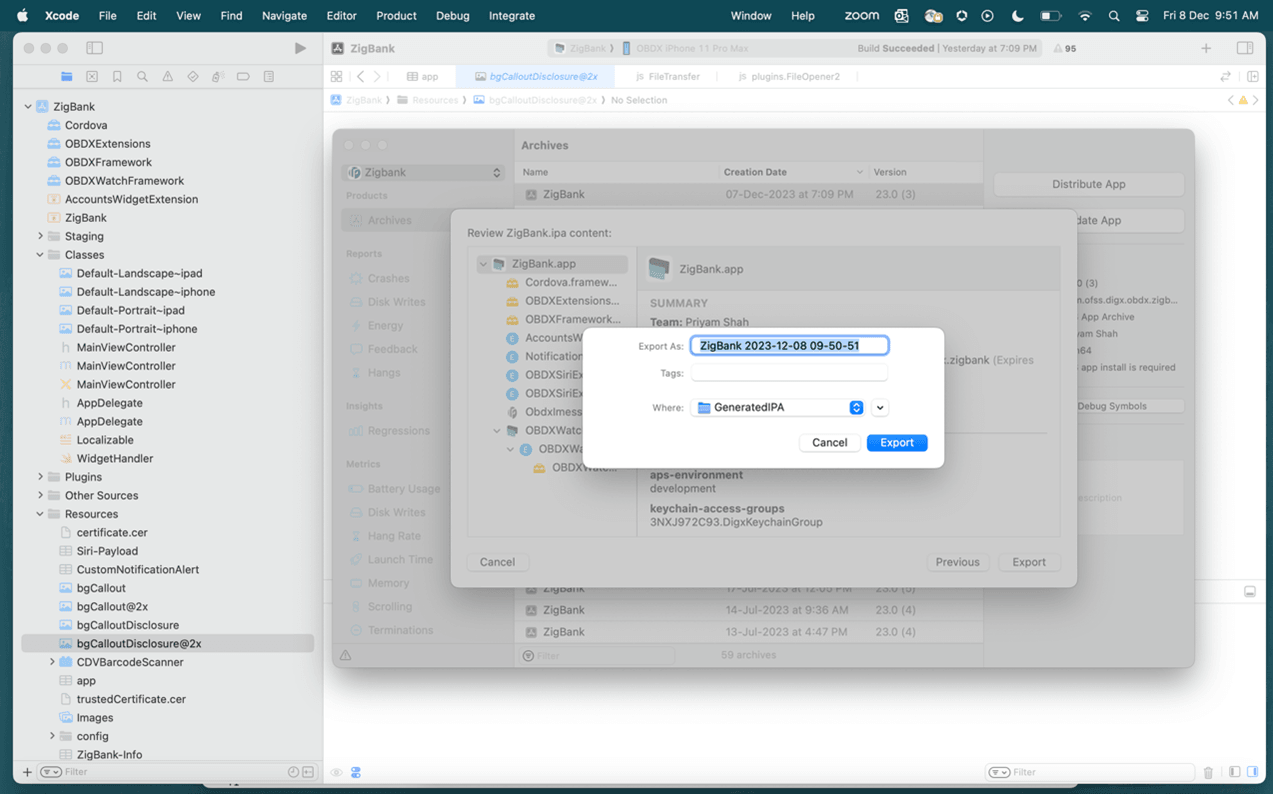
This is window which appear after selecting Debugging option. Note the Certificate and provisioning profile is for development type ipa likewise for other types verify the same.
- Click on Export and it will ask to save the ipa. Select the location and
click on Export. This ipa will be development ipa which can be installed on devices
which are added in the profiles on developer account.
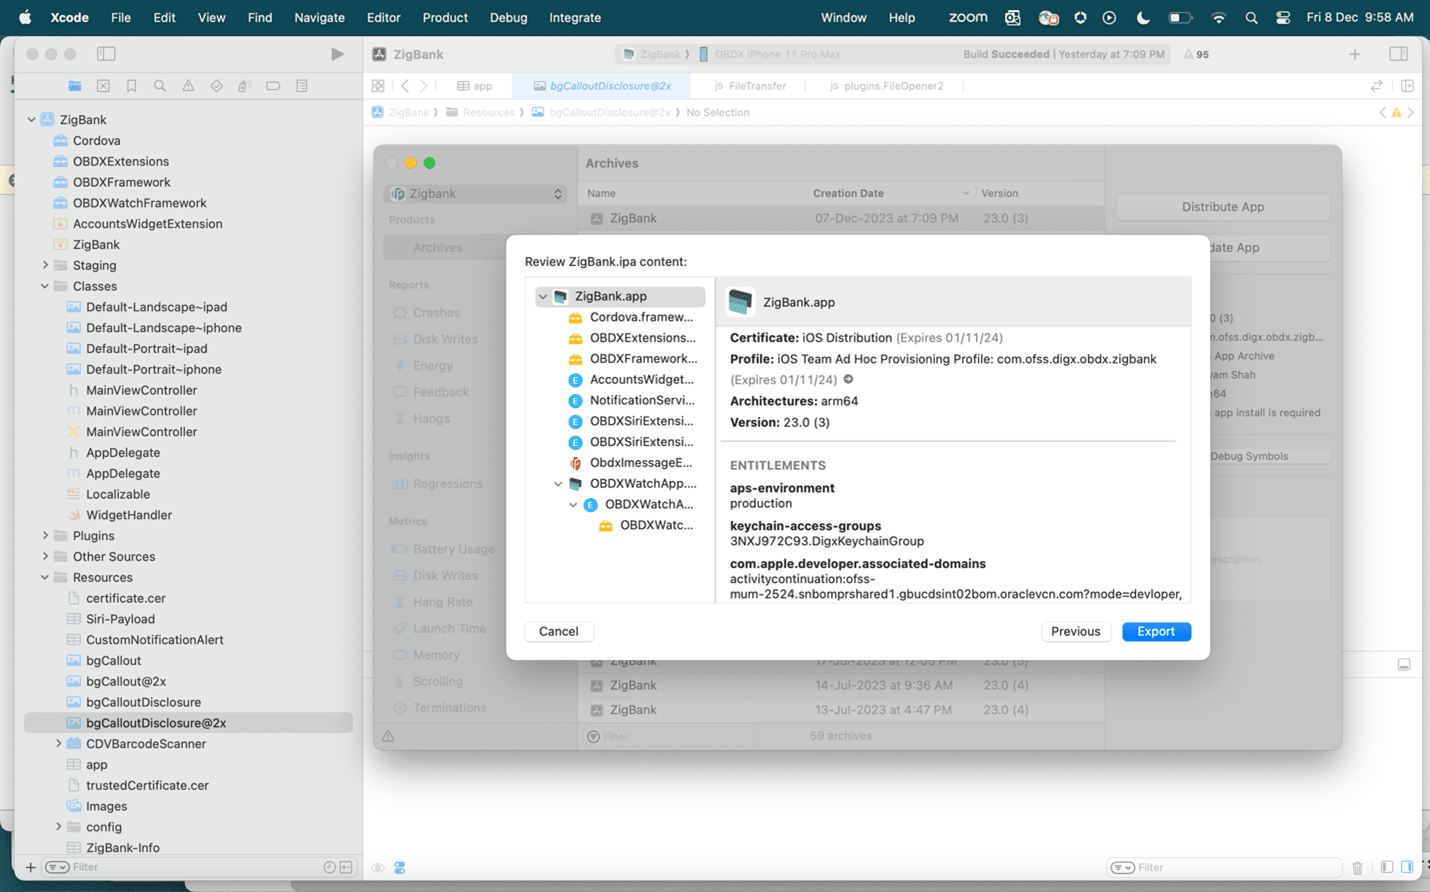
Below is the window which appears after selecting “Release Testing”. Note here the Certificate and Profile is of Adhoc Distribution.
Follow the above steps to Export and save the ipa. This ipa will be adhoc distribution ipa.
- The application can be pushed to TestFlight for test flight testing. Refer Apple Documentation for Test Flight Set up.
Parent topic: OBDX Servicing Application
