3 Service Providers

This topic describes the systematic instructions to configure the service providers.

The Service Providers are the product processors configure to process request send by Oracle Banking Routing Hub on behalf of service consumers. It comprises destination integration details.
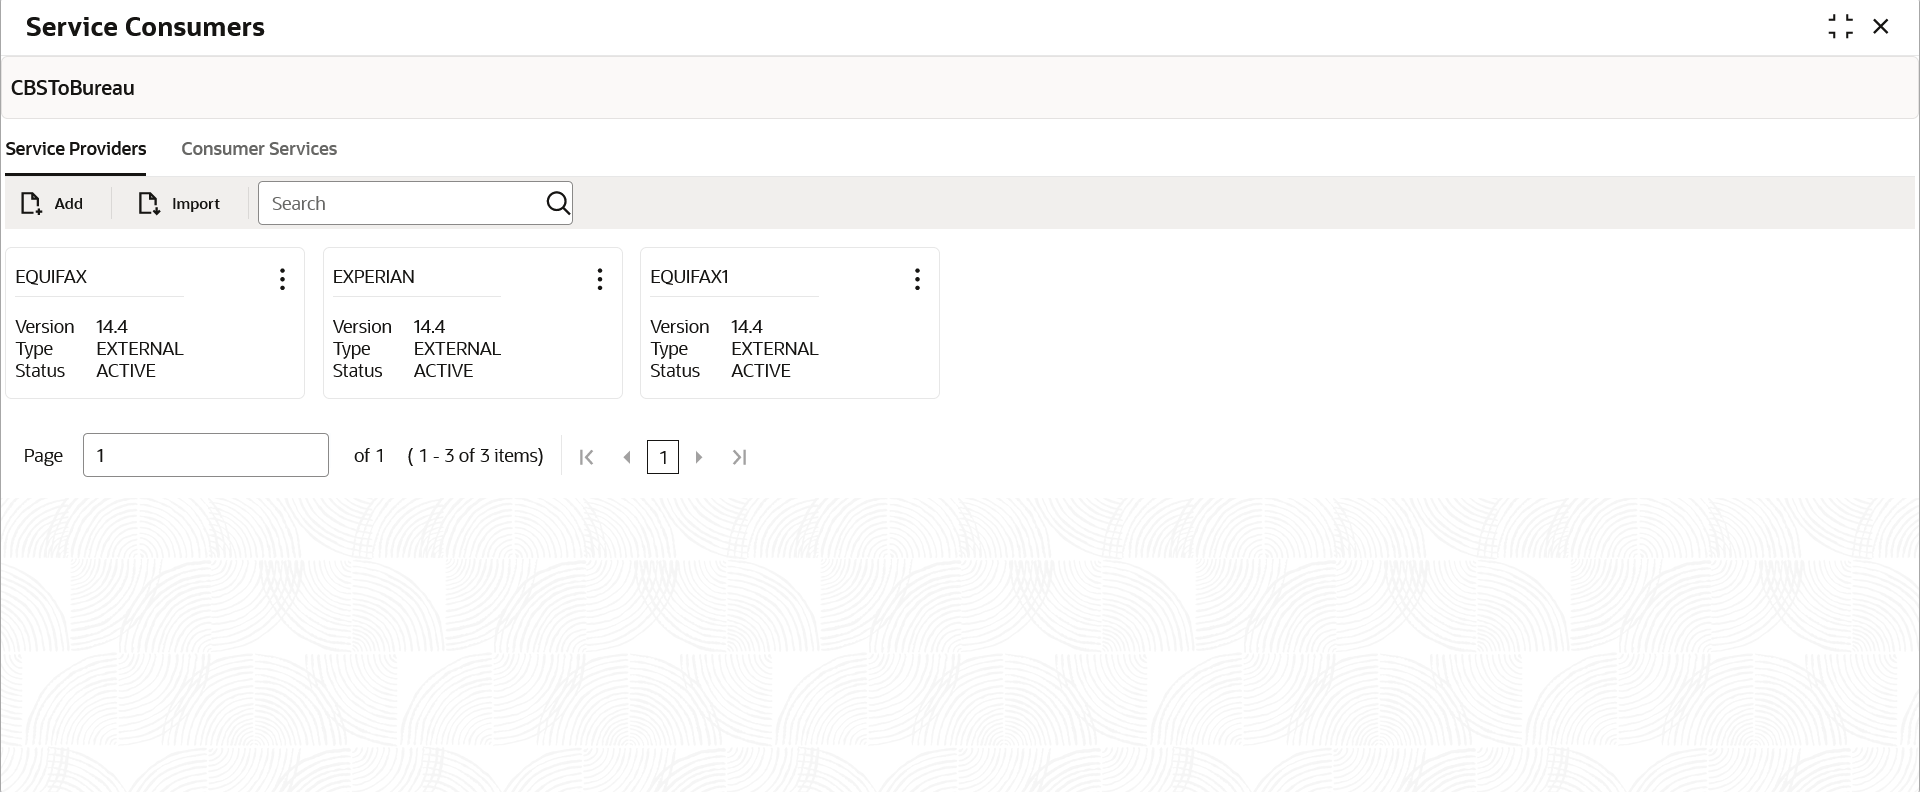
  1. On Service Consumers screen, click the required service consumer.
    The Service Providers screen displays.

Add Service Provider

The user can create Service Provider manually.

  1. Click Add.
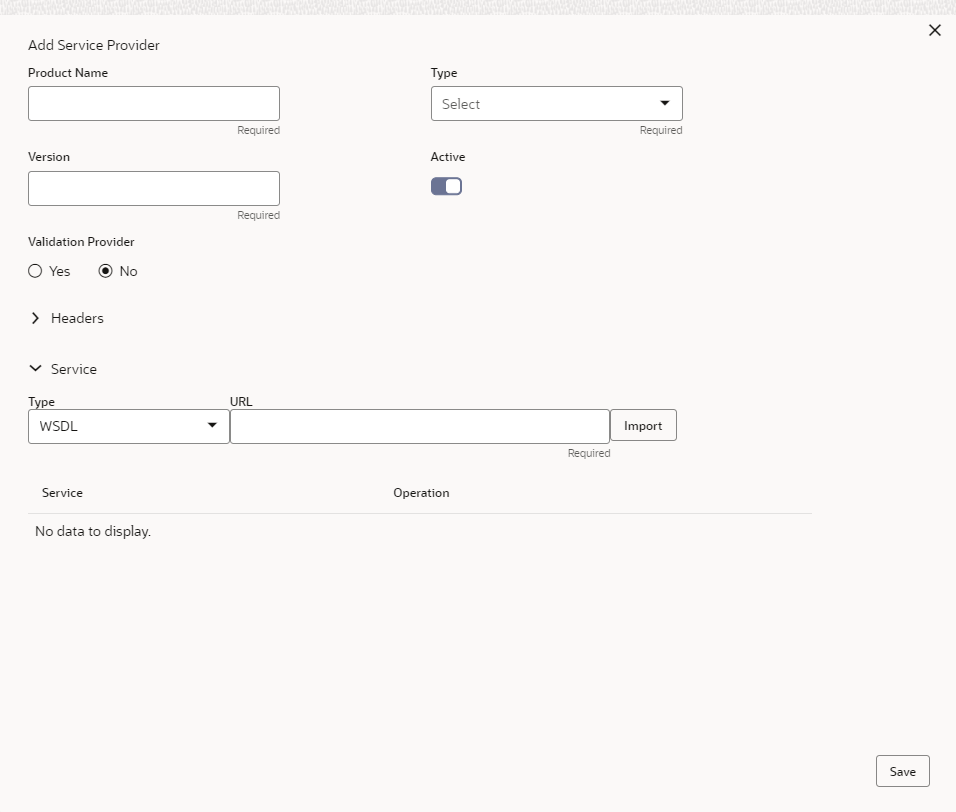
    The Add Service Provider screen displays.

    Figure 3-2 Add Service Provider


  2. Specify the fields on Add Service Provider screen.

    Note:

    The fields marked as Required are mandatory.

    For more information on fields, refer to the field description table.

    Table 3-1 Add Service Provider - Field Description

    Field Description
    Product Name Specify the product name of the service provider.

    Note:

    • Enter 0 to maximum of 255 characters.
    • No numeric value at beginning and no space allowed.
    Type Select the type of service provider from drop-down list
    The available options are:
    • INTERNAL: Used for Oracle products
    • EXTERNAL: Used for non-Oracle products
    Version Specify the provider version.

    Note:

    • Enter 0 to maximum of 255 characters.
    • Only numeric or decimal values are allowed.
    Active Predefined values are Active / Inactive

    If provider is marked as inactive, then all related routes will be stopped.

    Validation Provider Predefined values are Yes / No

    This property can be enabled to use a separate provider service for validating the requests before sending it for processing.

    Add To add, refer to the below steps.
    Actions Displays the action.

    The user can edit or delete the header.

    Name Displays the name of the header.
    Value Displays the value of the header.
    Type Select the type of service from drop-down list.
    The available options are:
    • WSDL
    • SWAGGER
    • OTHERS
    Name Specify the name of the operation.

    Note:

    This field appears only if the Type is selected as OTHERS.
    Http Method Select the HTTP method.

    The available options are:

    • GET
    • POST
    • PUT
    • PATCH
    • DELETE

    Note:

    This field appears only if the Type is selected as OTHERS.
    Endpoint Specify the endpoint URL for the operation.

    Note:

    This field appears only if the Type is selected as OTHERS.
    URL Specify the service URL of the file location.

    Note:

    This field appears only if the Type is selected as WSDL and SWAGGER.
    Import Click Import to extract the service information from URL.

    Note:

    This field appears only if the Type is selected as WSDL and SWAGGER.
    Context Path

    Context path of below formatted URL

    http://host:port/context-path/endpoint
    Service Headers

    Specify the Endpoint specific headers.

    Value can either be hardcoded or can be Velocity mapping.

    Note:

    This field appears only if the Type is selected as OTHERS.
    Service Query Params

    Specify the Endpoint specific query parameters.

    Value can either be hardcoded or can be Velocity mapping.

    Note:

    This field appears only if the Type is selected as OTHERS.
    Service Displays the extracted service from the selected URL.
    Operation Displays the extracted operation from the selected URL.

Headers

A product processor might require some standard headers to be passed along with the request. The user can specify the headers which are required by service endpoints for its all implementations but not present in swagger file.

Note:

Content-type header will be removed from Provider request if header value is NONE.

  1. To add Headers, follow the below steps.
    1. Under Headers section, click Add.
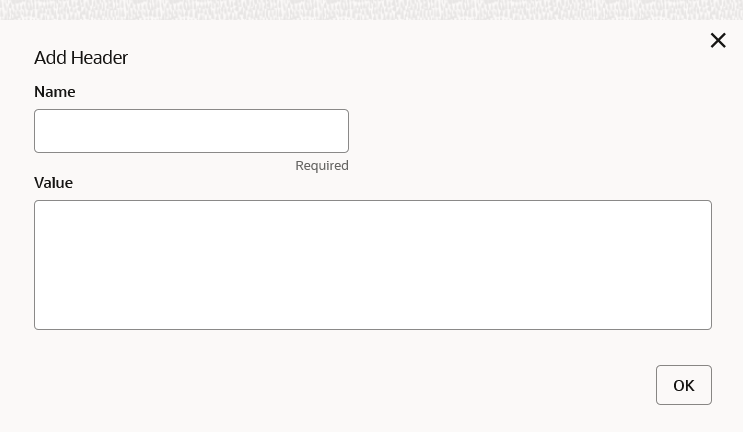
      The Add Header screen displays.
    2. Specify the fields on Add Header screen.

      Note:

      The fields marked as Required are mandatory.

      For more information on fields, refer to the field description table.

      Table 3-2 Add Header - Field Description

      Field Description
      Name Specify the name of the header.
      Value Specify the value of the header.
  2. Click OK to save the details.
    The Confirmation screen displays.
  3. Click Confirm.

Service

  • WSDL:

    The Web Services Description Language (WSDL) is an XML-based interface description language that is used for describing the functionality offered by a web service.

    Both SSL and non-SSL WSDL URL are supported.

    Note:

    If there is a change in wsdl file, then same wsdl file need to be imported again to update the provided service information in Routing Hub.
  • SWAGGER:

    Swagger is an Interface Description Language for describing RESTful APIs expressed using JSON.

    Currently, Swagger 2.0 & OpenAPI 3.0 both are supported.

    Note:

    If there is a change in swagger file, then same swagger file need to be imported again in order to update the provided service information in Routing Hub.
  • OTHERS:

    OTHERS option is selected for adding REST API details manually when provider does not have swagger file.

    Note:

    If there is a change in existing endpoint, then the same endpoint details need to be entered again with the new changes in order to update the existing provided service information in Routing Hub.
Import Service Provider

The user can create a service provider by importing the JSON file and also can import zip file in order to import all the configuration JSON files together (except parent level configuration JSON files).

  1. Click Import.
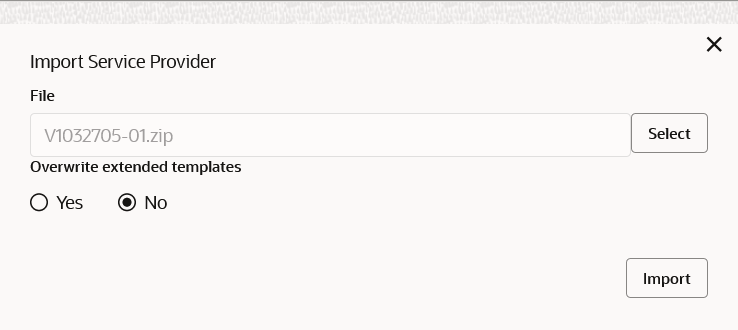
    The Import Service Provider screen displays.

    Figure 3-4 Import Service Provider


    For more information on fields, refer to the field description table below.

    Table 3-3 Import Service Provider - Field Description

    Field Description
    File Select the file using Select button.

    Note:

    Allows only to select one file and accepts JSON and ZIP file.
    Overwrite extended templates Select the respective radio button to overwrite extended templates.
    The options are:
    • Yes - This option overwrites the extended templates in configuration.
    • No - This option retains the existing extended templates in configuration.

    Note:

    This field appears only if the ZIP File is selected.
  2. Click Import to import the selected file.
    The Confirmation screen displays.

    Note:

    The following data needs to be changed after importing provider configuration file:
    • Implementation Host and Port
    • Implementation Authentication Password

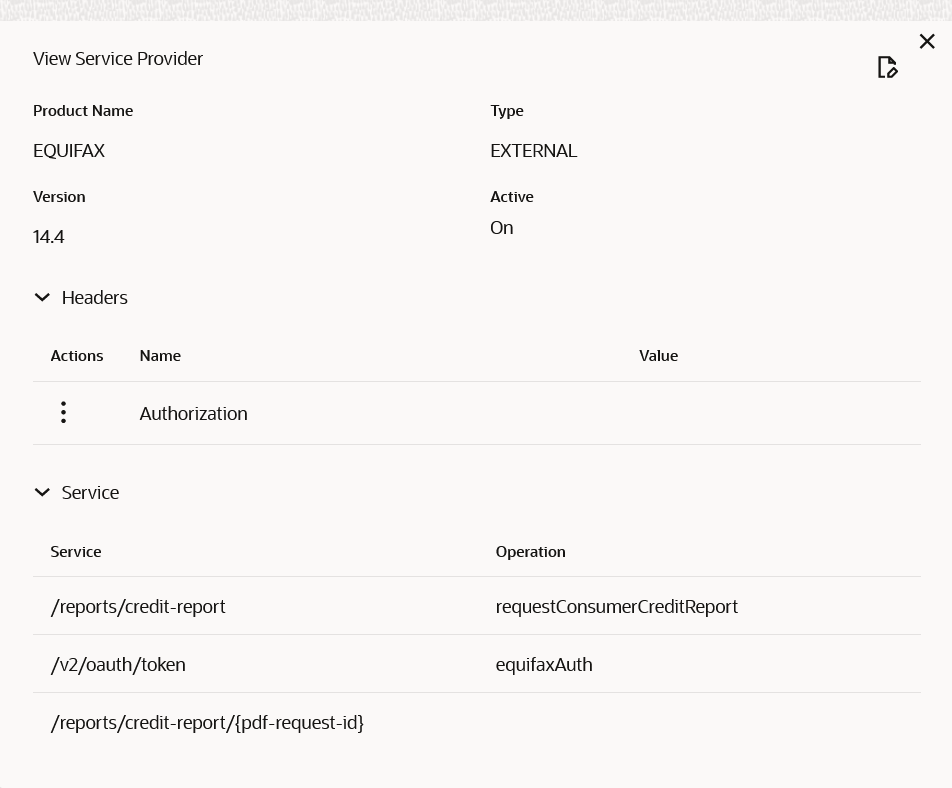
View Service Provider

  1. On Service Provider tile, click Operation menu (3 dots button), and click View.
    The View Service Provider screen displays.

    Figure 3-5 View Service Provider


  2. Click Edit button to edit the Service Provider.

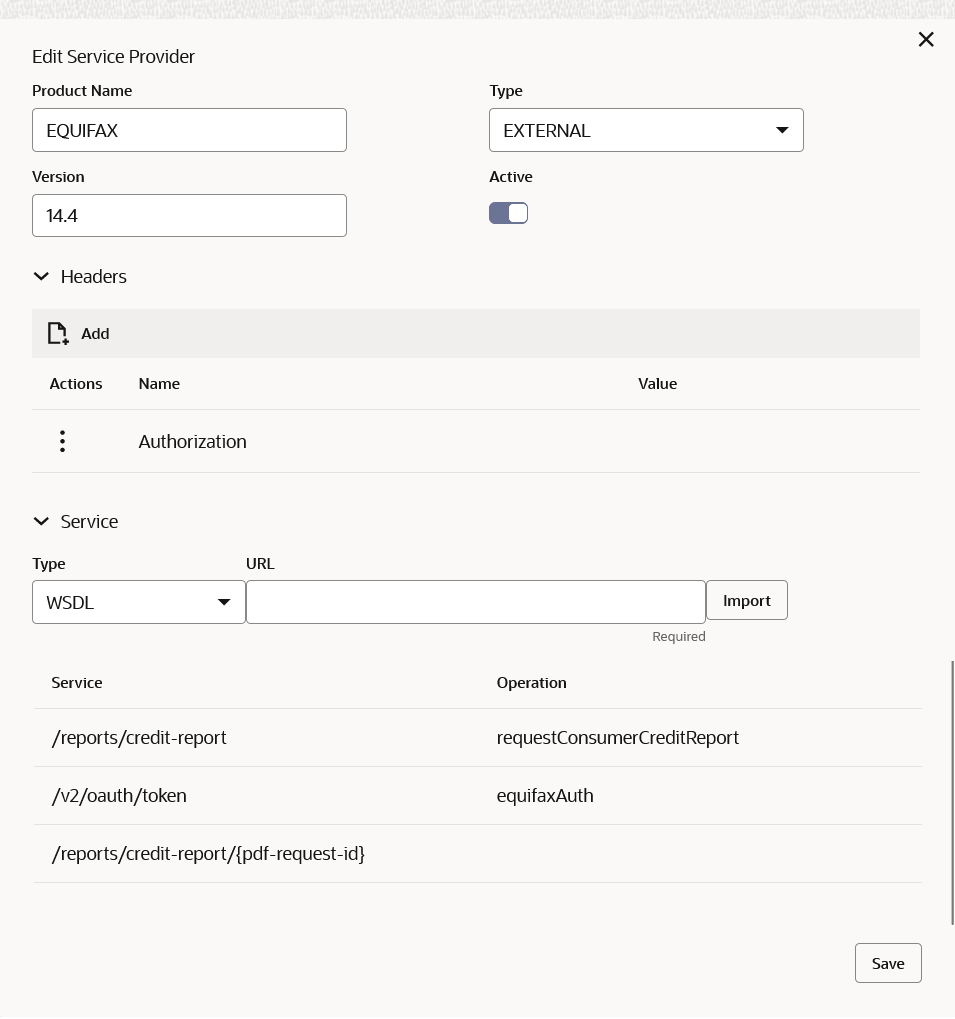
Edit Service Provider

The user can modify the provider details.

  1. On Service Provider tile, click Operation menu (3 dots button), and click Edit.
    The Edit Service Provider screen displays.

    Figure 3-6 Edit Service Provider


  2. Click Save once the edit is done.
    The Confirmation screen displays.

Delete Service Provider

The user can delete the provider.

  1. On Service Provider tile, click Operation menu (3 dots button), and click Delete.
    The Confirmation screen displays.

    Figure 3-7 Confirmation - Delete


  2. Click Confirm to delete the selected Service Provider.

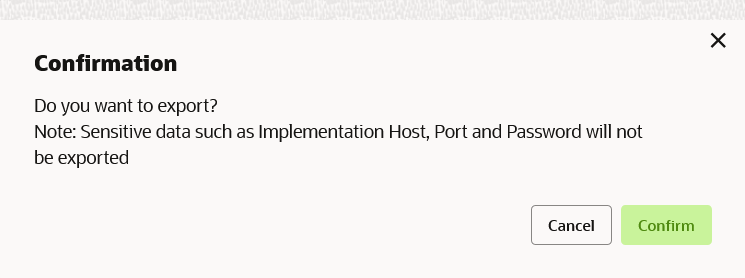
Export Service Provider

The user can export the provider configuration as JSON file.

  1. On Service Provider tile, click Operation menu (3 dots button), and click Export.
    The Confirmation screen displays.

    Figure 3-8 Confirmation - Export


    Note:

    The below data cannot be exported:
    • Implementation Host
    • Implementation Port
    • Implementation Authentication Password

    The above data needs to be configured manually after importing the configuration file. Same has been mentioned in Import section.

  2. Click Confirm to export the selected Service Provider.

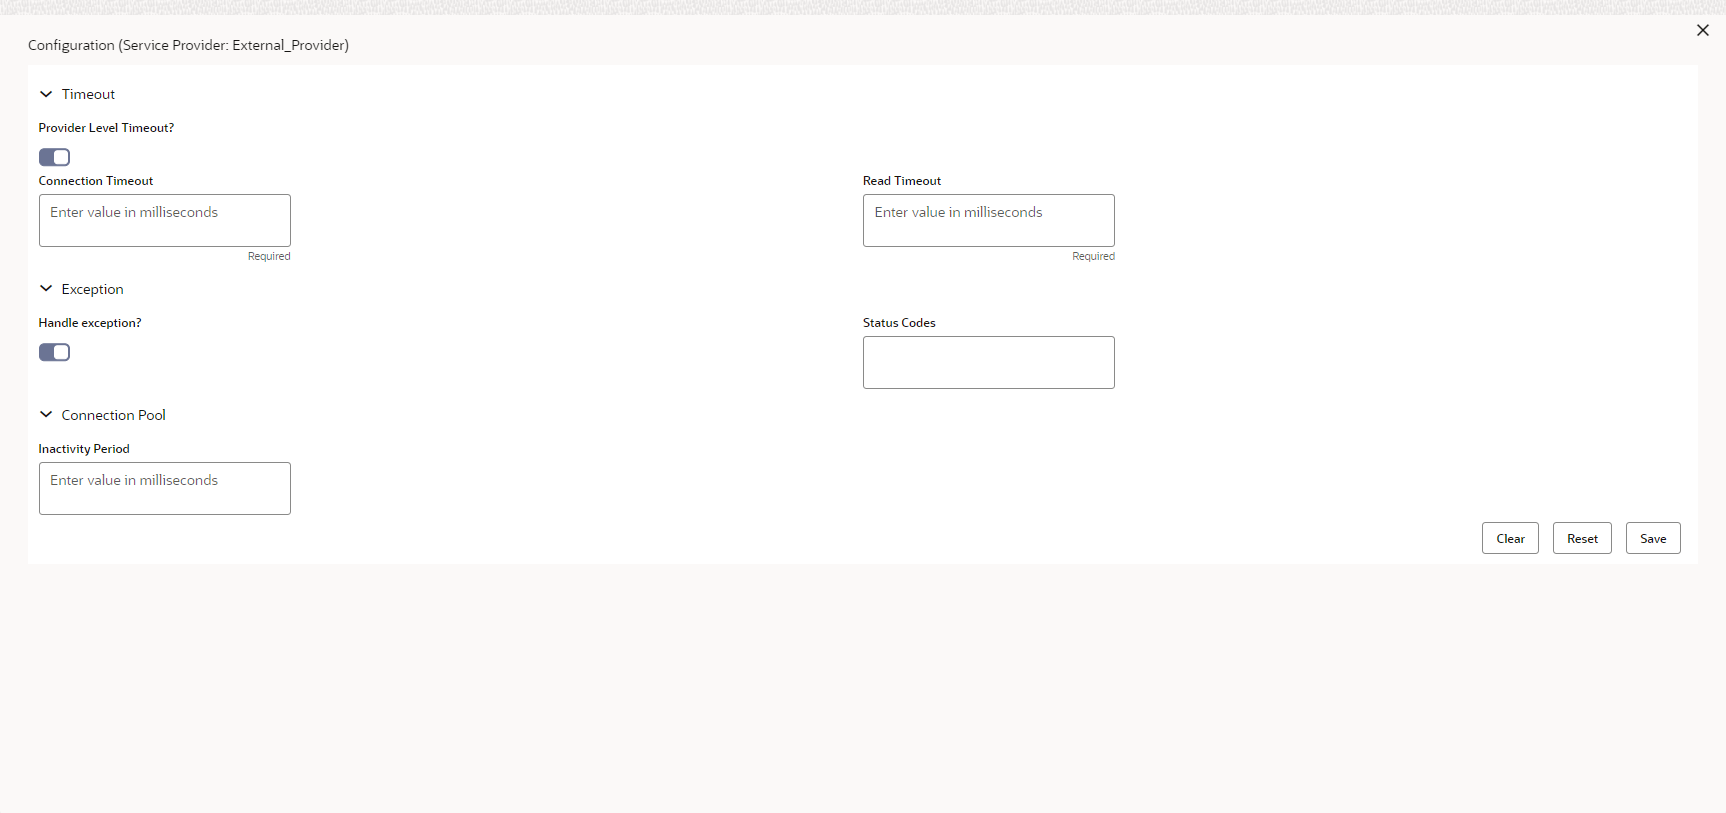
Configuration

End-user can configure the properties for failing the routing hub requests.

  1. On Service Provider tile, click Operation menu (3 dots button), and click Configuration.
    The Configuration screen displays.

    For more information on fields, refer to the field description table below

    Table 3-4 Configuration Service Provider - Field Description

    Field Description
    Provider level timeout This property is used to override the global timeout values.

    Note:

    Default value is false.
    Connection Timeout This property is used to set the timeout in making the initial connection i.e. connection handshake.

    Note:

    Value should be in milliseconds.
    Read Timeout This property is used to set the timeout on waiting to read data.

    Note:

    Value should be in milliseconds.
    Handle exception This property is used to fail the routing hub request for failed provider requests.

    Note:

    Default value is false.
    Status Codes This property is used to fail routing hub request for specific status codes of failed provider requests. If not specified, then routing hub request will fail for all 4xx and 5xx status codes of failed provider requests.
    Inactivity Period This property is used to specify connection inactivity time for re-validating connections in connection pool.

Request Audit

  1. On Service Provider tile, click Operation menu (3 dots button), and click Request Audit.
    The Request Audit screen displays.

    Note:

    Refer to Request Audit topic for the screen and field description.

Clear Cache

The user can clear the SOAP client cache for the service providers.

  1. On Service Provider tile, click Operation menu (3 dots button), and click Clear Cache.