- Development Workbench- Customer Landing Page
- Create a New Function in Customer Landing Page
3 Create a New Function in Customer Landing Page
This topic explains systematic instructions to create a new function in the Customer Landing Page.
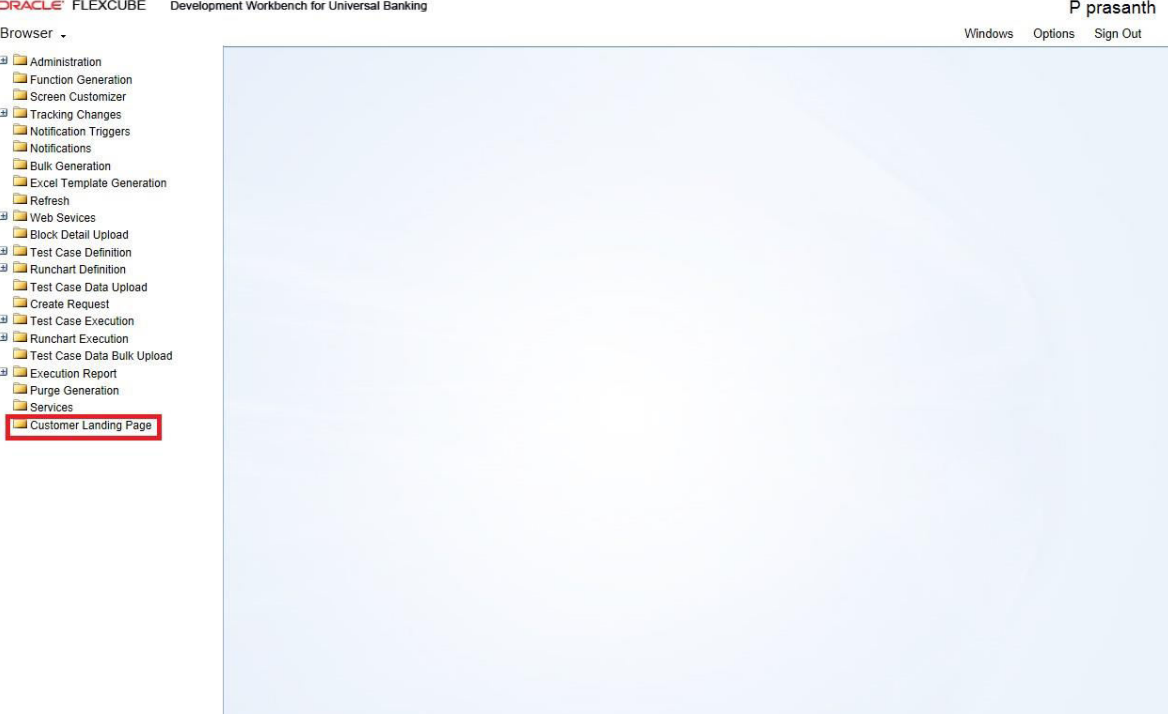
- On Expand Menu, click Customer Landing Page node.The Customer Landing Page screen displays.
- On the Customer Landing Page screen, specify the fields to create a new function.
Table 3-1 Customer Landing Page - Field Description
Field Description Action Select one of the following actions: - New - Select this option for new screen development.
- Load - Select this option to load the existing screen RADXML for customization. If the Load action is selected, the Save XML Path option changes to Load Screen XML. Select the corresponding RADXML by clicking BROWSE in the Load Screen XML field. All the header information will get populated.
Function ID If the Action is selected as New, specify the function ID. Function ID is the unique name with which a screen is identified. Function Id name should follow the Oracle FLEXCUBE Universal Banking standard naming convention as below: - Function ID must have a maximum length of 8 characters.
- For detail screens, the third character must be D.
- For report screens, the third character must be R.
- For Call Form Function IDs, the third character must be C.
- The first 2 characters must specify the module name for which the particular function ID is used (recommended).
Save XML Path The label description of the field changes depending on the Action. If the action is Load, Open Development Tool enables the Browse, so that the user can browse the RADXML and load it. Function Category Select the function category from the drop-down list: - Master - Select this option to create a master function.
- Detail - Select this option to add tables and other information. This option is used to develop tables, fieldsets, blocks etc. in the Customer Landing Page. For reference, refer to the Development of Launch Forms and Others Screens document.
- Summary - Summary screen in Customer Landing Page is similar to Summary screen in normal function generation. Refer to the Oracle FLEXCUBE Enterprise Limits and Collateral Management ODT Screen Development for detailed information.
- Tabs - The Tabs screen is part of the Master screen. The Tabs screen contains a group of screens in it. Each screen is detailed under each tab.
- Subsystems - This category is used to display subsystem buttons to launch screens.
- On the Customer Landing Page screen, click the Preferences node at the left panel.The Preferences screen displays.
Function ID levels preferences like Module, Logging Required, Tank Modification, Main Menu, Sub-Menu1, and Sub-Menu2 are maintained through the Preferences screen in Open Development Tool.
The data maintained in the Preferences screen are used for generating static data scripts for tables SMTB_MENU, SMTB_FUNCTION_DESCRIPTION, SMTB_ROLE_DETAIL, and SMTB_FCC_FCJ_MAPPING.
- On the Preferences screen, specify the fields.
Table 3-2 Preferences
Field Description Module Click Search and select the module from the list of values. The developer can select the module name from the list of values provided. The list of values is populated based on the modules maintained in the SMTB_MODULE table of the business schema (the current Oracle FLEXCUBE Universal Banking environment to which the tool is mapped). Module code has to be provided mandatory. The module name provided would be reflected in the script for SMTB_MENU generated by Open Development Tool (in the module column). This will also be considered while naming the packages generated by the tool. The first two characters of the packages generated will be taken from the module code maintained. Module Description The system displays the Module Description based on the Module selected. Head Office Function Check this box to indicate the function is a head office function. It will be reflected in the static script for SMTB_MENU in column HO_FUNCTION. If the function is a head office function, then only query operation will be possible at all the other branches for the particular screen. Logging Required Check this box to indicate that logging is required for the function. This will also be reflected in the script generated for SMTB_MENU (column LOGGING_REQD). If this box is checked, all the requests and responses for the function ID will be logged in CSTB_MSG_LOG. This is used for the View Change option. Auto Authorization Check this box to indicate that auto authorization is allowed for the function. This will also be reflected in the script generated for SMTB_MENU (column AUTO_AUTH). Note:
Auto Authorization is possible only if it is allowed at the function ID level, user level, and branch level.Tank Modification Check this box to indicate that modification is to be tanked for the function. This will be reflected in the TANK_MODIFICATIONS column of the SMTB_MENU table script. If the Tank Modification box is checked, then the record in that screen would be logged to logging tables and taken up for processing (untanking) in the later stage during EOD operations. Currently, this is applicable only for maintenance screens. Field Log Required Check this box to indicate that logging is required for the function. This will be reflected in the FIELD_LOG_REQD column in SMTB_MENU. If the Field Log Required box is checked, then all operations on the screen will be logged to logging tables (STTB_FIELD_LOG.STTB_RECORD_LOG, etc). Currently, this is applicable only for maintenance screens. Excel Export Required Check this box to export records from the summary screen to excel. Multi Branch Access Check this box to indicate that multi-branch access is required for the function ID. This will be reflected in the MULTIBRANCH_ACCESS column of the SMTB_MENU table script generated. If the Multi Branch Access box is checked, then records of different branches for the screen can be modified from a single branch. Module Auto Authorization Check this box to indicate that module auto authorization is allowed for the function. Java Functions Check this box to indicate that Java functions are enabled. GateWay Screen Check this box to indicate that Gateway screen are enabled. Transaction Block Name This field shows the transaction block name. This is applicable only if the Multi Branch Access box is checked for the screen. Select the block from the list of values which contains the field for the branch code. Transaction Field Name This field shows the transaction field name. This is applicable only if the Multi Branch Access box is checked for the screen. The list of values provides all the block fields for the transaction block selected. Select the field for branch code from the list. Transaction Block Name and Transaction Field Name will be reflected in the system JavaScript file (SYS js) generated by Open Development Tool. The developer has to code for querying the records based on the branch code value of this field. Branch Program ID It captures the branch program ID for the function. Process Code This can be used to map which process needs to be initiated during the screen launch. This is used for the work flow screens. Module Group Click Search and select the module group from the list of values. SVN Repository URL This is applicable only if integration to SVN (version control tool) is required. Path of the SVN repository till the module needs to be provided in this field. In the multiple-entry block, the developer needs to maintain all the related function ID names for the screen. Open Development Tool will default the name of the function Id to the first row of the multiple entries along with the module maintained earlier. If any other function ID is required for the particular screen, the developer has to add the row. For example, for the FTDTRONL screen, the developer designs a detailed screen. The user also wants to add one summary screen to the screen as well as a gateway function Id for web services. For this, the user can add two new columns FTSTRONL (for the summary) and FTGTRONL (for gateway operations) to the block as shown below.
- Click Save.
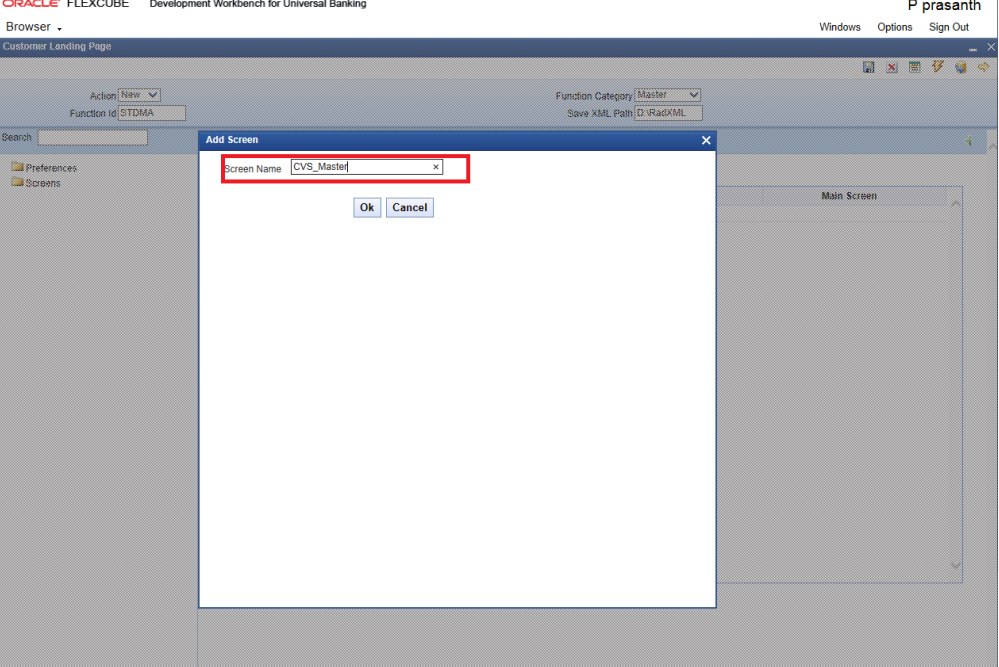
- On the Customer Landing Page screen, right-click on the Screens node, and select Add.The Add Screen window displays.
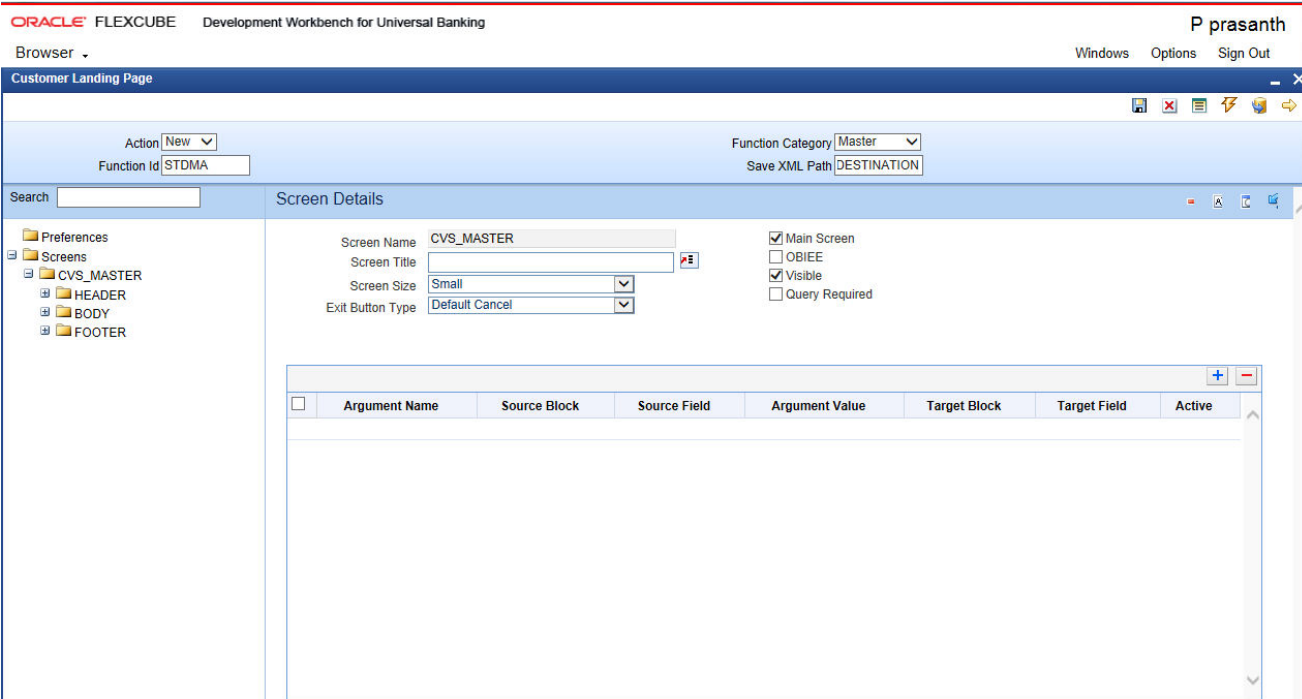
- Specify the name as CVS_Master in the field Screen Name, and click OK.The Screen Details screen displays.
- Click Save to save the new screen.
- To add a tab for the newly created screen, click on the newly created screen under the Screens node.
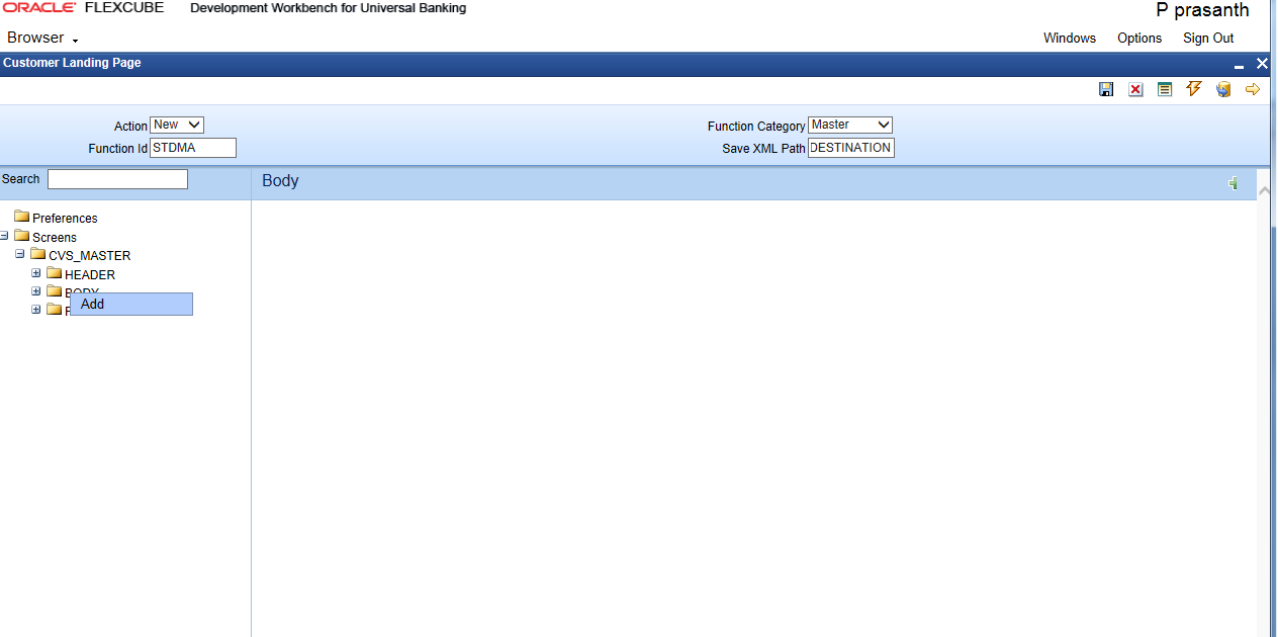
- Right-click on the Body of the screen, and select Add.
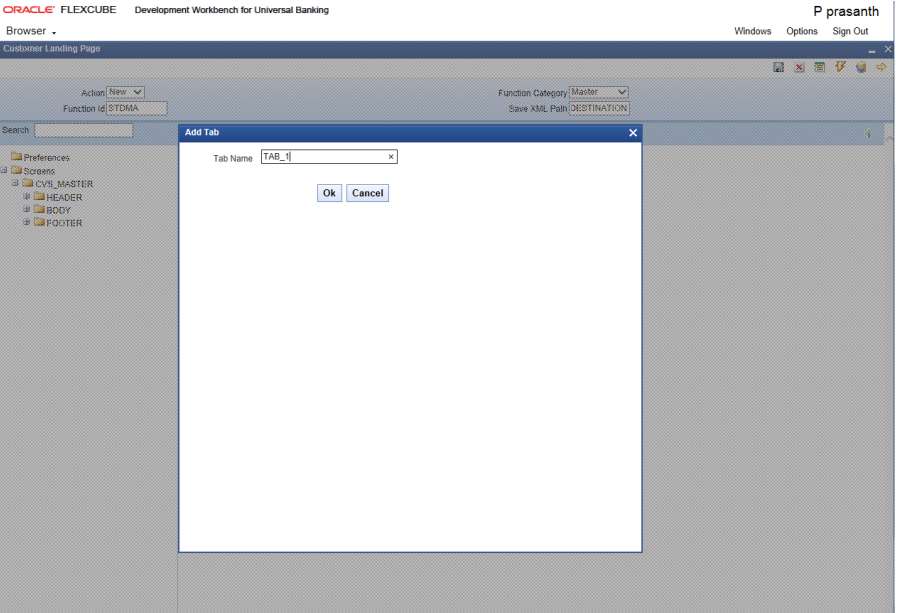
Figure 3-5 Customer Landing Page- New Tab Creation
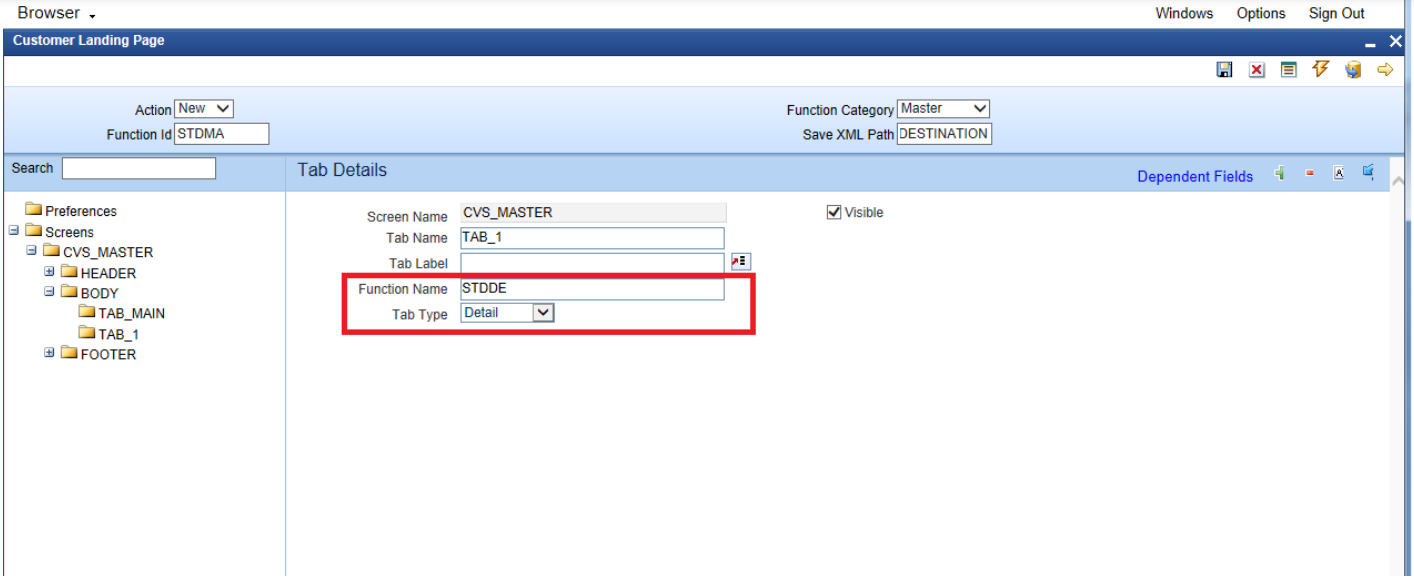
The Add Tab window displays. - Specify the Tab Name as Tab_1, and click OK.The Tab Details screen displays.
- Specify the Tab Name and Tab Label fields.
- For generating RADXML and other artifacts, click Generate at the top right corner of the screen.The Generate screen displays.
- Click OK.
