- Development Workbench - Notifications
- Create Notifications
7 Create Notifications
This topic provides systematic instructions to generate new or modify the existing Notification.
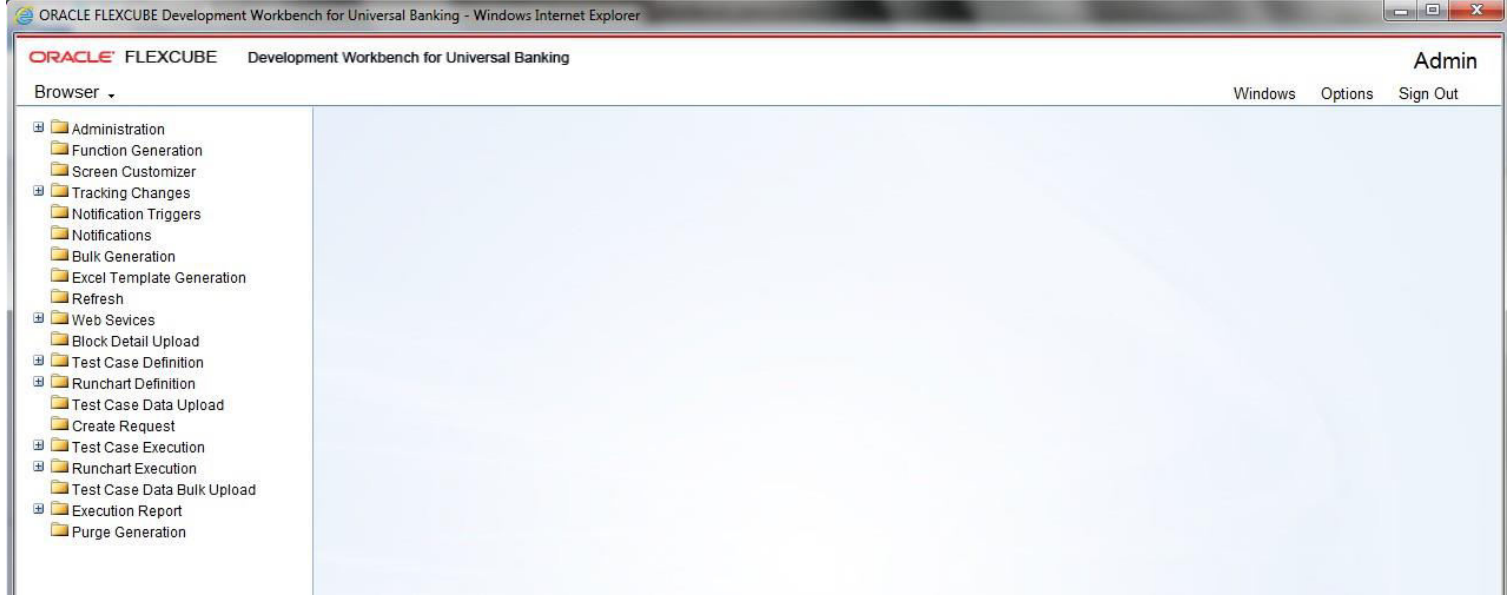
- Log in to the Development Workbench.Development Workbench For Universal Banking screen displays.
Figure 7-1 Development Workbench For Universal Banking
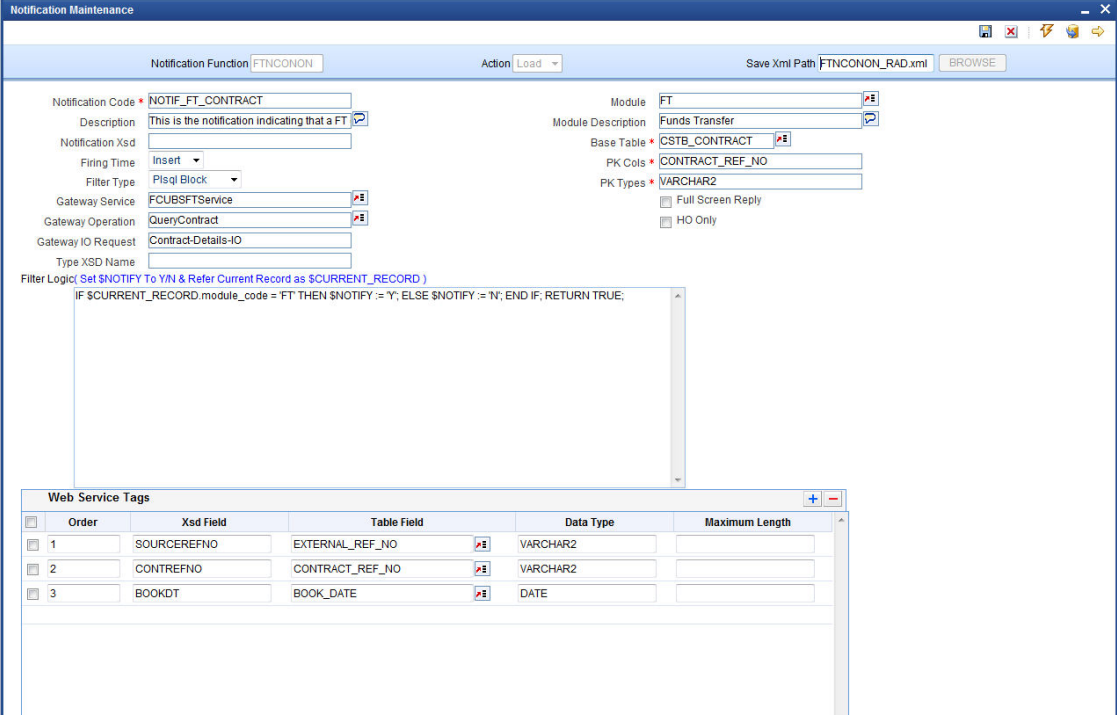
- Click on the Notifications option under the Browser menu.Notification Maintenance screen displays. Notification Maintenance screen is used to create a new notification or modify an existing notification, here notification information gets captured for notification codes and the user needs to save notification details into XML.
- To create a new Notification, follow the steps given below:
- Specify the details in the Notification Maintenance screen and save it.
Table 7-1 Notification Maintenance- Field Description
Field Description Action Select either New or Load action. The New option is to create a new notification and the Load option is used to modify the existing one. Save XML Path Specify the path to save notification XML. This would be considered only if the Save Mode is Client and Work Directory specified as $CURRENT_DIRECTORY. Notification Function Specify the notification function-id name. For Example: FTNCONONNote:
Naming Conventions- Notification Function must have maximum 8 characters and the 3rd letter must be N.Notification Code Enter the notification code to which we need to capture values. This is a mandatory field. For Example: NOTIF_LD_CONTRACT, This is the notification indicating that an LD contract has been created/modified.Note:
Recommended Convention for Notification Codes- NOTIF_<Module Code>_<Description>Description Information field. A meaningful description of the Notification has to be provided in the field. Module This attribute signifies the module on which the notification is based. Module Description Information field. Module Description that would be defaulted from Module LOV. Notification XSD Notification XSD name will have to be provided in the corresponding Field. For Example: FT-Contract-Notif.xsd, Notification XSD has to be provided only if no Gateway Web Service Query Operation is configured to the Notification.Note:
The naming convention to be followed while naming Notification XSD is as follows- [Module Name] – [Notification Description] – Notif.xsdBase Table Select the base table on which trigger needs to be applied. Firing Time Indicates the Operation on the base Table for which Notifications have to be sent. Options available are Insert, Update, or both. Filter Type This attribute can take the following values. - Where Clause
- Plsql Block
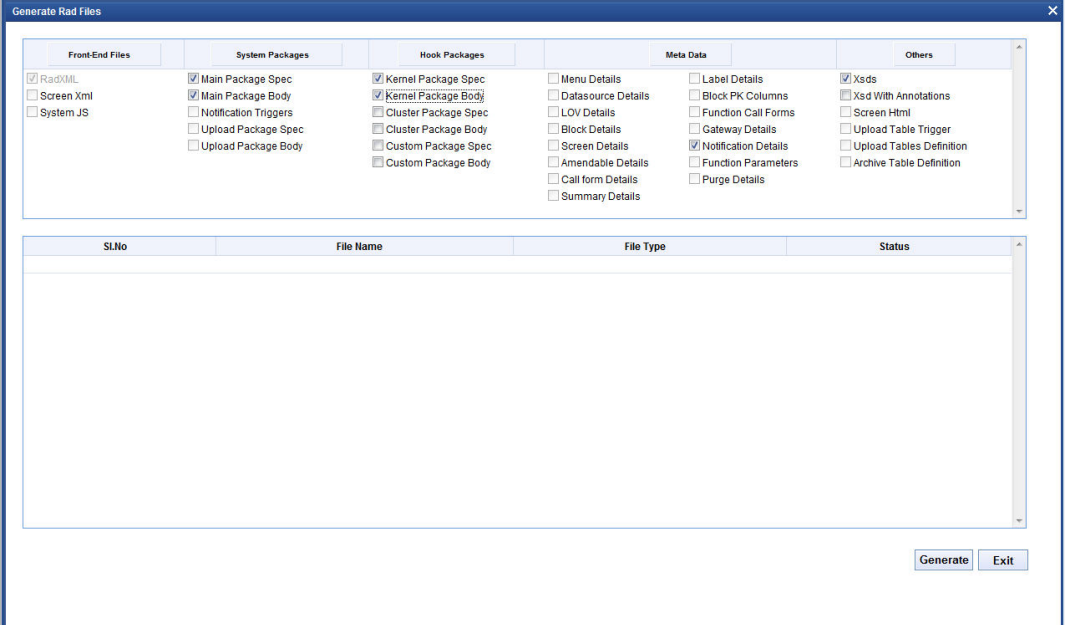
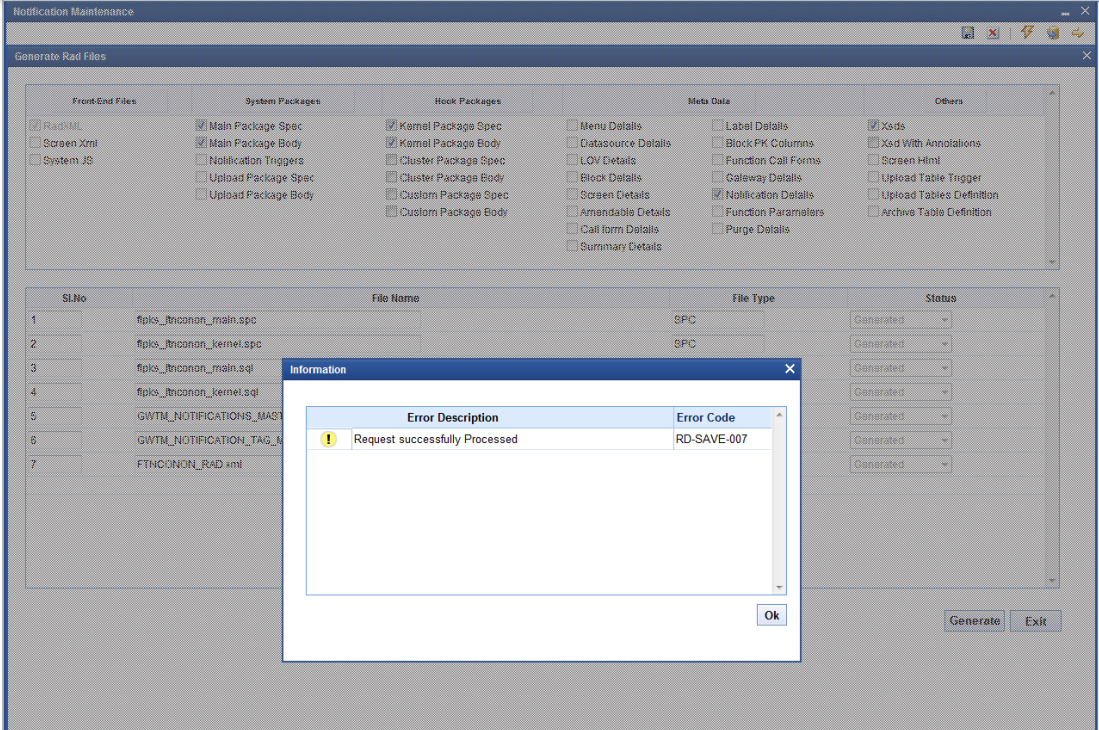
Pk Cols Enter Primary key columns of the Base Table. Pk Types Enter Primary key field Data Types. Provide details of Gateway Service, Operation, Type XSD Name, and Full-Screen Reply if a Query Web Service has to be mapped to the Notification. Gateway Operation The gateway operation name to execute the query for the mentioned Service. Gateway Service The gateway service is to be used to get the full-screen response. Gateway IO Request The gateway IO request node to be used in querying operations. Type XSD Name This field has to be entered if Notification is mapped to a Service and Request. The name of the Master Type XSD for the service and operation has to be provided here. This can be found in the included portion of the Request Msg XSD of particular Service-Operation. For Example: LC-Contract-Types.xsd Full screen Reply This attribute decides whether a full screen or primary key notification response is to be sent. This is applicable only if gateway Service details are provided. HO only This attribute is used to send notifications only from the head office. Filter Logic The filter logic decides whether the notification needs to be sent or not. This can be a simple where-clause on the base table or a complex pl/sql block. Web service Tags The columns selected from the base table as part of web service tags will be used to send the full-screen notification response. These tags define the elements of Notification XML when no Query service is mapped to it. Generate Rad Files screen displays. - Click on the Generate button.An Information window displays confirming the successful generation of Notification.
- Specify the details in the Notification Maintenance screen and save it.
- To modify the existing Notification RADXML, follow the steps given below:
- In Notification Maintenance screen, select the Action field as Load.
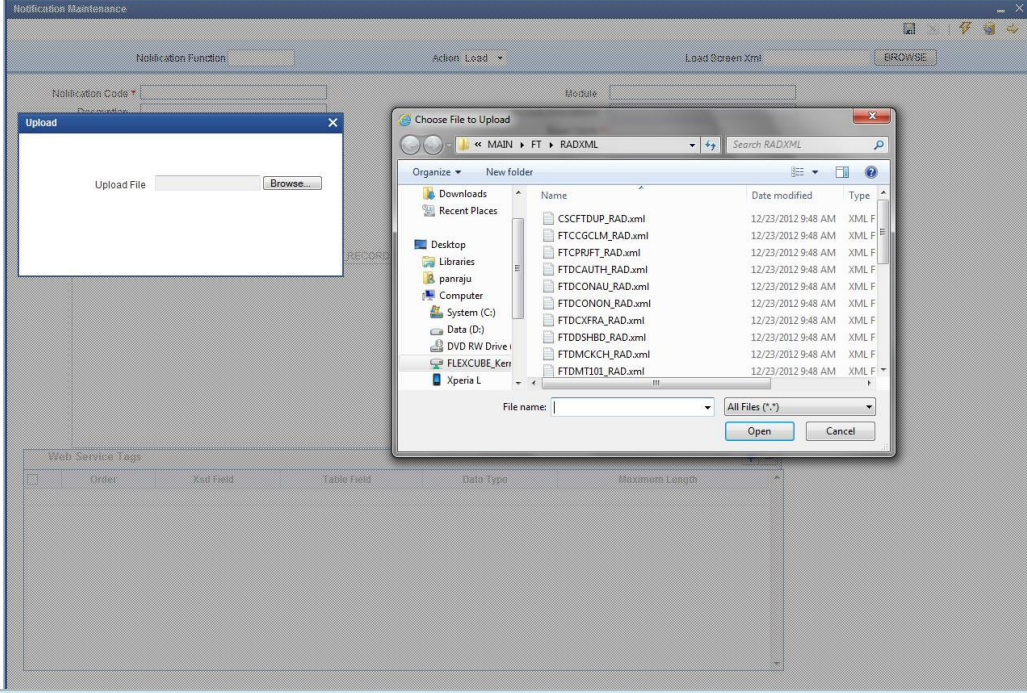
- Click on the BROWSE button at Load Screen XML field.Choose File to Upload folder window displays.
- Select the RADXML file to be modified and click on the Open button.Notification Maintenance screen displays with selected RADXML file details.
- Modify the details as required and click on the Save icon.Selected RADXML file gets modified.
