- Development of Report Forms
- Designing Report Form
4 Designing Report Form
This topic describes the systematic instruction to Designing Report Form
- From browser, select ‘Function Generation'
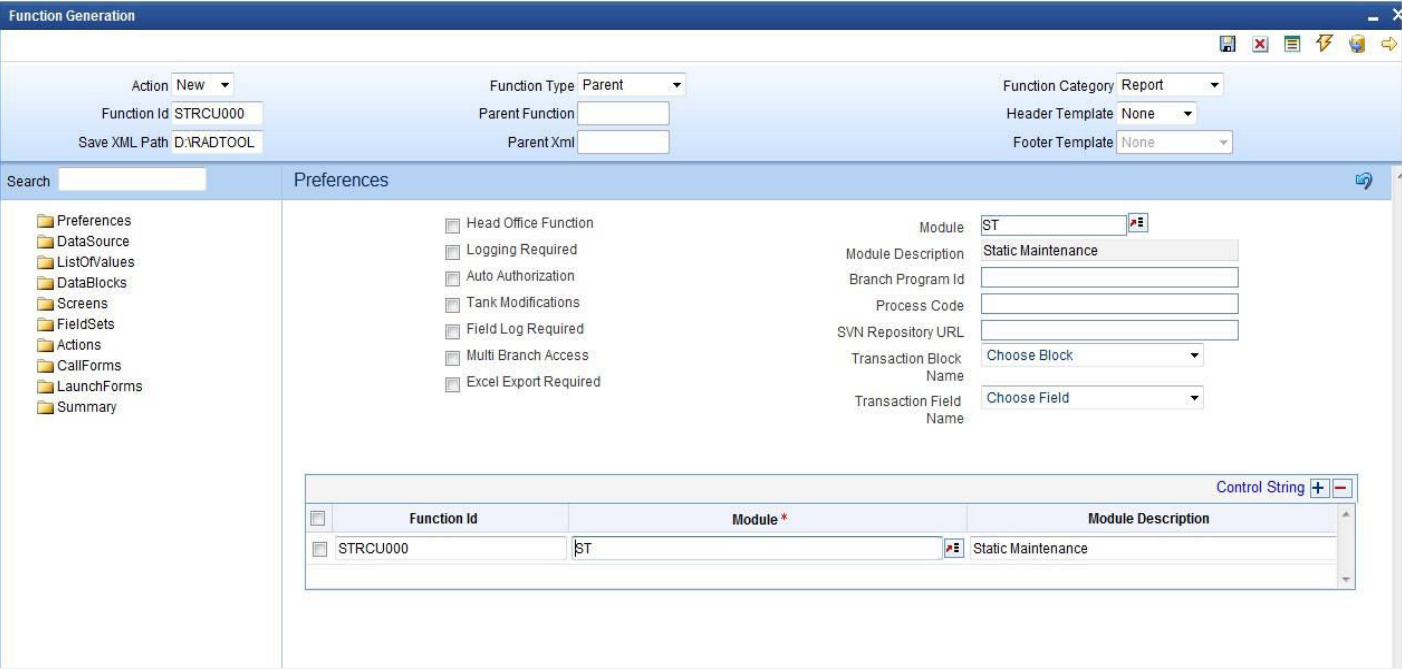
- Select ‘New’ from ‘Action’, and set the function type as ‘Report’ from the drop down list in ‘Function Category’. Type in the name of the screen; make sure that the third letter of the name is ‘R’
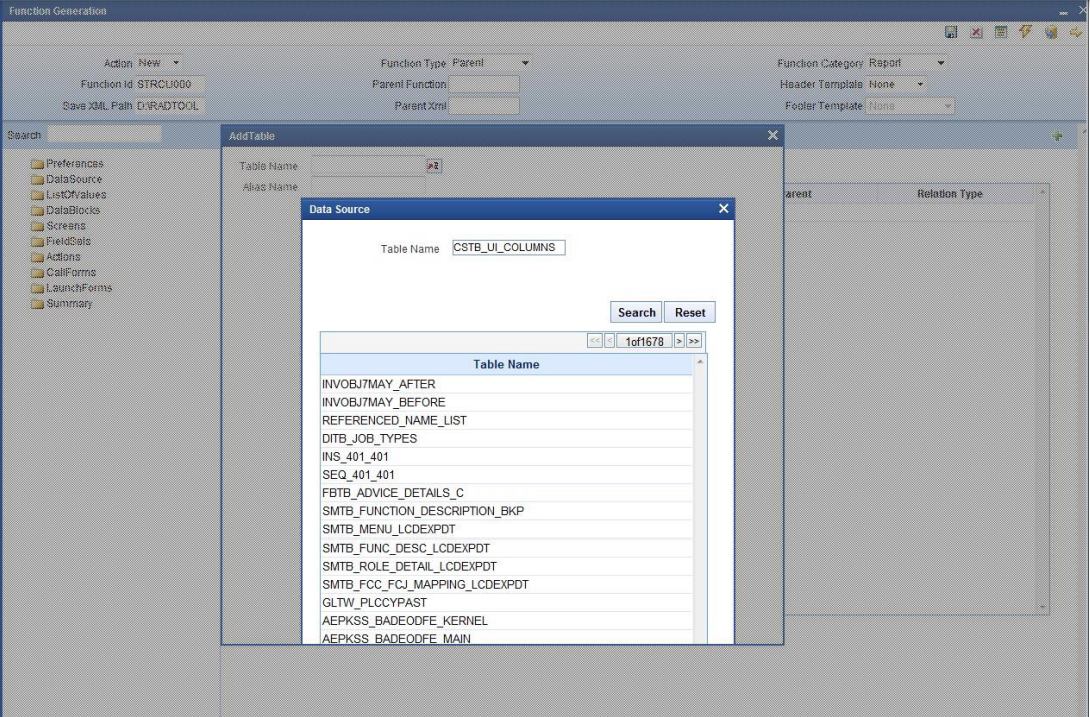
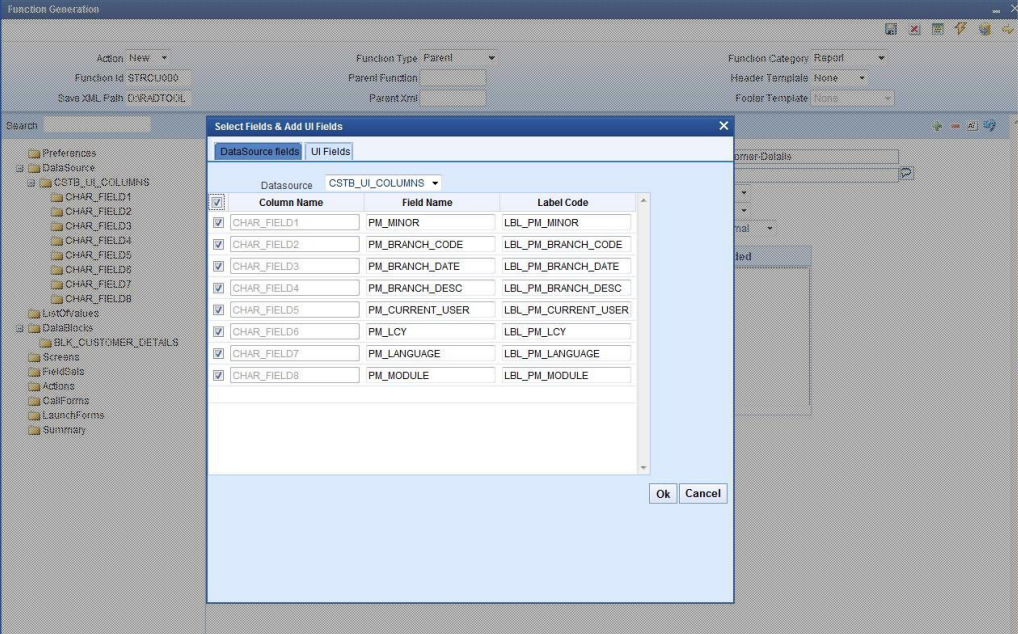
- Add data sources by right clicking on ‘DataSource’. In a report screen, the only table that should be added is ‘CSTB_UI_COLUMNS’. Add columns from the table as required. The number of columns to be added depends on the number of report parameters required in the report screen. Add as many fields as required in the report screen.
- Right click on data blocks and add block fields.
There are some generic report parameters which needed to be added in any report screen. They are:
- PM_MINOR
- PM_BRANCH_CODE
- PM_BRANCH_DATE
- PM_BRANCH_DESC
- PM_CURRENT_USER
- PM_LCY
- PM_LANGUAGE
- PM_MODULE
Note:
While adding columns to the data source CSTB_UI_COLUMNS, take these generic parameters also into consideration.The ‘Report Parameter’ checkbox has to be checked in case of report parameters. Also, ‘Visible’ has to be unchecked in all generic parameters. Also, default values are to be given to some of these fields
For example,
PM_BRANCH_CODE specify the Default value as GLOBAL.CURRENT_BRANCH, PM_BRANCH_DATE specify the Default value as GLOBAL.APPLICATION_DATE, PM_CURRENT_USER specify the Default value as GLOBAL.USER_ID.
Development Workbench would automatically add the Report Options for all Report screens. Following are the report options
- Report Format
- Report Output ( Print, Spool, View)
- Print At ( Client/Server)
- Printer ID
- To add new field set, right click on field set.
- Give field set properties:
- Save and generate the files:
- Deploy the files
The report screen can be deployed by clicking on the 'Deploy' button.


