2.12.20 Post Dated Cheque

This topic provides the information on Post Dated Cheque.

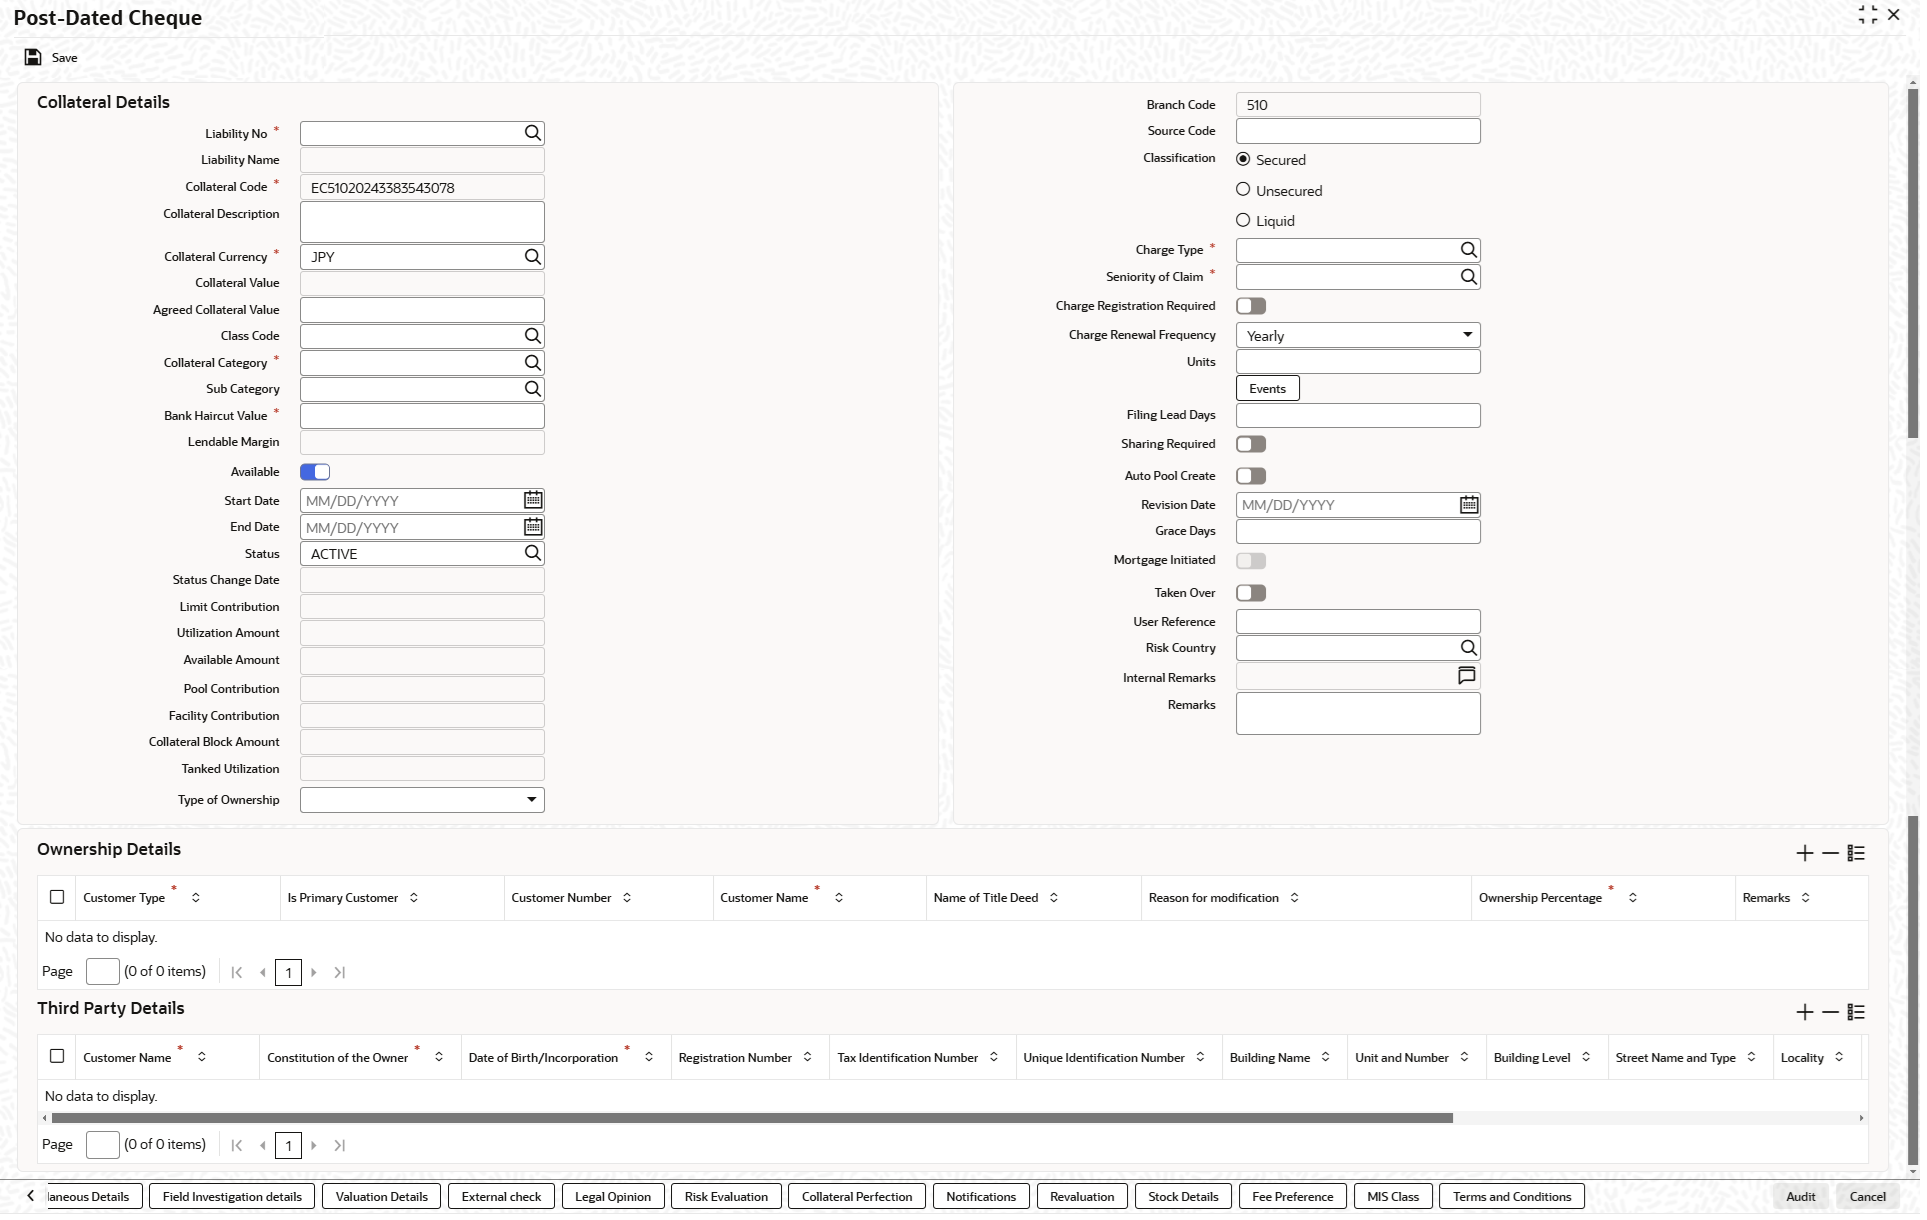
The system allows to add collaterals of type post-dated cheque in GCDCOLPD screen while creating customer collaterals.

The user can add any number of post-dated cheques as collateral. While creating a collateral record, at least one post-dated cheque must be available as child collateral.

If multiple post-dated cheques are added as collaterals, the value of the collateral is the sum of amounts in all the post-dated cheques.

In case, the post-dated cheque currency is different from the collateral currency, the system converts the cheque amount to collateral currency with the configured exchange rate.
  • Note:

    The Collateral Value derived from the linked post-dated cheques cannot be changed manually.
End date of the collateral is derived based on the farthest date of the linked post-dated cheques.
  • Note:

    Collateral end date derived from the linked post-dated cheques can be changed manually, but it cannot be less than the derived date.
  1. On the Home screen, specify GCDCOLPD in the text box and click the Next icon.
    The Post-Dated Cheque screen is displayed.
  2. On Post-Dated Cheque screen , click the PDC Details tab.
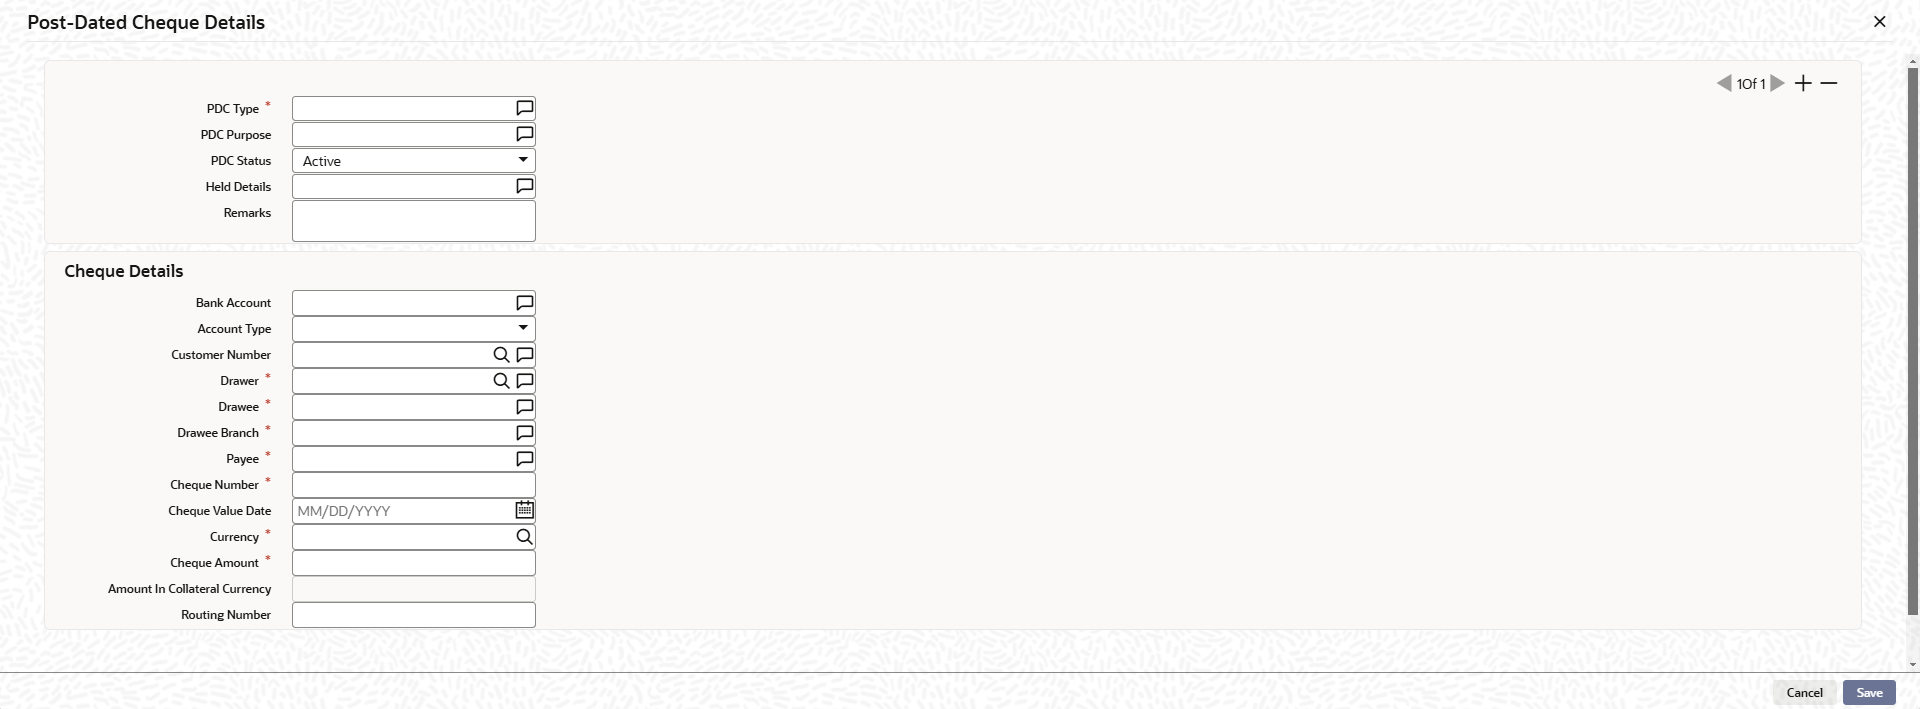
    The Post-Dated Cheque Details screen is displayed.

    Figure 2-86 Post Dated Cheque Details


    For more information on fields, refer to the field description table.

    Table 2-101 Post Dated Cheque Details - Field Description

    Field Descriptions
    PDC Type Specify the type of the post dated cheque, such as Bearer, AC-Payee, and Order.
    PDC Purpose Specify the purpose of the post dated cheque such as Security and Payment.
    PDC Status Select the status of the post-dated cheque from the drop-down list. The available options are:
    • Active - During new collateral creation process of post-dated cheques, the PDC Status will be selected as Active by default.
    • Cancelled - After saving the collateral, the user can manually mark / update the PDC Status as Cancelled at any point during the collateral life cycle.
    • Cheque Paid - After saving the collateral, the PDC Status can be marked / updated as Cheque Paid either manually by user or through automatic update based on the date captured as cheque paid at any point during the collateral life cycle.

      Note: The Collateral value will get reduced based on the individual status update of associated / linked post-dated cheques.

      The system does not allow the following changes to the PDC Status:
      • Cancelled to Active / Cheque Paid
      • Cheque Paid to Active / Cancelled
    Held Details Docket number or the name of department where post dated cheques are to be stored.
    Remarks Additional detail of the post-dated cheque, if any.

    Table 2-102 Cheque Details Fields and Description

    Field Description
    Bank Account Bank account number to which the entity cheque amount is to be drawn.
    Account Type Select the type of the bank account to which the entity cheque amount is to be drawn. The options available are:
    • Savings
    • Current
    • Overdraft
    Customer Number Customer number (alphanumeric) of the entity issuing the cheque.
    Drawer Name of the Entity issuing the cheque. The user can select the ‘Drawer’ from drop-down list or manually enter the entity name.
    Drawee Name of the bank at which the cheque issued by the entity is to be drawn.
    Drawee Branch Branch name of the bank at which the cheque issued by the entity is to be drawn.
    Payee Recipient name of the cheque.
    Cheque Number Cheque number printed on the cheque.
    Cheque Date Post-dated cheque date.
    Currency Currency in which the post dated cheque is issued.
    Cheque Amount Amount mentioned in the post-dated cheque for security collateral.
    Amount in Collateral Currency Post-dated cheque amount converted to collateral currency, if the post-dated cheque currency and the collateral currency are different.
    Routing Number Routing number is the Magnetic Ink Character Recognition (MICR) number printed on the cheque.
  3. Click Save to save the record.