- Development of Maintenance Form
- Create Data Block
2 Create Data Block
This topic provides systematic instructions to create Data Block.
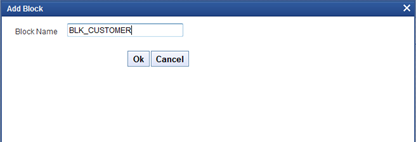
- Under Function Generation screen, right-click on the Data Block and select Add option to create the new data block.The Add Block window displays.
- Specify the Block Name field and click OK.Block Name should start with BLK_. The Block Name should be short and equivalent to a data source but not the same as DataSource Name.The new DataBlock gets created and Block Properties screen displays.
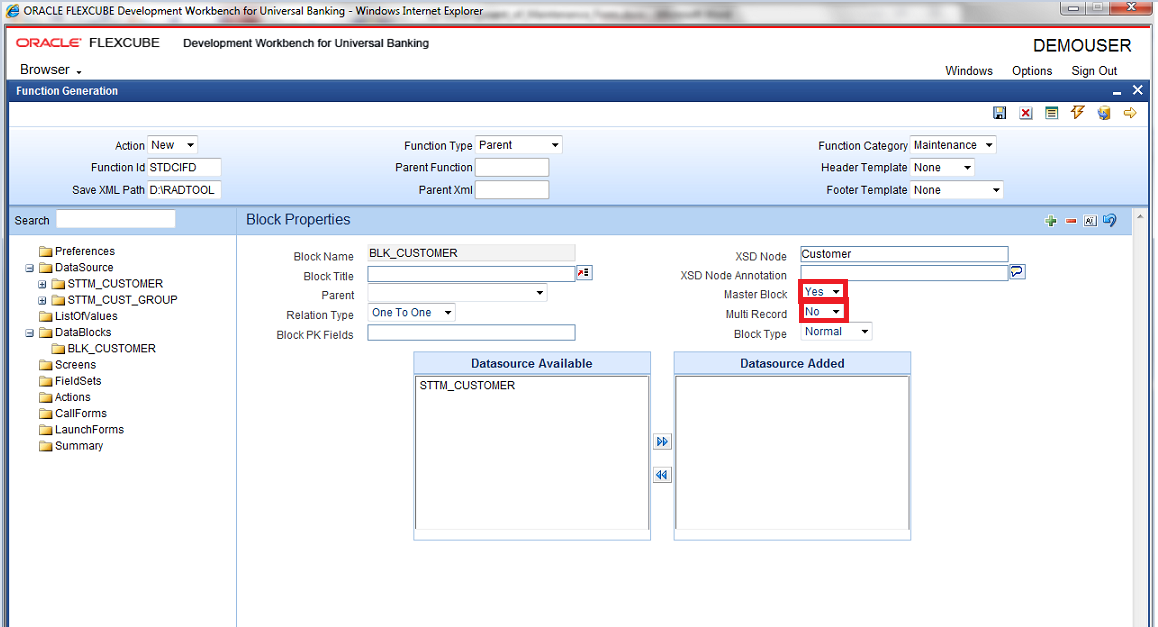
- Select Parent block if added block is not Master Block.
- Select Multi Record field as Yes/No based on Master Block value.Available data sources displays in the DataSource Available text area.
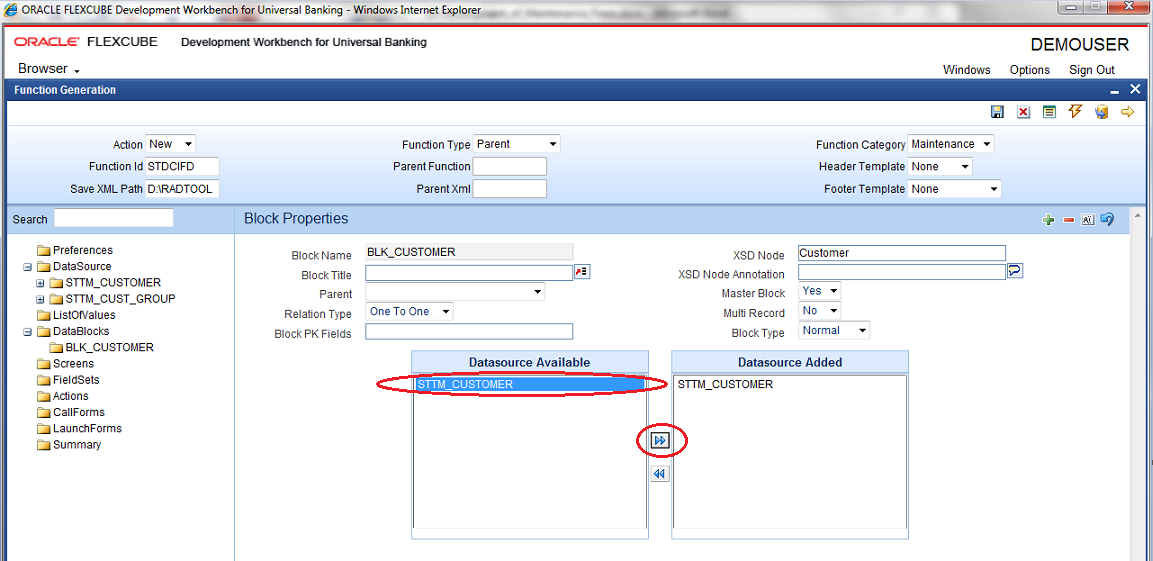
- Select the required data source and click Move to attach Data Source to the Block.The Selected Data sources gets attached to the Block.
Figure 2-3 Block Properties- Attaching Data Sources to Data Block
- To add multi record data source to data block, select Multi Record as Yes in the data Block Properties screen.Multi Data Source once used to one block won’t be available for reuse whereas a single record data source can be used in multiple blocks.All the data sources with Multi Record as Yes will be populated.
- Select Block Fields as follows:
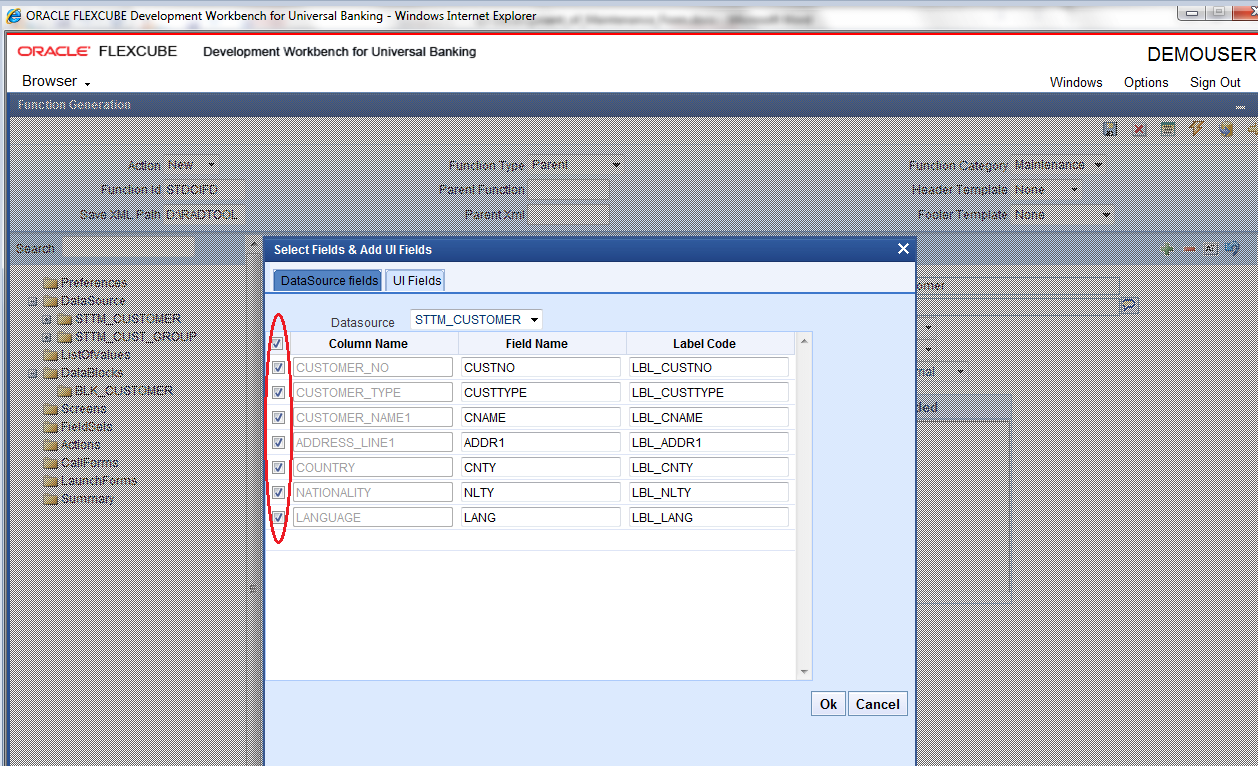
- Right-click on the newly added block.Select Fields & Add UI Fields window displays.
- Check the right side check boxes to add the required fields.
- Verify the Field Name and Label Code details and click OK.The Field Name should not be the same as the column name. Special characters are also not allowed in the Field Name (including underscore and space). Label Code will be automatically populated based on the Field Name. Management ODT Screen Development
- Right-click on the newly added block.


