- Development WorkBench Screen Development
- Define LOVs
30 Define LOVs
This topic provides systematic instructions to define LOVs.
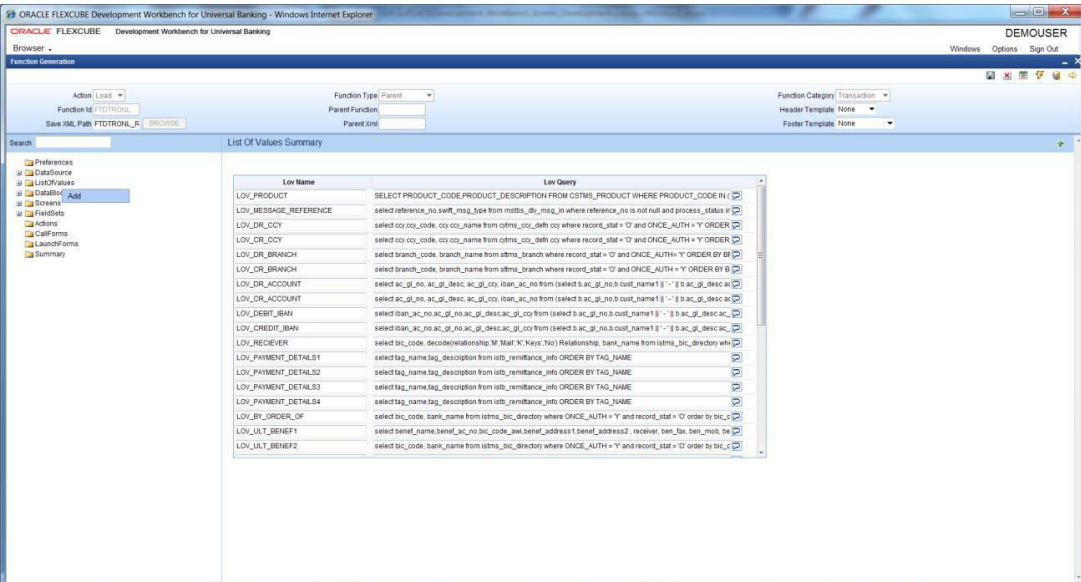
- Right-click on the ListOfValues node and select Add option from the right-click menu.
- Or click on the Add (+) icon in the top right portion of the LOV grid screen.LOV window displays.
- Specify the LOV Name field and then click on OK button.LOV name should start with LOV_.For Example: LOV_COUNTRYList Of Values Details screen displays.
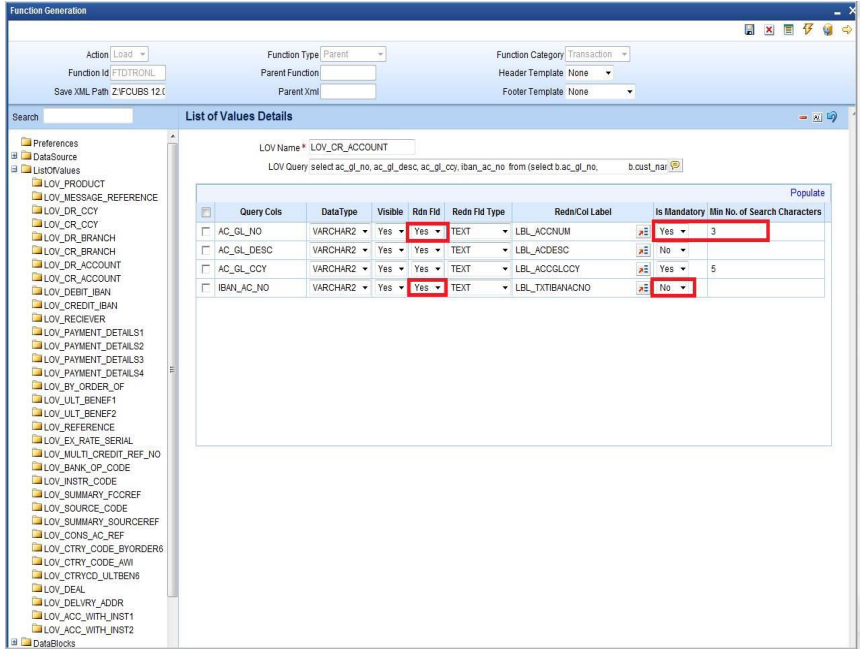
- Specify the fields in the List Of Values Details screen.
Table 30-1 List Of Values Details
Field Description LOV Name This is a non-editable field. It will be defaulted based on the LOV name provided while creating LOV. LOV Query LOV query has to be provided in this field. Bind variables for the LOV have to be specified as ?. Bind variables are the parameters whose values are required as input for executing the query during run time. For Example: SELECT CUSTOMER_TYPE FROM STTM_CUSTOMER WHERE CUSTOMER_NO=? Here value for Customer No is to be passed as a parameter. LOV Column Details Click on Populate button. This will default all the columns which will come in the output of the LOV query. For Example: for the above query, it will populate only one row with Query Cols value as CUSTOMER_TYPE. Table 30-2 LOV Column Details
LOV Column Details Description Query Cols This is a non-editable field. This will be populated by the system on clicking of Populate button. All the columns from the query result will be populated as query cols. Data Type This row will also be defaulted based on the LOV query. The data type of the query cols has to be provided here. Visible The Result Column of the LOV can be made invisible by specifying in this column. Reduction Fld A field can be made as a reduction of non-reduction by using this flag. If the field is a reduction field, then in the LOV screen in FLEXCUBE, the user will have to filter the list of values based on the reduction fields. Reduction Fld Type The display type of the reduction field can be specified here. Display type of the reduction field can be either of the below-given values: - TEXT
- CHECK BOX
- RADIO
- SELECT
Redn/Col Label The reduction fields should be provided with proper labels so that their description comes on the LOV screen. Label Codes have to be mandatorily maintained for the functioning of the LOV screen. Is Mandatory If the reduction field id is selected as YES, ODT will allow selecting the Is Mandatory option for a particular column. If Is Mandatory is selected as Yes, ODT will ask for minimum search character length. By default, the value is 3. If the field is mandatory and minimum search character length is given as n, then while searching, the user has to enter a minimum of n characters to search a particular value otherwise the system will show an error message. Minimum Search Character length If Is Mandatory is selected as YES, then only ODT will allow entering values for Min search character length. By default, the value is 3. Any value less than 3 will not be accepted. ODT will show an alert message in case of any rule violation. Once the value for the Minimum search character length field is provided, the user has to enter minimum character length to fetch a value corresponding to that return field. LOVs have to be attached to the block field as per requirement. - In the block field, select the Display Type as LOV to attach LOV to the Block Field.
- Specify the below given details in the Block Field Properties screen:In the figure below AC_GL_NO is mapped to the CRACC field. Therefore the value of the result column AC_GL_NO from the selected record will have defaulted to the CRACC field.
Table 30-3 LOV Details
Field Description LOV name Select List will contain both Local LOVs and Global LOVs. The developer has to select the LOV as required for the field. Input By LOV Only This field has to be checked if the field has to be input through LOV only. LOV Validation Reqd If validation for the entered value is required against the values fetched from the LOV query, this checkbox can be checked. Bind Variables Bind variables defined in the LOV query have to be mapped to the corresponding data block field. During LOV query execution, the value of these data blocks will be picked up in place of bind variables (?). Click on the button Default from LOV Definition. The number of rows corresponding to the number of bind variables in the query will be created. Below details has to be maintained in the bind variable tab: - Block Name: The block which contains the bind variable block field has to be selected from the list of all data blocks.
- Bind Variable: The block field which is the bind variable has to be selected from a list of fields of the block selected.
- Data Type: The data type of the bind variable has to be mentioned here. This can be STRING, DATE, NUMBER, etc.
Return Fields Information regarding the return fields has to be provided in the Return Fields Tab. The developer has to map the block fields to which the selected values from LOV should be assigned. Click on the button Default from LOV Definition. All Query Cols will be defaulted based on the LOV definition. - Query Column: This will be defaulted by the system based on the LOV definition on clicking Default button.
- Block Name: Provide the Block Name which contains the field to which the particular coulmn value has to assigned.
- Return Fld Name: Select the data block field to which the result will be assigned.
LOV Details will be generated in the script for CSTB_LOV_INFO which needs to be compiled in the FLEXCUBE schema for the functioning of LOVs.

