8.3 Configure Weblogic for Oracle FLEXCUBE

This section explains the systematic instructions to configure the Oracle WebLogic application server for Oracle FLEXCUBE Universal Banking.

To configure the Oracle WebLogic application server for Oracle FLEXCUBE Universal Banking, follow the steps given below:

  1. Start the Administrative Console of the WebLogic application server. Enter the Oracle WebLogic Admin Console URL in the address bar in an internet browser. For example:http://10.10.10.10:1001/console
    Oracle Weblogic Server - Welcome screen is displayed.

    Figure 8-72 Oracle Weblogic Server - Welcome


    The image shows the Oracle Weblogic Server - Welcome Screen. It displays several fields to specify the Oracle Weblogic Server - Welcome.

  2. Specify the WebLogic administrator Username, Password and click Log In.
    Oracle Weblogic Server - Home Page screen is displayed.

    Figure 8-73 Oracle Weblogic Server - Home Page


    The image shows the Oracle Weblogic Server - Home Page Screen. It displays several fields to specify the Oracle Weblogic Server - Home Page.

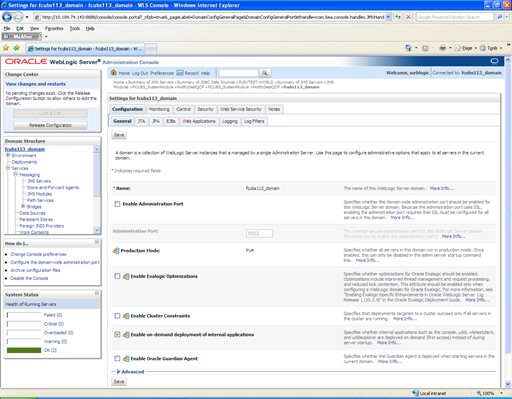
  3. Select the domain from the domain structure as shown below. (Eg: fcubs113_domain).
    Settings for fcubs113_domain screen is displayed.

    Figure 8-74 Settings for fcubs113_domain


    The image shows the Settings for fcubs113_domain Screen. It displays several fields to specify the Settings for fcubs113_domain.

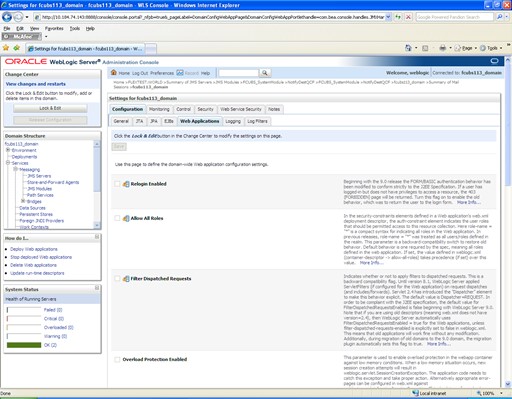
  4. Under the Configuration tab, select Web Applications.
    Settings for fcubs113_domain - Web Applications tab is displayed.

    Figure 8-75 Settings for fcubs113_domain - Web Applications


    The image shows the Settings for fcubs113_domain - Web Applications Screen. It displays several fields to specify the Settings for fcubs113_domain - Web Applications.

  5. Check the options JSP Compiler Backwards Compatible and Archived Real Path Enabled.
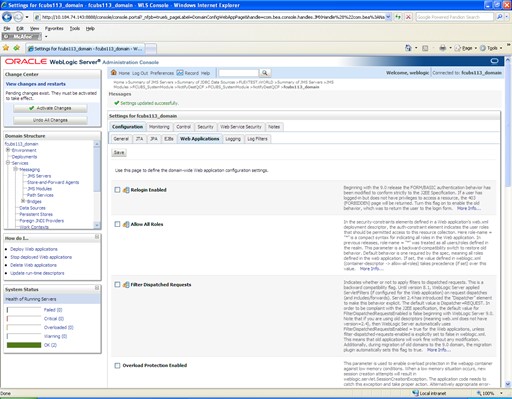
  6. Click on Save button and the message Settings are updated successfully is displayed.
    Settings for fcubs113_domain - Messages screen is displayed.

    Figure 8-76 Settings for fcubs113_domain - Messages


    The image shows the Settings for fcubs113_domain - Messages Screen. It displays several fields to specify the Settings for fcubs113_domain - Messages.

  7. Click the Activate Changes button under the Change Center. The message All the changes have been activated. No restarts are necessary is displayed.