8.4.1 Create JavaMail Session
This topic explains the systematic instructions to create JavaMail session.
To configure the JavaMail session, follow the steps below.
- Start the Administrative Console of the WebLogic application server. Enter the Oracle WebLogic Admin Console URL in the address bar in an internet browser. For example:http://10.10.10.10:1001/consoleOracle Weblogic Server - Welcome screen is displayed.
Figure 8-77 Oracle Weblogic Server - Welcome

- Specify the WebLogic administrator Username,
Password and click Log
In.Oracle Weblogic Server - Home Page screen is displayed.
Figure 8-78 Oracle Weblogic Server - Home Page

- On the left pane, under Domain Structure, expand Services and Click Mail Sessions under it.
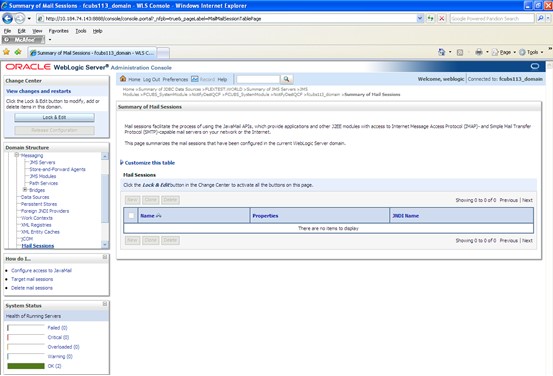
- Click the Lock & Edit button.Summary of Mail Sessions screen is displayed.
Figure 8-79 Summary of Mail Sessions
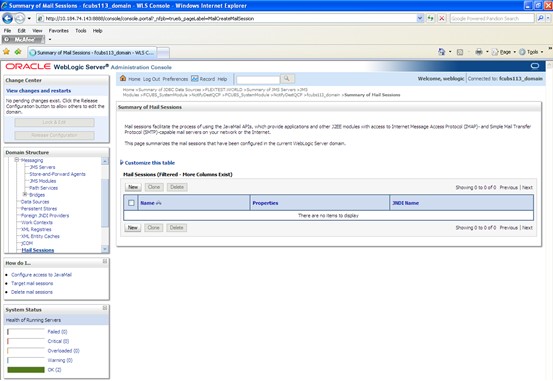
- Click on the New button to create a new mail session.Create a New Mail Session screen is displayed.
Figure 8-80 Create a New Mail Session
- On the Create a New Mail Session screen,specify the
fields.
Figure 8-81 Create a New Mail Session
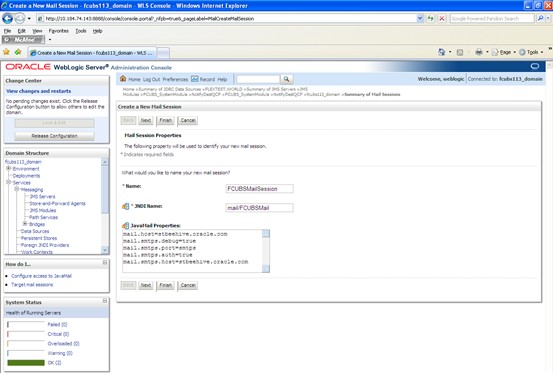
Table 8-9 Create a New Mail Session
Field Description Name Specify the name as FCUBSMailSession. JNDI Name Specify the JNDI Name as mail/FCUBSMail. Java Mail Properties Specify the following mail properties. - mail.host=<HOST_MAIL_SERVER> (For example: samplename.mail.com)
- mail.smtps.port=<SMTPS_SERVER_PORT> (For example: 1010)
- mail.transport.protocol=<MAIL_TRANSFER_PROTOCOL>(For Example: smtps)
- mail.smtps.auth=true
- mail.smtps.host==<HOST_SMTPS_MAIL_SERVER> (For example: samplename.mail.com)
- Click on Next.Create a New Mail Session - Targets screen is displayed.
Figure 8-82 Create a New Mail Session - Targets
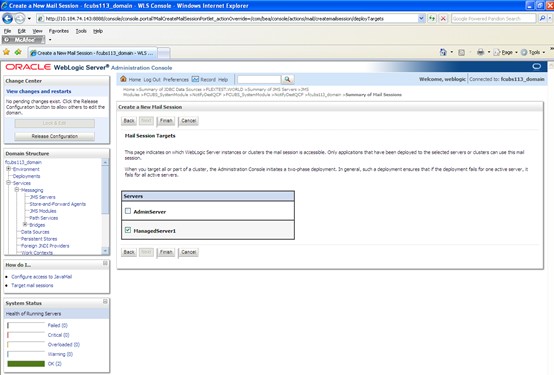
- Check the box against the required servers and click Finish to complete the configuration.fcubs.properties file needs to be updated with the encrypted values of
- SMTP_HOST
- SMTP_USER
- SMTP_PASSWORD
- SMTP_JNDI
This can be achieved using the Oracle FLEXCUBE Universal Banking Installer.
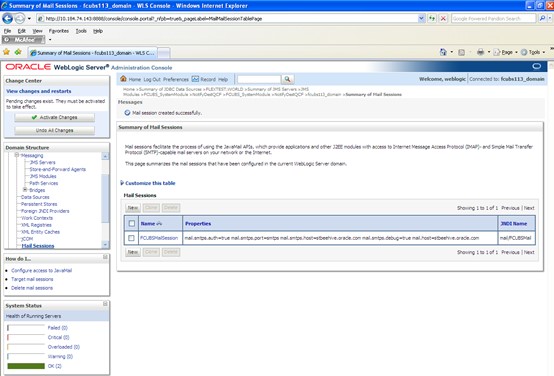
- Click the Activate Changes button under the
Change Center to activate the current mail session
settings. The message All the changes have been activated. No restarts
are necessary is displayed.Summary of JDBC Data Sources - Activate Changes Message screen is displayed.
Figure 8-83 Summary of JDBC Data Sources - Activate Changes Message
Parent topic: Setup/Configure Mail Session in Weblogic