- User Guide
- Third Party Maintenance
- Third Party Account Parameters
- Create Third Party Account Parameters
15.1.1 Create Third Party Account Parameters
This topic describes the systematic instructions to configure the third party account parameters.
- On Home screen, click Liquidity Management. Under Liquidity Management, click Third Party Maintenance.
- Under Third Party Maintenance, click Account
Parameters. Under Account Parameters,
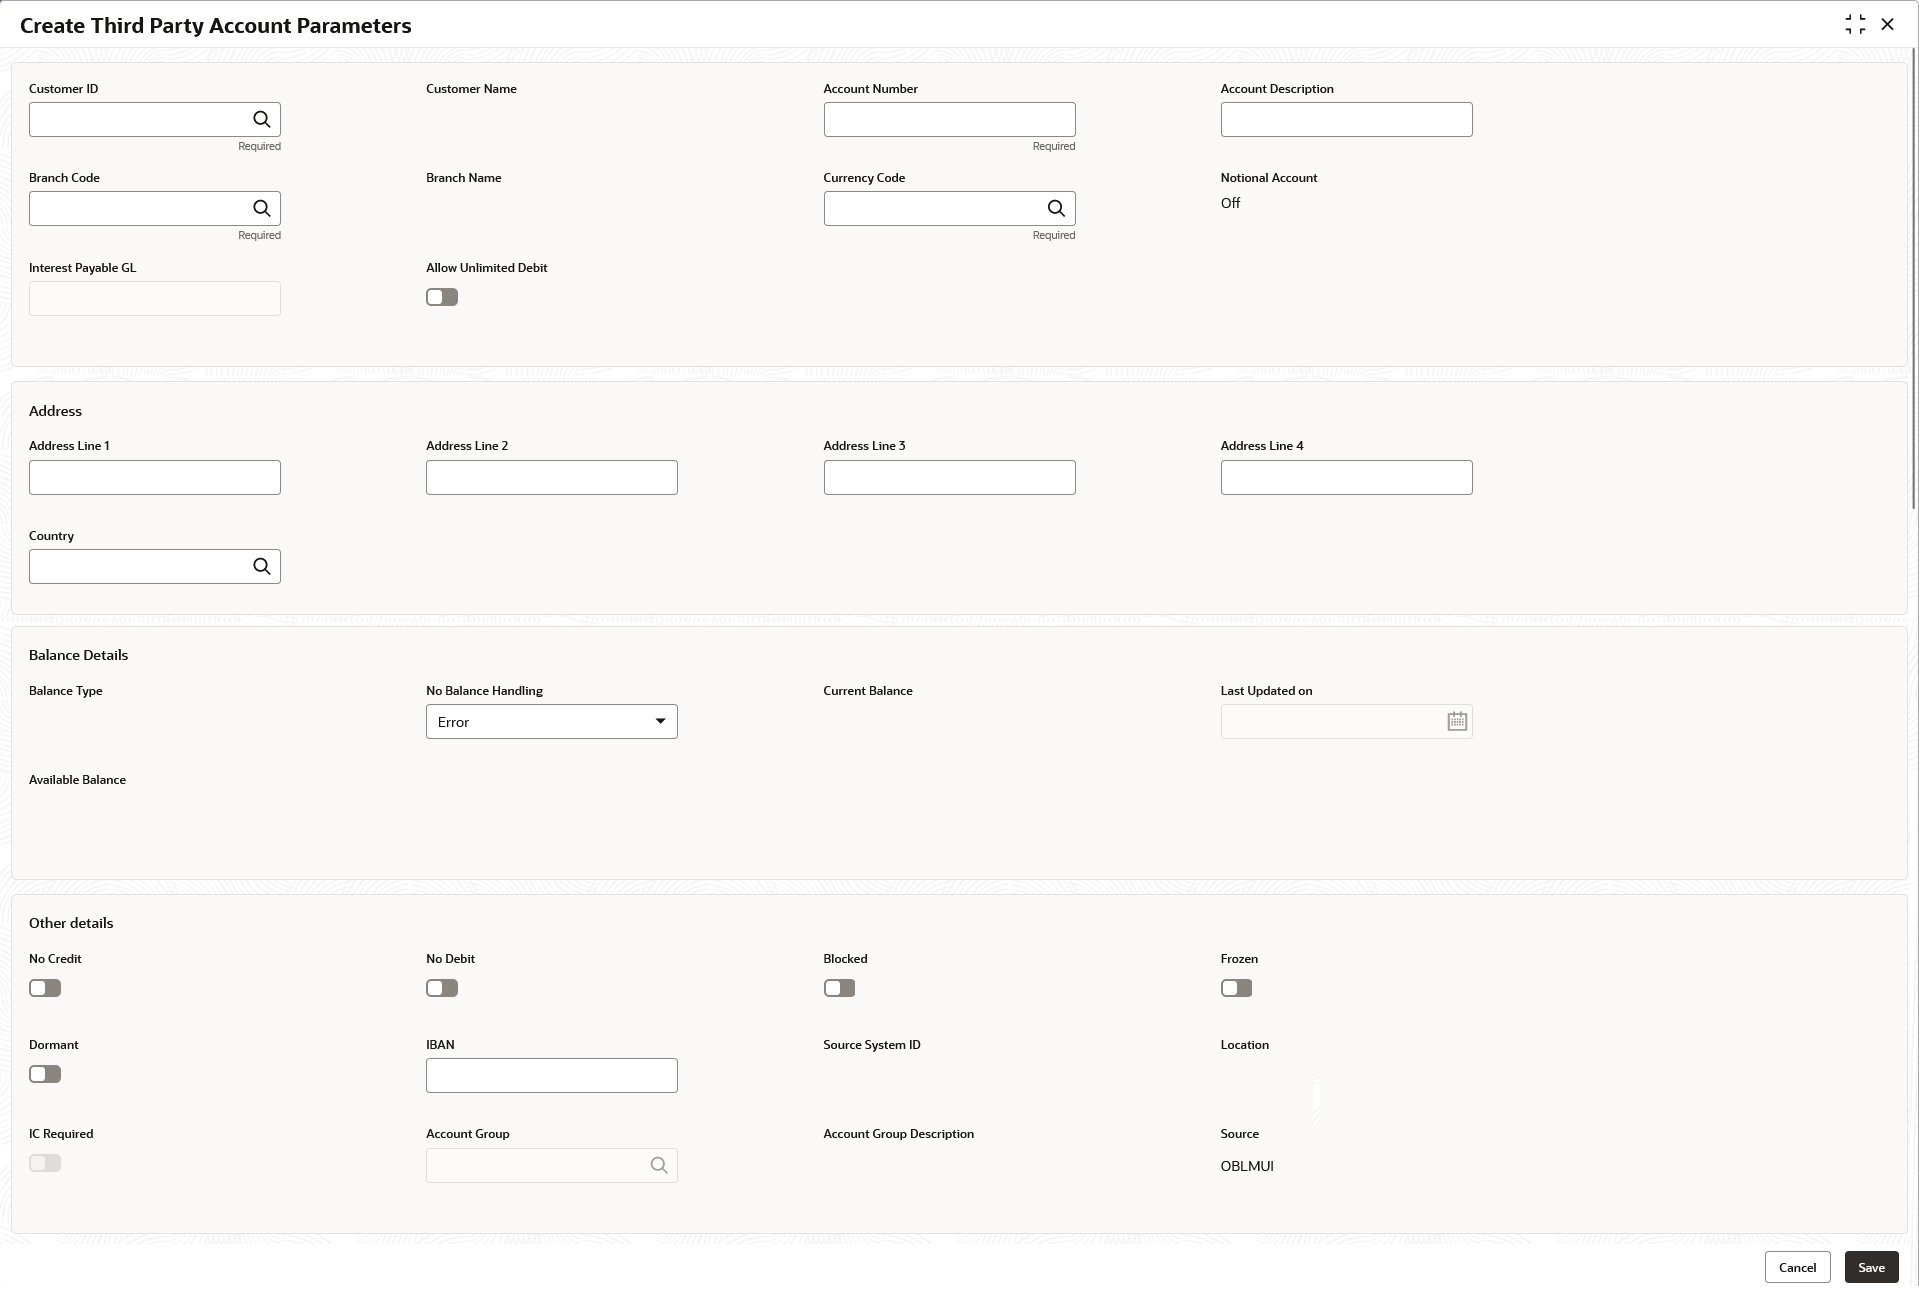
click Create Third Party Account Parameters. The Create Third Party Account Parameters screen displays.
Figure 15-1 Create Third Party Account Parameters
- Specify the fields on Create Third Party Account
Parameters screen.
Note:
The fields marked as Required are mandatory.For more information on fields, refer to the field description table.
Table 15-1 Create Third Party Account Parameters - Field Description
Field Description Customer ID Click Search icon and select the customer ID. Customer Name Displays the customer name on selecting the customer ID. Account Number Specify the account number. Account Description Specify the account description. Branch Code Click Search icon and select the Branch code. Branch Name Displays the branch name on selecting the branch code. Currency Code Click Search icon and select the currency code. Account Type Displays the account type. This field is marked as External by default. Notional Account Select the toggle to enable the notional pooling for this account. Interest Payable GL Specify the Interest Payable GL. Entity ID Displays the entity ID for the selected branch. This field appears only if the user selects Notional Account as Yes.
This field is left blank if there are no details provided in Branch parameters.
Entity Name Displays the entity name for the selected branch. This field appears only if the user selects Notional Account as Yes.
This field is left blank if there are no details provided in Branch parameters.
Address Specify the address of the account in the below text fields. - Address Line 1
- Address Line 2
- Address Line 3
- Address Line 4
Balance Type Specify the balance type. Current Balance Displays the current balance of the account. Last Updated on Displays the date of last update. Available Balance Displays the available balance of the account. Last Updated on Displays the date of last update. No Credit Select the toggle to enable the account does not have any credit facility. No Debit Select the toggle to enable the account does not have any debit facility. Blocked Select the toggle to enable the account status is blocked. Frozen Select the toggle to enable the account status if frozen. Dormant Select the toggle to enable the account status if dormant. IBAN Specify the IBAN for the third-party account. Source System ID Specify the source system ID. Location Specify the location of the account. IC Required Select the toggle to enable the Oracle Banking Liquidity Management UI. Account Group Click Search to view and select the account group. Account Group Description Displays the account group description of the account group. Source Displays the Oracle Banking Liquidity Management UI by default. - Click Save to save the details.The added Account must be authorized by the different user which has the authorization role assigned.
Parent topic: Third Party Account Parameters
