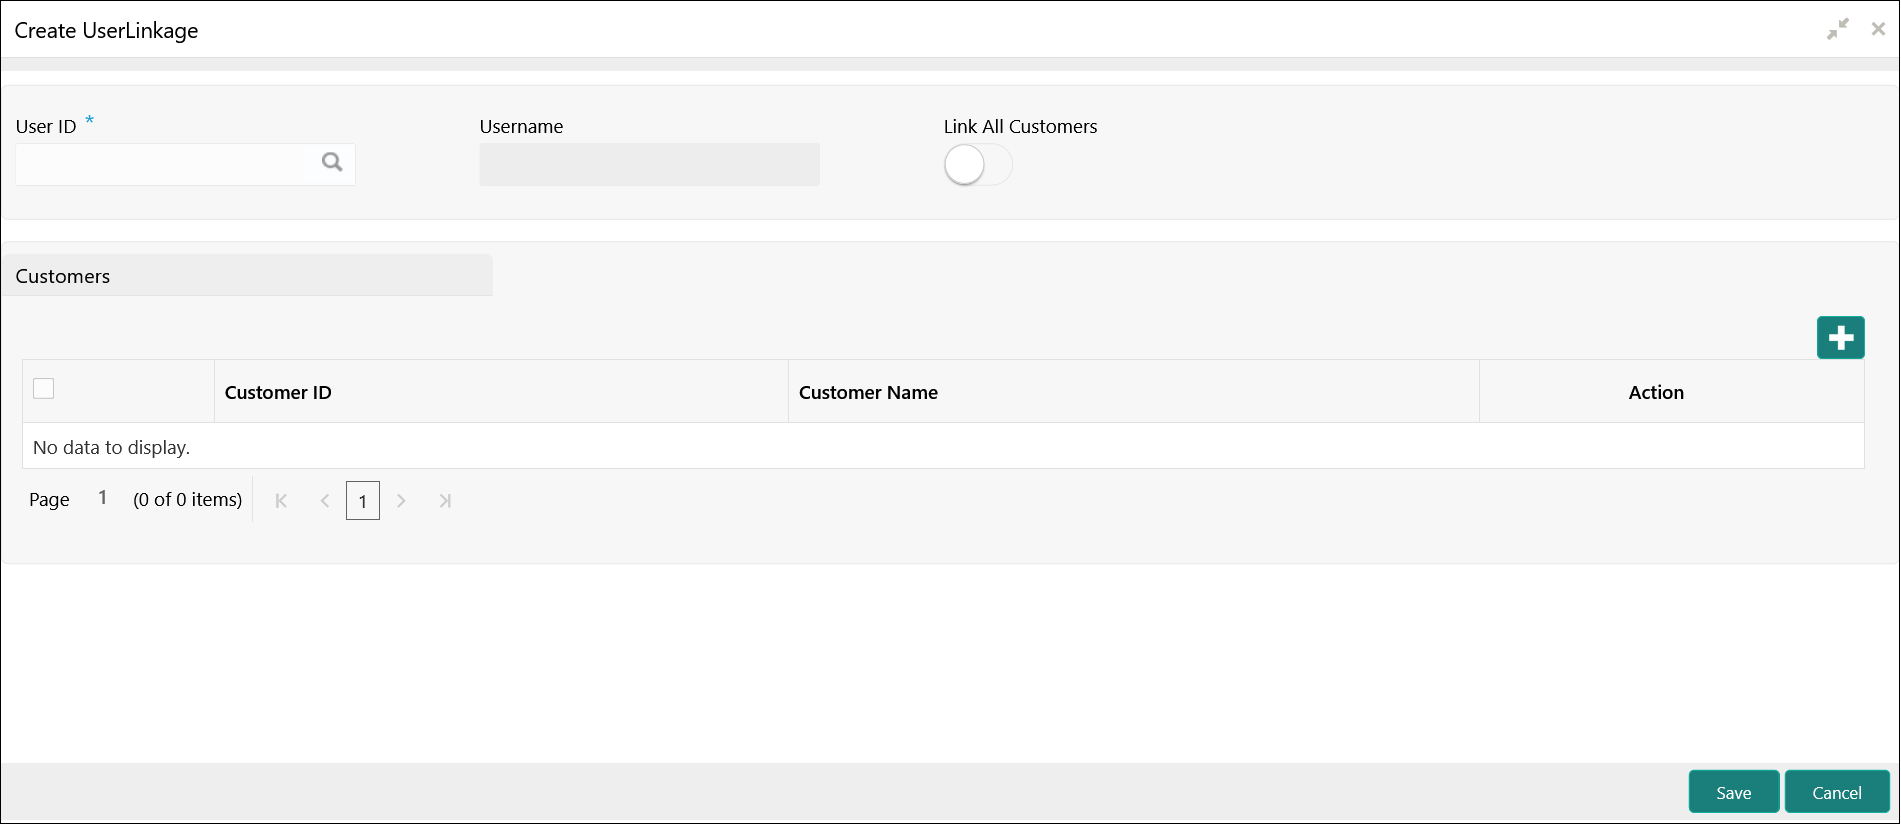
5.15.1 Create UserLinkage

This topic describes the systematic instructions to configure customer and user linkage.

A user can be liked to a customer or group of customers or all the customers available in the system. The Customer and User Linkage is provided for administrative and privacy purposes. A user can view only the linked customer data across the system, the user cannot view any data of the customers who are not linked to the user. In the absence of such a linkage, any user can view any customer data which can lead to privacy and administrative issues.
Specify User ID and Password, and login to Home screen.
  1. On Home screen, click Oracle Banking Liquidity Management System. Under Oracle Banking Liquidity Management System, click Maintenance.
  2. Under Maintenance, click UserLinkage. Under UserLinkage, click Create UserLinkage.
    The Create UserLinkage screen displays.
  3. Specify the fields on Create UserLinkage screen.

    Note:

    The fields, which are marked with an asterisk, are mandatory.
    For more information on fields, refer to the field description table.

    Table 5-30 Create UserLinkage – Field Description

    Field Description
    User ID Click Search icon to view and select the User ID for which the linkage needs to be done.

    This field is an LOV which fetches all the users maintained in the system.

    Username Displays the user name based on the user ID selected.
    Link All Customers Select the toggle if the user needs to be linked to all the customers available in the system.

    If user selects Link All Customers option, then the customers created in future also gets automatically linked to the user.

    If the requirement is to restrict the user linkage only to a specific customer or a group of customers, do not select this option.

    Customers Select this option if the user needs to be linked to a specific customer or specific group of customers but not all the customers in the system.
    Customer ID Click Search icon to view and select the customer ID.
    Customer Name Displays the customer name.
    Action Displays the action to edit or delete the customer details.
  4. Click + to enable the Customer ID LOV. The process needs to be repeated to link the next customer.
  5. Click Save to save the details.