- User Guide
- Inter Company Loans
- Limit
- Create Limit
16.1.1 Create Limit
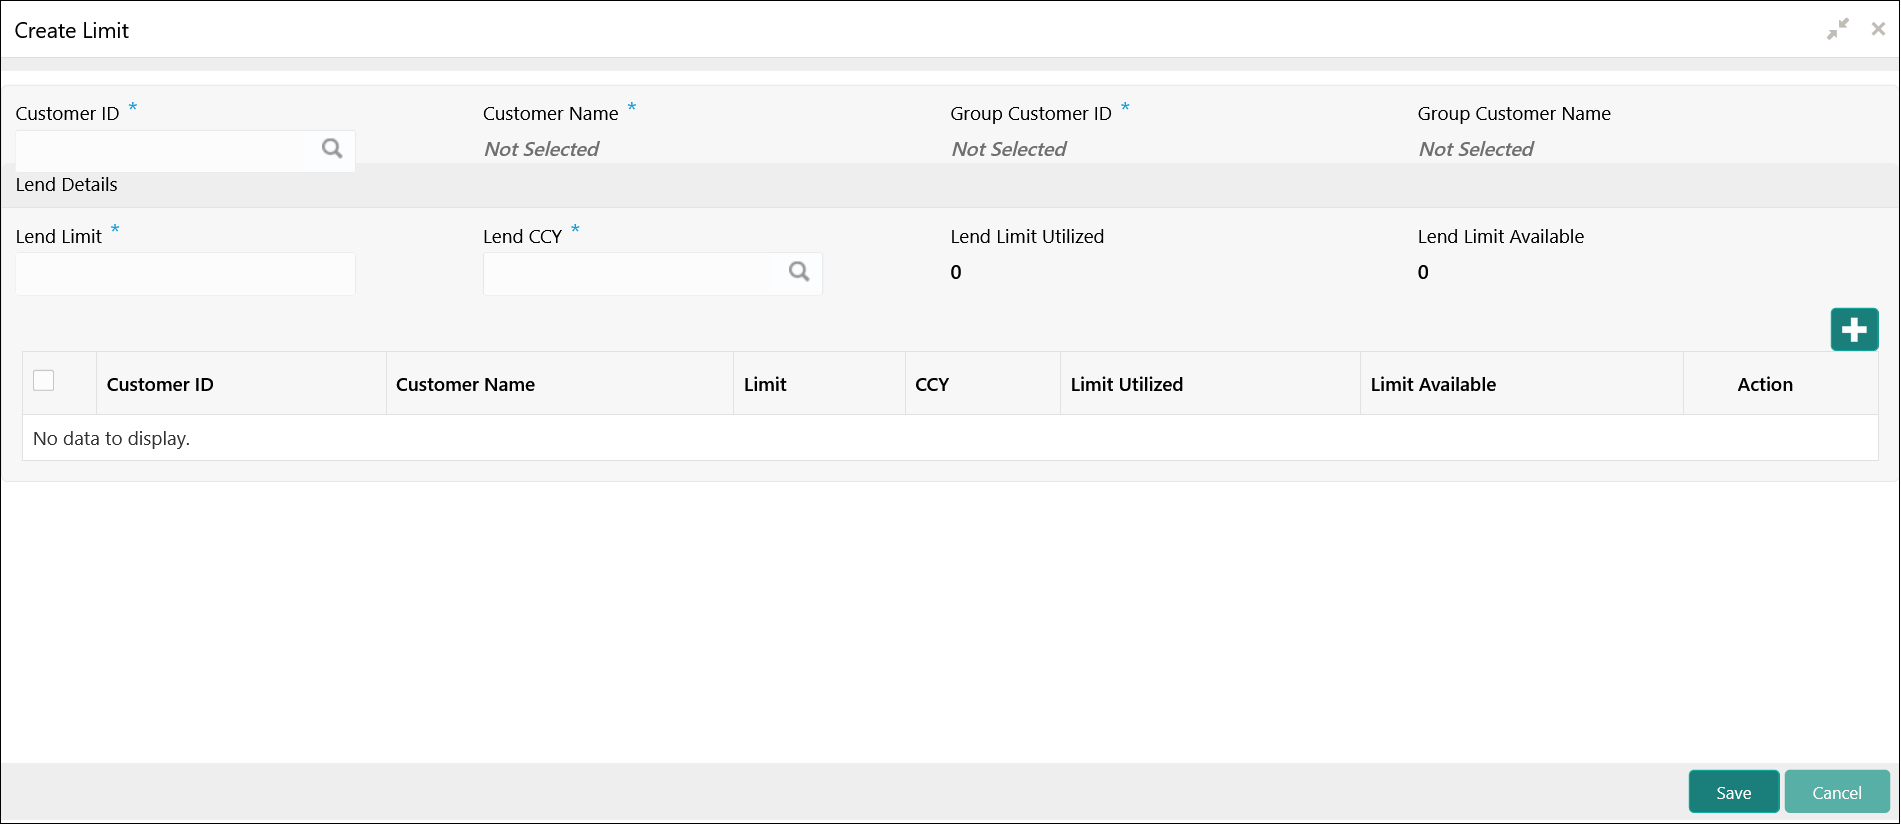
This topic provides the systematic instructions to configure the lend limit for the group.
Specify User ID and Password, and login to Home screen.
- On Home screen, click Oracle Banking Liquidity Management System. Under Oracle Banking Liquidity Management System, click Intercompany Loan.
- Under Intercompany Loan, click
Limit. Under Limit, click
Create Limit.The Create Limit screen displays.
- Specify the field on Create Limit screen.For more information on fields, refer to the field description table.
Note:
The fields, which are marked with an asterisk, are mandatory.Table 16-1 Create Limit – Field Description
Field Description Customer ID Click Search to view and select the customer ID. Customer Name After selecting the customer ID, the customer name will be automatically populated. Group Customer ID After selecting the customer ID, the group customer ID will be automatically populated. Group Customer Name After selecting the customer ID, the group customer name will be automatically populated. Lend Limit Specify the lend limit. This is an overall amount which a specific customer under consideration can lend to other peers under category Inter Company Loans.
Lend CCY Click Search icon and select the currency in which the lending operation take place. Lend Limit Utilized Displays an overall lend limit utilized by the specific customer under consideration. Lend Limit Available Displays available lend limit for any of the upcoming loan transactions. Customer ID Click Search icon and select the customer ID (from the existing list of customers). Customer Name Displays the customer name on selecting customer ID. Lend Limit Displays an amount that can be lent to the specific customer. Lend Limit Utilized Displays utilized limit by the customer. While creating, it will be zero.
Lend Limit Available This will be same as Lend Limit while creating the record. This is an available lend limit for any of the upcoming swep\loan transactions for the specific customer.
- Click + button to add a row that captures the details of a customer who will be able to borrow from this customer.
- Click - button removes the selected row(s) of the customer(s).
- Click Save to save the details.
Parent topic: Limit
