- User Guide
- Simulation Details
- Simulation
- Create Simulation
- Simulation Details
11.1.1.1 Simulation Details
This topic describes the systematic instructions to create the new simulation structure maintained in Oracle Banking Liquidity Management system.
- Click + button on the Simulation
screen to create a new simulation.The Simulation Details screen displays.
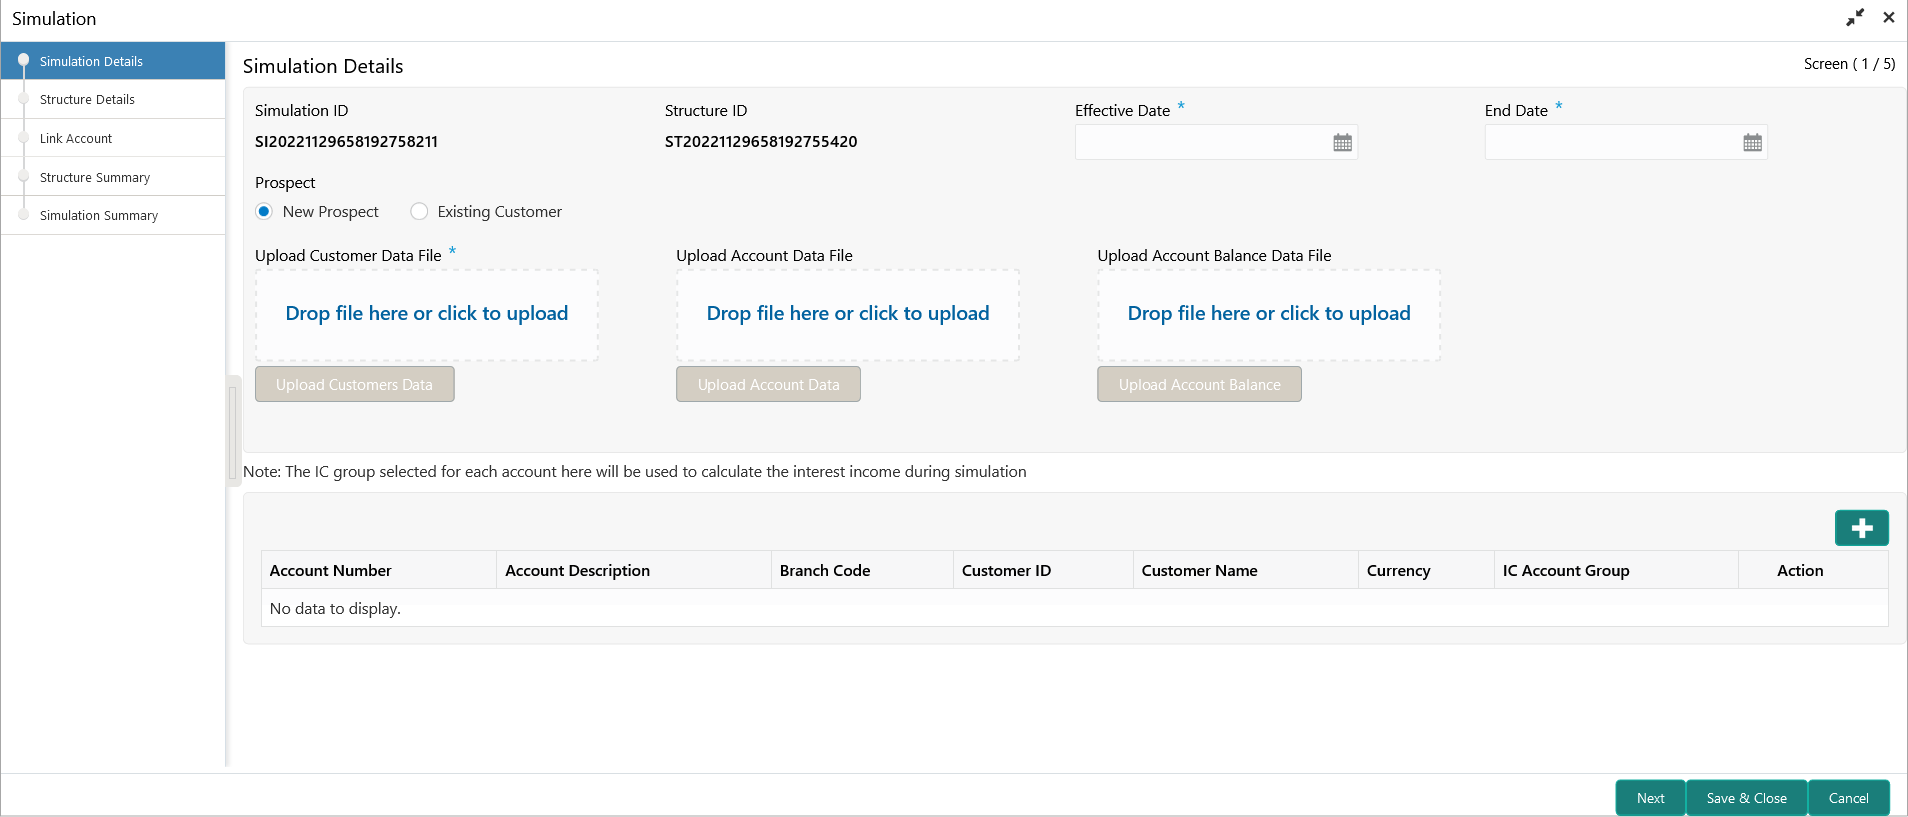
Figure 11-2 Simulation Details - New Prospect
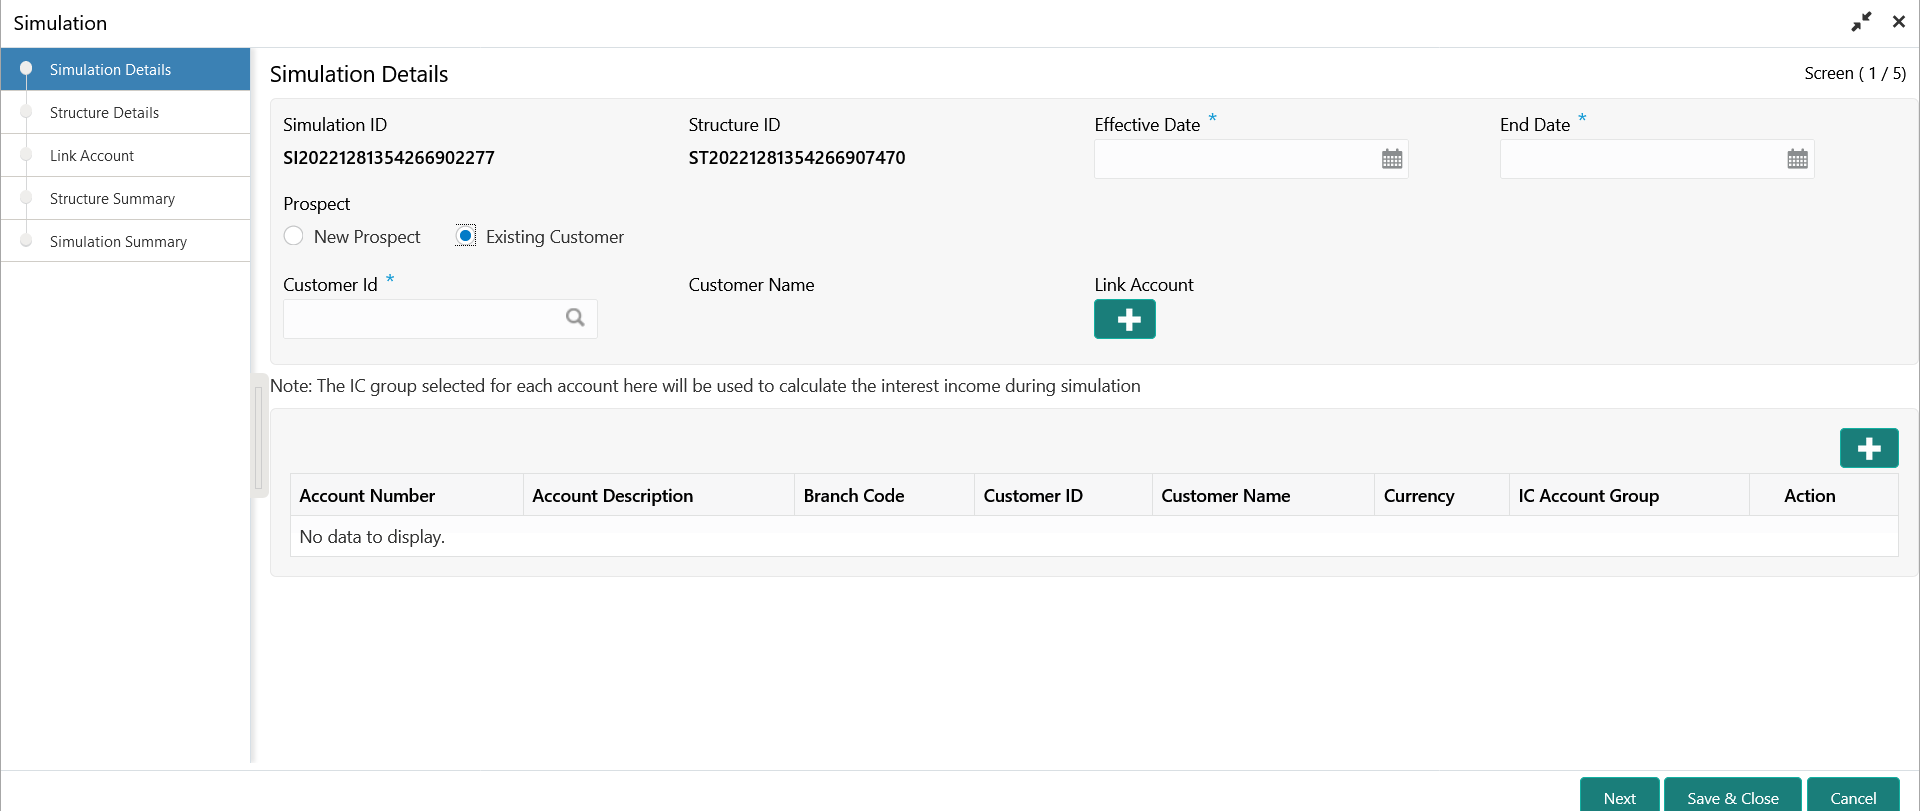
Figure 11-3 Simulation Details - Existing Customer
- Specify the fields on Simulation Details screen.For more information on fields, refer to the field description table.
Note:
The fields, which are marked with an asterisk, are mandatory.Table 11-2 Simulation Details - Field Description
Field Description Simulaton ID Displays the simulation ID which is auto generated. Structure ID Displays the structure ID which is auto generated. Effective Date Specify the date from when the simulation structure becomes effective. End Date Specify the date till when the simulation structure is effective. Note:
This date should always be greater than the effective date.Prospect Select the type of prospect as New Prospect/ Existing Customer. Drop file or click to upload Click this button to browse and select the file for the respective file uploads. Note:
This field is applicable to New Prospect.Upload Customer Data Click this button to upload the customer data file. Note:
This field is applicable to New Prospect.Upload Account Data Click this button to upload the account data file. Note:
This field is applicable to New Prospect.Upload Account Balance Click this button to upload the account balance data file. Note:
This field is applicable to New Prospect.Customer ID Click Search icon to view and select the customer ID from the list. Note:
This field is applicable to Existing Customer.Customer Name Displays the name of the customer based on the customer ID selected. Note:
This field is applicable to Existing Customer.Account Number Displays the account number. Note:
This field is editable.Account Description Displays the account description of the account. Note:
This field is editable.Branch Code Displays the branch code for the account. Note:
This field is editable.Customer ID Displays the customer ID for the account. Note:
This field is editable.Customer Name Displays the customer name for the account. Note:
This field is editable.Currency Displays the currency for the account. Note:
This field is editable.IC Account Group Click Search icon and select the IC Account Group. - Click
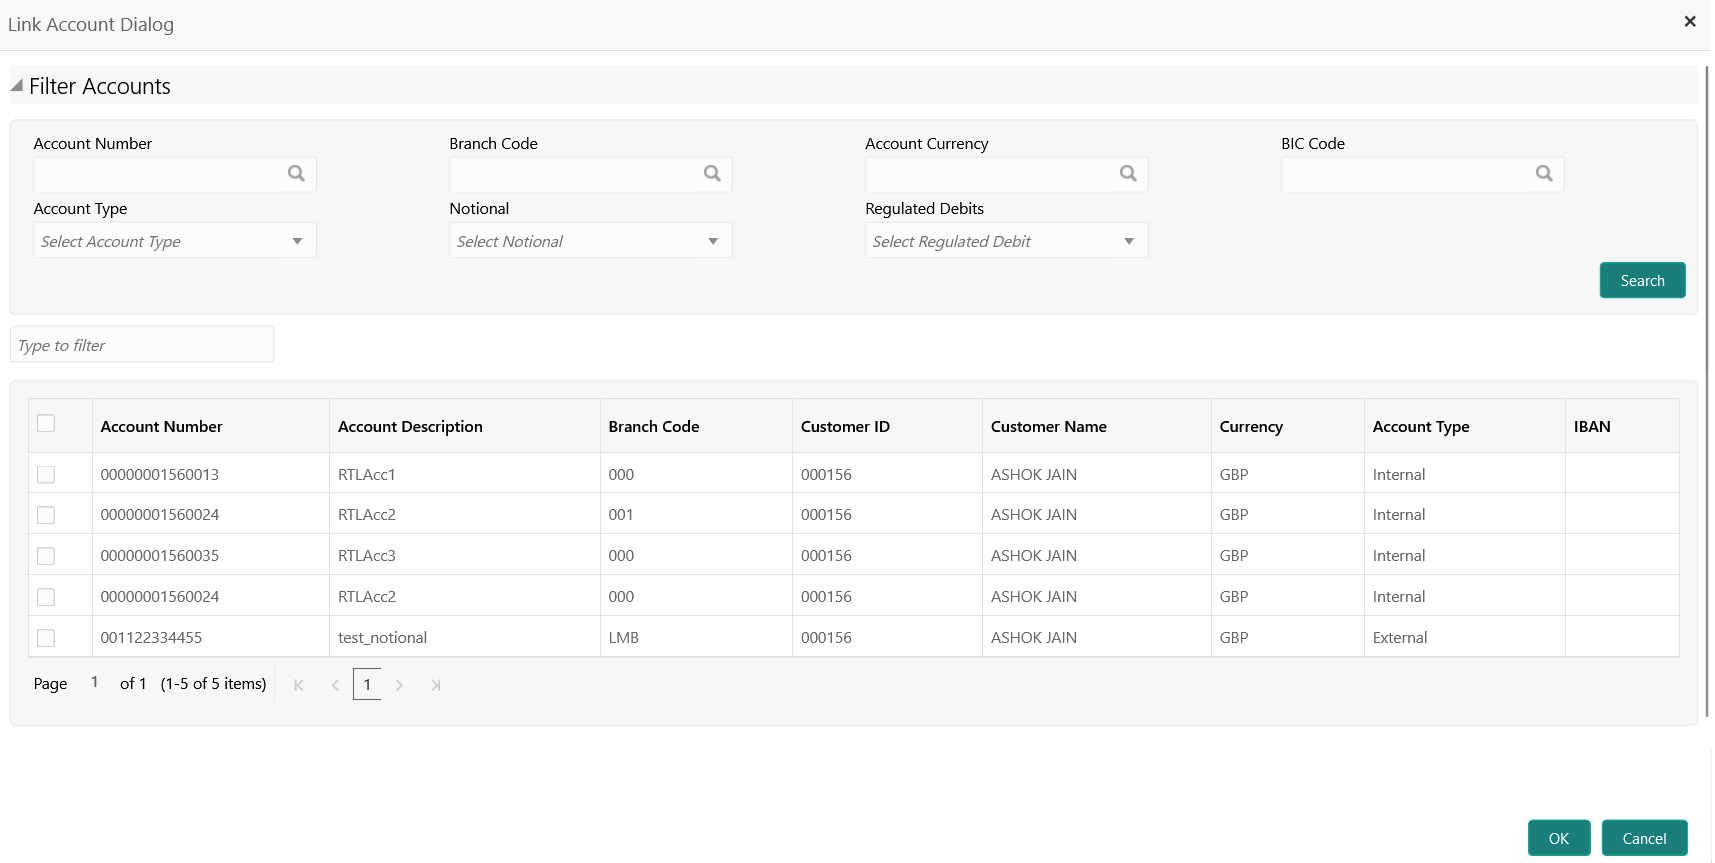
 icon and select the accounts to participate in structure..The Link Account Dialog displays.
 - On the Link Account Dialog screen, specify the filter
criteria to filter the accounts.For more information on fields, refer to the field description table.
Table 11-3 Link Account Dialog – Field Description
Field Description Account Number Click Search icon to view and select the account number to add the structure. If the customer hierarchy is maintained at the customer level and the parent customer is selected for structure creation, then all the accounts of parent and child customers will be displayed for selection.
Branch Code Click Search icon to view and select the branch code to filter the accounts. Account Currency Click Search icon to view and select the account currency to filter the accounts. BIC Code Click Search icon to view and select the BIC code to filter the accounts. Account Type Select the account type to filter the accounts. The available options are- External Account
- Internal Account
Notional Select the required option whether the account is notional or not. The available options are- Yes
- No
The user can select the required option to filter the accounts.
Regulated Debits Select the required option whether the account is regulated for debits or not. The available options are- Yes
- No
The user can select the required option to filter the accounts.
Note:
This field is not applicable for Simulation.Account Number Displays the account number for the structure creation. Account Description Displays the description of the account. Branch Code Displays the branch code for the account. Customer ID Displays the Customer ID for the account. Customer Name Displays the name of the Customer ID. Currency Displays the currency of the account. Account Type Displays the account type. The available options are- External
- Internal
IBAN Displays the IBAN for the account. - Click OK to add the selected accounts to the Simulation Details screen.
- Click
 to add the new for account details.
 - Click
 to edit the account details.
 - Click
 to delete the account details.
 - Click Next to save and navigate to the Structure Details screen.
- Click Save and Close to save and close the simulation details.
- Click Cancel to discard the changes.
Parent topic: Create Simulation


