- Configurations User Guide
- Configurations
- Credit Decision Configuration
- Pricing
- View Pricing Model
1.4.8.2 View Pricing Model
This topic describes the systematic instructions to view the list of pricing model.
- On Home screen, click Retail Banking. Under Retail Banking, click Configuration.
- Under Configuration, click Credit Decision.
- Under Credit Decision, click Pricing Model.
- Under Pricing Model, click View Pricing
Model.The View Pricing Model screen displays.
For more information on fields, refer to the field description table.
Table 1-91 View Pricing Model – Field Description
Field Description Pricing Code Displays the pricing code. Pricing Description Displays the description of the pricing model. Authorization Status Displays the authorization status of the record. The options are:- Authorized
- Rejected
- Unauthorized
Record Status Displays the status of the record. The options are:- Open
- Closed
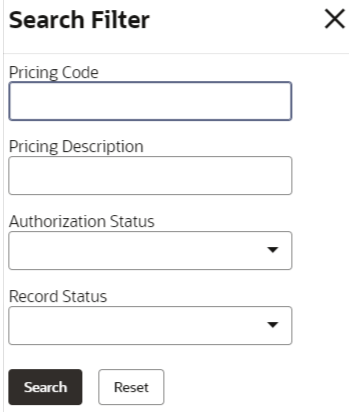
Modification Number Displays the number of modifications performed on the record. - Click Search icon.The View Pricing Model - Search screen displays.
For more information on fields, refer to the field description table.
Table 1-92 View Pricing Model - Search – Field Description
Field Description Pricing Code Specify the pricing code. Pricing Description Specify the description of the pricing model. Authorization Status Select the authorization status from the drop-down list. The available options are:- Authorized
- Rejected
- Unauthorized
Record Status Select the record status from the drop-down list. The available options are:- Open
- Closed
- Click three-dots icon to unlock, delete, authorize or view the created pricing model.
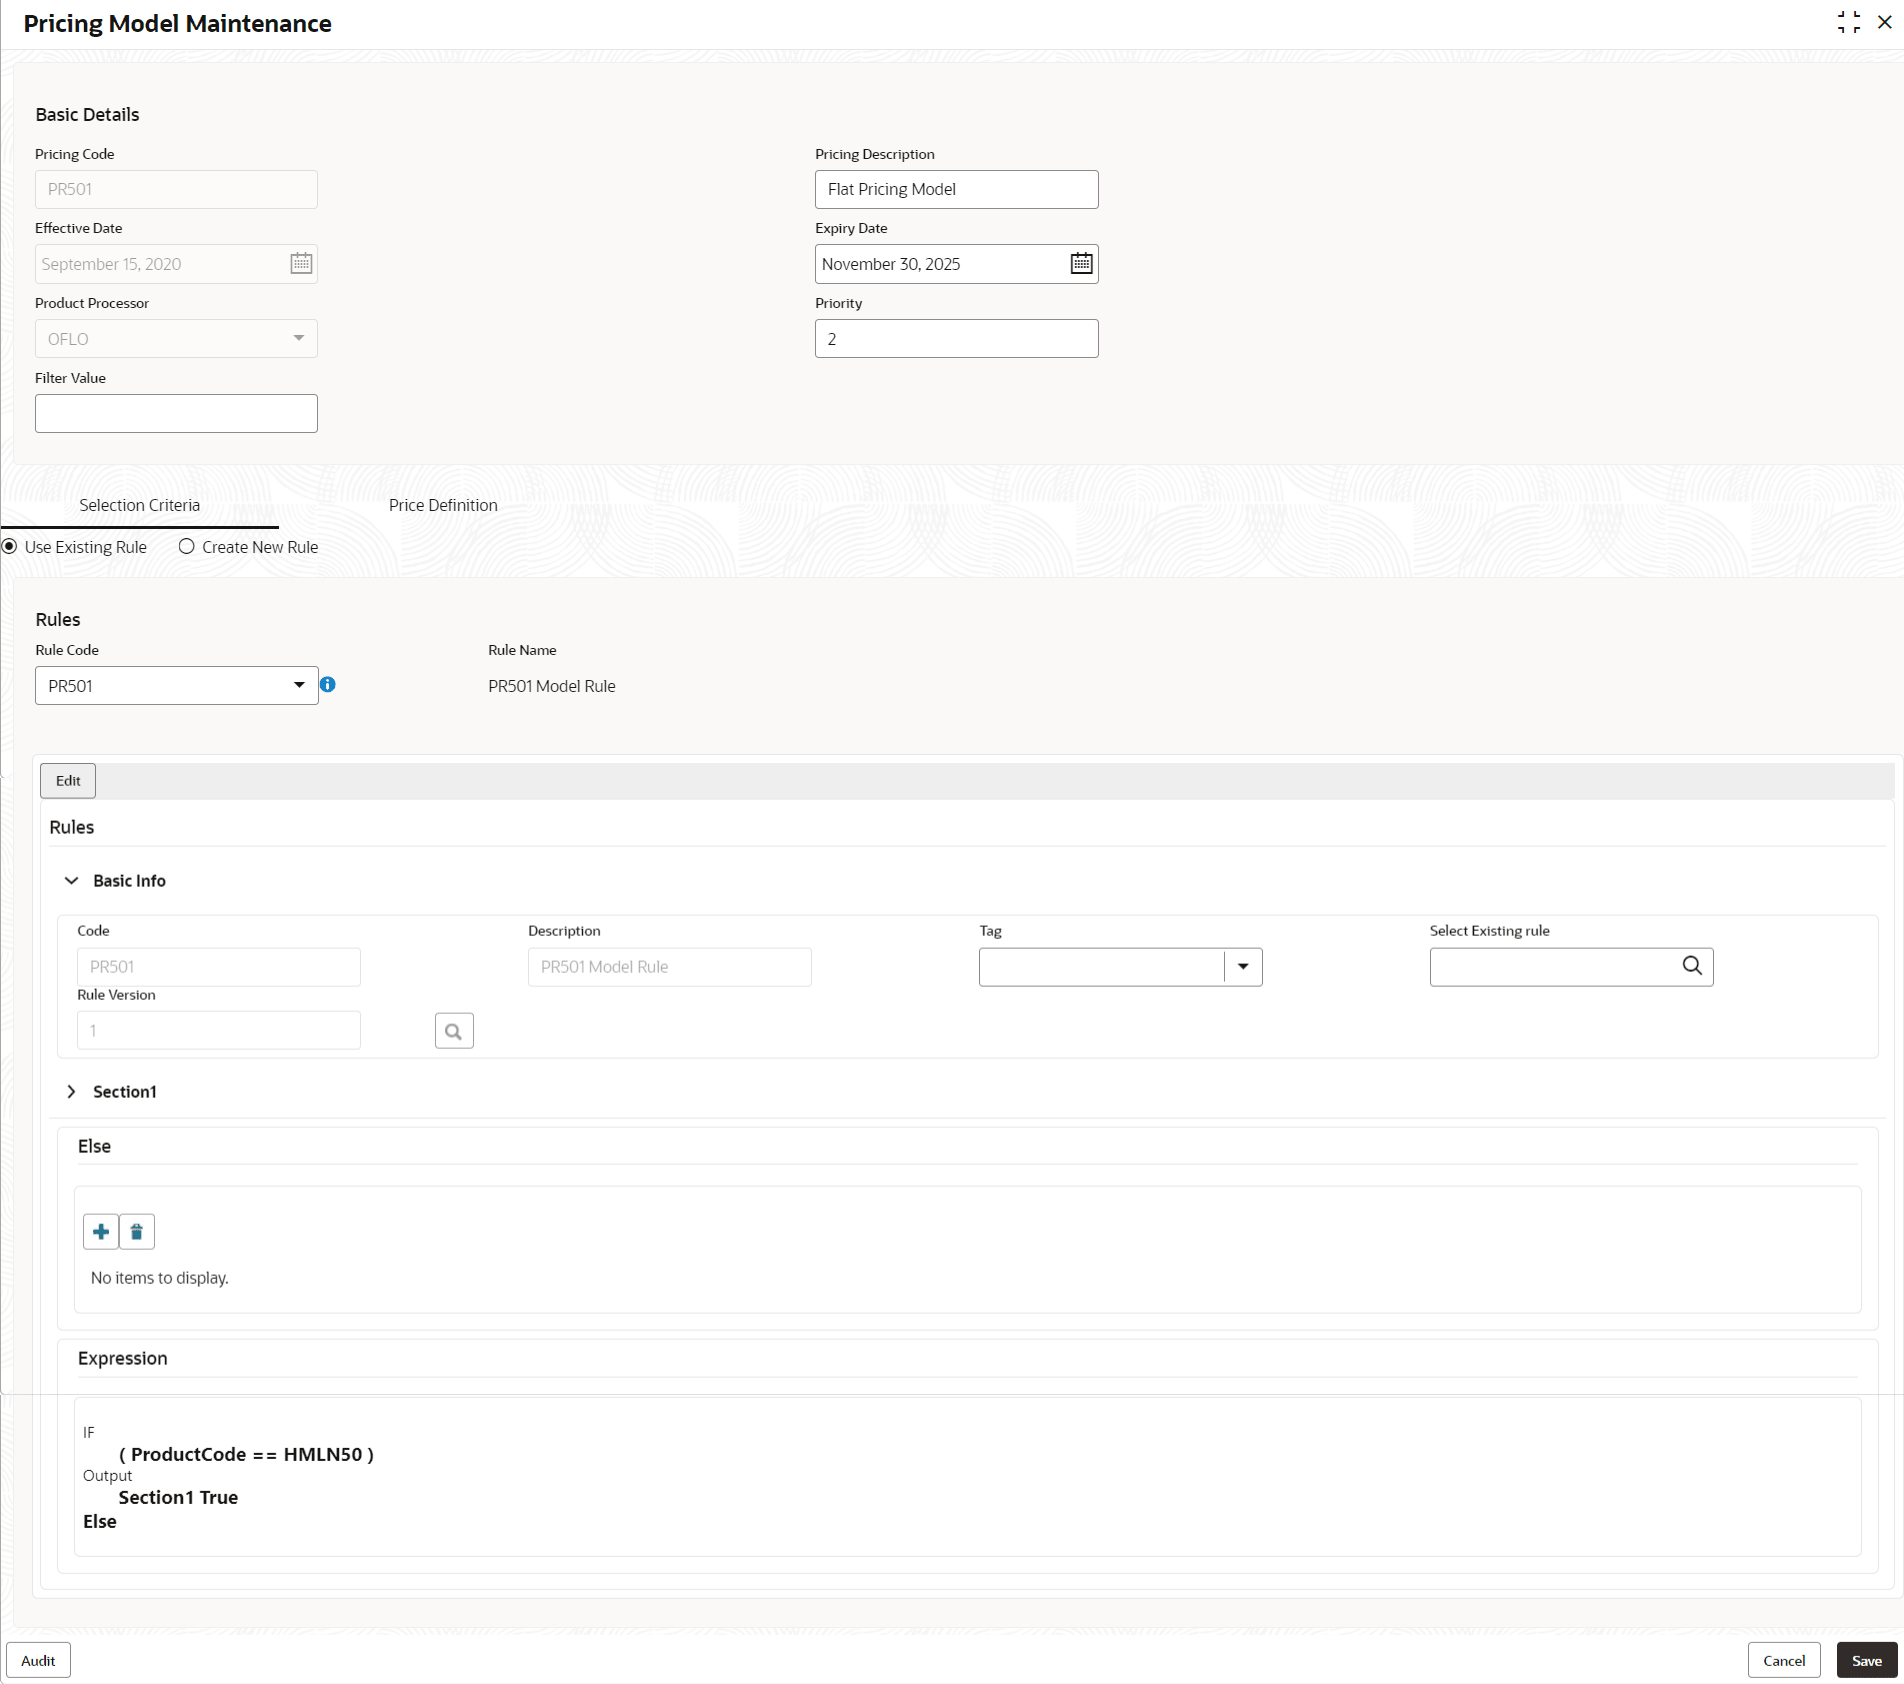
- Click Unlock icon to modify the fields.The Pricing Model Maintenance - Unlock screen displays.
Figure 1-93 Pricing Model Maintenance - Unlock
Note:
The fields marked as Required are mandatory.For more information on fields, refer to the field description table.
Table 1-93 Pricing Model Maintenance - Unlock - Field Description
Field Description Pricing Code Displays the pricing code for the created quantitative pricing model. Pricing Description Specify the pricing description for the created pricing model. Effective Date Specify the effective date for the created pricing model. Expiry Date Specify the expiry date for the created pricing model. Product Processor Displays the product processor for the created pricing model. Priority Specify the priority of the created pricing model. Use Existing Rule Specify the existing rule if linked.
Rule Code Specify the rule code for the created pricing model.

Click this icon to get the information about the rule. Rule Name Displays the rule name. Create New Rule Specify the new rule linked to the pricing model. Code Specify the new rule code for the created pricing model. Description Specify the rule description for the created pricing model. + icon Click this icon can add new expression. Fact / Rules Displays the fact or rule of the created pricing model. Operator Displays the comparison operator of the created pricing model. Data Type Displays the data type for the fact or rule for the created pricing model. Output Displays the output for the created pricing model. Expression Displays the expression updated in the expression builder for the created pricing model. Pricing Definition The below listed fields appear in Pricing Definition tab. Minimum Rate Specify the minimum rate applicable for the defined pricing model. Maximum Rate Specify the maximum rate applicable for the defined pricing model. Rate Type Select the range type for the created pricing model from the drop-down list.
The available options are:- Flat
- Tiered
Rate% Specify the interest rate application for the defined pricing. Note:
This field appears once the user select the Rate Type option as Flat and Link a Rule? option as Yes.Rule Select the rule for the defined pricing. Note:
This field appears once the user select the Rate Type option as Flat and Link a Rule? option as Yes.<Numeric Feature> From Specify the minimum numeric value of feature to which the interest rate is applicable. Note:
This field displays if the Rate Type is selected as Tiered.<Numeric Feature> To Specify the maximum numeric value of feature to which the interest rate is applicable. Note:
This field displays if the Rate Type is selected as Tiered.<Character Feature> Value Specify the alphabetic value for which the interest rate is applicable. Note:
This field displays if the Rate Type is selected as Tiered.Rate% Specify the interest rate applicable for the defined tier. Note:
This field appears once you select the Rate Type option as Tiered and Link a Rule? option as No.Rule Select the rule for the defined tier. Note:
This field appears once the user select the Rate Type option as Tiered and Link a Rule? option as Yes. - Click Save to update the modified fields.


