- Supply Chain Finance User Guide
- Maintenance for Supply Chain Finance
- Charges Maintenance
- Charge Preferential Pricing
- Create Charge Preferential Pricing
2.6.4.1 Create Charge Preferential Pricing
This topic describes the systematic instruction to maintain the charges for specific products or parties.
- On Home screen, click Supply Chain Finance. Under Supply Chain Finance, click Maintenance.
- Under Maintenance, click Charges. Under Charges, click Charge Preferential Pricing.
- Under Charge Preferential Pricing, click
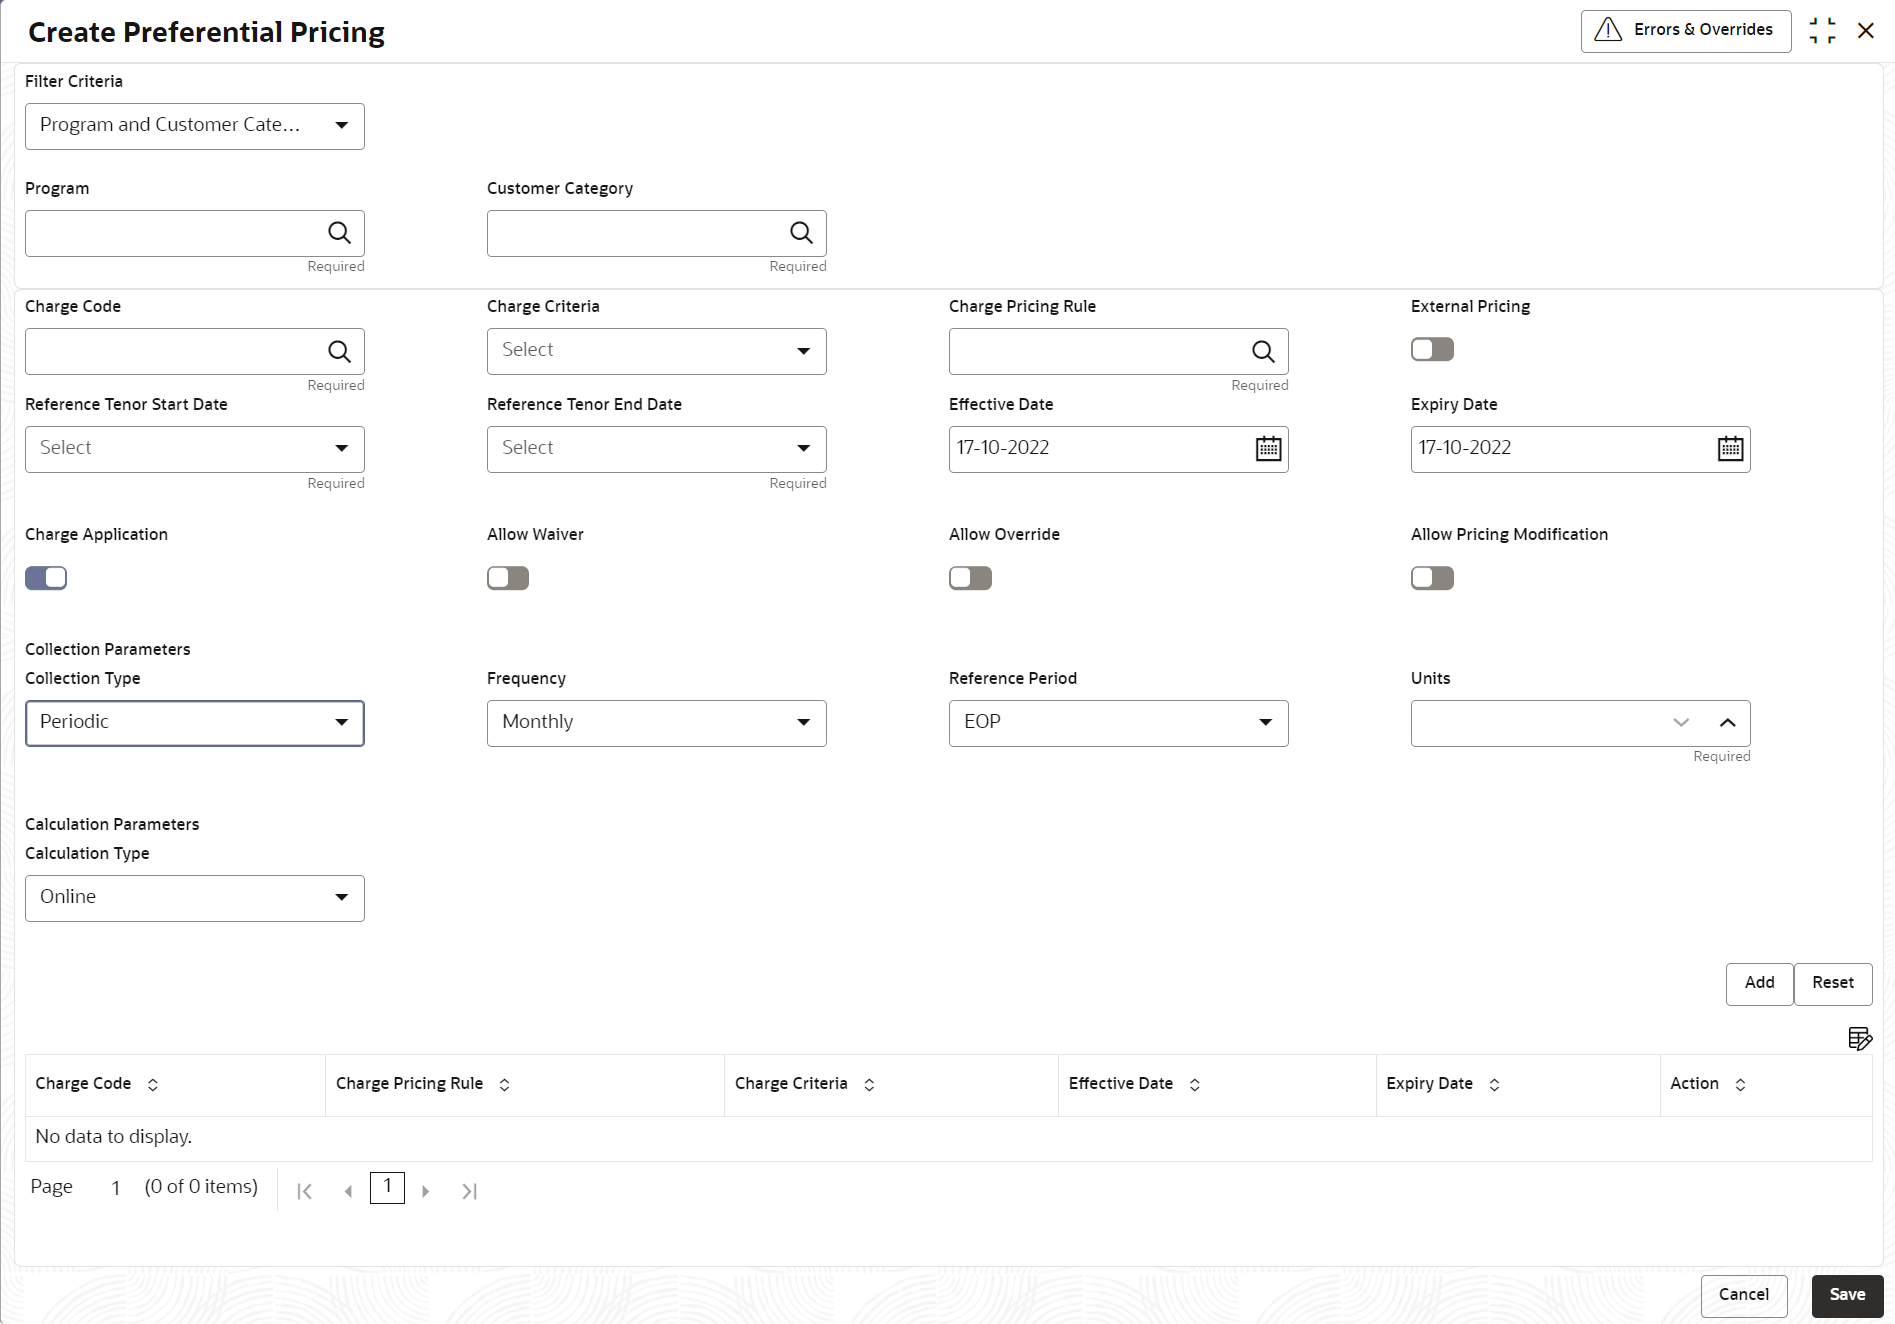
Create Preferential Pricing.The Create Preferential Pricing screen displays.
- Specify the fields on Create Preferential Pricing
screen.For more information on fields, refer to the field description table.
Note:
The fields marked as Required are mandatory.Table 2-29 Create Preferential Pricing - Field Description
Field Description Filter Criteria Select the appropriate filter criteria for specific application of accounting entries.
Based on the selected criteria, the Program, Party ID, and Customer Category fields are displayed.
Program Click the search icon to select the program to map the preferential pricing to.
This field is displayed only if the Filter Criteria is selected as Program.
Party Click the search icon to select the party to map the preferential pricing to.
This field is displayed only if the Filter Criteria is selected as Party.
Customer Category Click the search icon to select the customer category.
This field is displayed only if the Filter Criteria is selected as Customer Category.
Charge Code Click the search icon to select the charge code for pricing configuration. Charge Criteria Select the criteria to be considered based on which charge should be calculated.
The available options are:- Finance Amount
- Invoice Amount
- Parent Charge Code
Parent Charge Code Select the parent charge code.
This field is displayed if the Charge Criteria is selected as Parent Charge Code.
Charge Pricing Rule Click the search icon to select the charge pricing rule to be applied. External Pricing Switch the toggle ON to allow the user to configure the external pricing.
By default, this toggle will be OFF.
External Pricing System Select the external pricing system from the drop-down list for which the external charges needs to be configured.
This field appears only if the External Pricing toggle is ON.
External Pricing Identifier Specify the unique identifier for the external pricing system.
This field appears only if the External Pricing toggle is ON.
External Pricing Identifier Description Specify the brief description about the external pricing identifier.
This field appears only if the External Pricing toggle is ON.
Reference Tenor Start Date Specify which date should be considered to calculate the start of tenor duration. Reference Tenor End Date Specify which date should be considered to calculate the end of tenor duration. Effective Date Click the calendar icon to select the start date of the preferential charge validity. Expiry Date Click the calendar icon to select the end date of the preferential charge validity. Charge Application Switch the toggle ON to enable charge application. Allow Waiver Switch the toggle ON to enable manual charge waiving at the time of transaction processing. Allow Override Switch the toggle ON to enable overriding of the charge amount at the time of transaction processing. Allow Pricing Modification Switch the toggle ON to allow pricing rule modification at the time of transaction processing. Collection Parameters Displays the fields related to Collections Parameters. Collection Type Select how the pricing should be collected.
The available options are:- Periodic
- Online
Frequency Select the frequency of charge collection.
The available options are:- Daily
- Weekly
- Monthly
- Half Yearly
This field is displayed only if the Collection Type is selected as Periodic.
Reference Period Select when the collection should take place for the selected frequency.
For monthly or half-yearly frequency, the collection can take place either at the beginning of the period (BOP) or end of the period (EOP).
For weekly frequency, the collection can happen on a specific day of the week.
This field is displayed only if the Collection Type is selected as Periodic.
Units Specify whether the charge collection should take place as per units of specified frequency.
This field is displayed only if the Collection Type is selected as Periodic.
Calculation Parameters Displays the fields related to Calculation Parameters. Calculation Type Select how the pricing should be calculated.
The available options are:- Periodic
- Online
Frequency Select the frequency of charge calculation.
The available options are:- Daily
- Weekly
- Monthly
- Half Yearly
This field is displayed only if the Calculation Type is selected as Periodic.
Reference Period Select when the calculation should take place for the selected frequency.
For monthly or half-yearly frequency, the calculation can take place either at the beginning of the period (BOP) or end of the period (EOP).
For weekly frequency, the calculation can happen on a specific day of the week.
This field is displayed only if the Calculation Type is selected as Periodic.
Units Specify whether the charge calculation should take place as per units of specified frequency.
This field is displayed only if the Calculation Type is selected as Periodic.
Charges Grid Displays the details of the preferential pricing added as an entry in this grid. - Click Add to add the details to the grid.
- Click Reset to reset the rows in the grid.
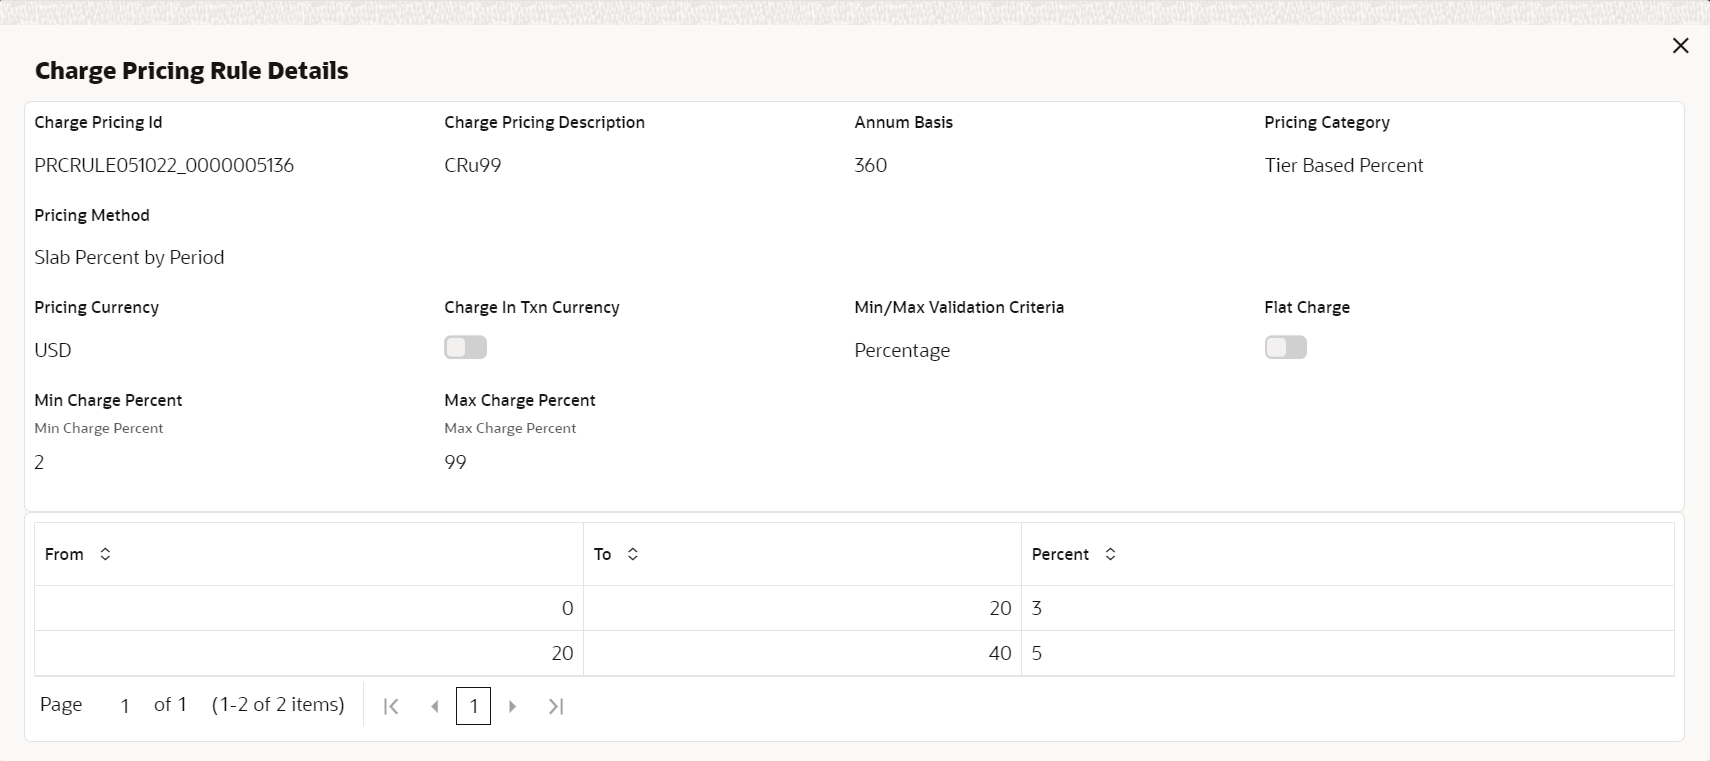
- Click the hyperlink in the table grid to view the details of the pricing
rule.The Charge Pricing Rule Details screen displays.
- Perform the following steps to take action on the records in the grid:
- Select the record in the grid and click Options icon in the Action column.
- Click Edit to modify the details.
- Click Delete to remove the record.
- Click Save to save the record and send it for authorization.
Parent topic: Charge Preferential Pricing

