3.3 Configuring SSO in OAM Console
After installing OAM, Webtier Utilities and Webgate, extend the weblogic domain to create OAM server.
- Identity Store Creation
To create new User Identity Store, Login to OAM Console and navigate to System Configuration>>Common configuration>>Data Sources>> User Identity Store.
- Input below information in the User Identity Store.
Choose Store Type as Oracle Internet Directory.
Location:
LDAP server Host name and Port Number in <HOSTNAME>:PORT format
Bind DN:
User name to connect the LDAP Server
Password:
Password to connect the LDAP Server
User Name Attribute
The attribute created in LDAP, which will be the User Name for the other application (here it will be treated as the OBTF Username)
User Search Base:
The container of the User Name in the LDAP server.
Group Search Base:
The container of the Group Name in the LDAP server.

Description of the illustration picture2.png - After input of the above information click on ‘Apply’ button. On
successful creation, click test connection button to verify whether the LDAP
connection is working fine.

Description of the illustration picture3.png - Creating Authentication Module
Navigate to System Configuration >> Access Manager Settings >> Authentication Modules >> LDAP Authentication Module.
Click ‘New’ Button to create new Authentication Module. Input the Name of the authentication module and choose the User Identity Store we created in step 1.

Description of the illustration picture4.png - Creating OAM 12c Webgate
Navigate to System Configuration>>Access Manager Settings>>SSo Agents>>OAM Agents.
Click on ‘Create 12c webgate’ button
or Click on New OAM 12c Webgate link available in welcome page.

Description of the illustration picture5.pngEnter any name for Webgate and Base URL (The host and port of the computer on which the Web server for the Webgate is installed) and click on apply.

Description of the illustration picture6.pngOnce the OAM 12c Webgate created, add filterOAMAuthnCookie=false parameter along with default parameters in User Defined Parameters.
Click ‘Apply’ button to save the changes.

Description of the illustration picture7.png - Post OAM Webgate 12c Creation Steps
Perform the following steps to copy the artifacts to the Webgate installation directory
- On the Oracle Access Manager Console host, locate the updated OAM Agent ObAccessClient.xml configuration file (and any certificate artifacts). For example:
$DOMAIN_HOME/output/$Agent_Name/ObAccessClient.xml- On the OAM Agent host, copy artifacts (to the following Webgate directory path). For example:
12cWebgate_instance_dir/webgate/config/ObAccessClient.xml
(for instance WebTier_Middleware_Home/Oracle_WT1/instances/instance1/config/
OHS/ohs1/webgate/config/ObAccessClient.xml)
- Creating Authentication Scheme
To create Authentication Scheme navigate to Policy Configuration >> Authentication Schemes
Click on ‘Create’ button to create new Authentication Scheme.
Name : Any name to identify Authentication Scheme
Challenge Method : BASIC
Challenge Redirect URL : /oam/server
Authentication Module : Choose the authentication module created in step 2.

Description of the illustration picture8.pngIf it is a basic authentication scheme, we need to add the 'enforce-valid-basic-auth-credentials' tag to the config.xml file located under /user_projects/domains/<MyDomain>/config/. The tag must be inserted within the <security-configuration> tag as follows: [Just before the end of security configuration tag]
<enforce-valid-basic-auth-credentials>false</enforce-valid-basic-auth-credentials>
</security-configuration>
- Creating Authentication Scheme
To create authentication policy, navigate to Policy Configuration >> Application Domains >> [Webgate agent name] >> Authentication Policies.
Click new button and input the below information
Name: Enter any name to identify the Authentication Policy (eg. OBTFWebPolicy)
Authentication Scheme: Choose the authentication scheme created in step 5.
Resources:
Add the resources which are all need to be protected. If <WebgateName>:/…/ and <WebgateName>:/ are added in the resources then all the sources are protected.

Description of the illustration picture9.pngAdd DN in the Responses section. Enter the value as $user.attr.dn. The responses maintained in the tab will be added in the response header during the authentication.
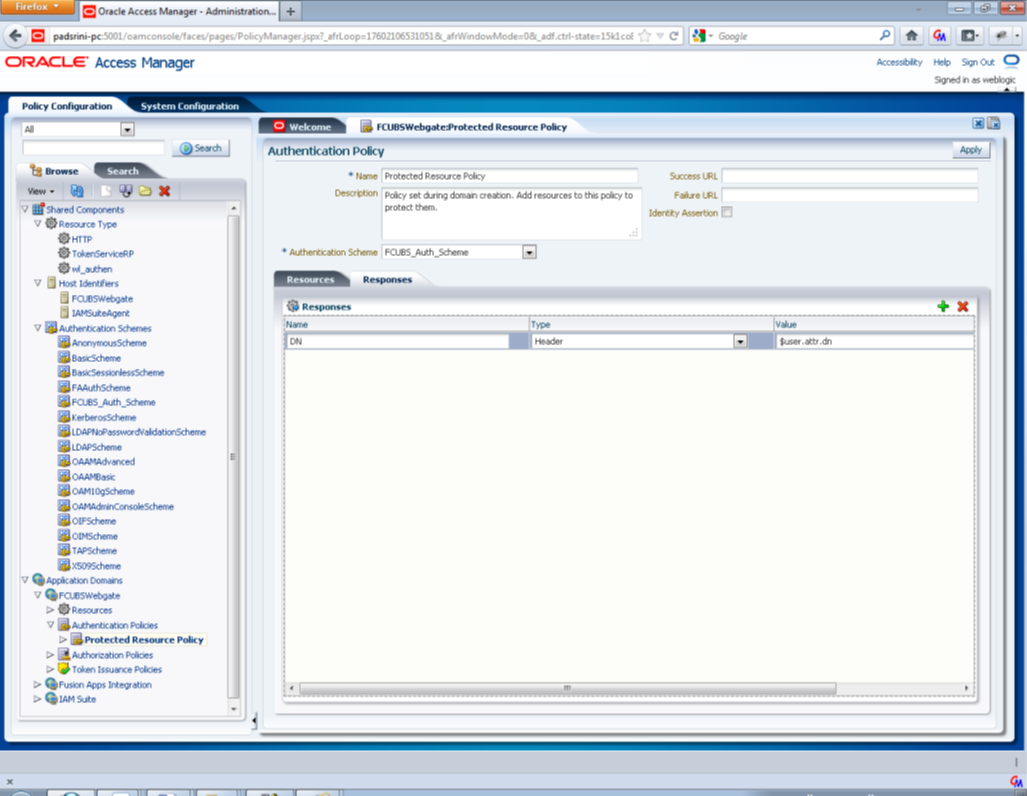
Description of the illustration picture10.png - Adding Resources
Navigate to Policy Configuration >>Application Domains >>OBTFWebgate >>Resources .
- Click on Create New Resource button.
- Select the type as HTTP.
- Select the Host Identifier as OBTFWebgate
- Enter the resource URL as /FCJNeoWeb
- Select the protection level as Protected
- Click on apply button to update the resource
added.
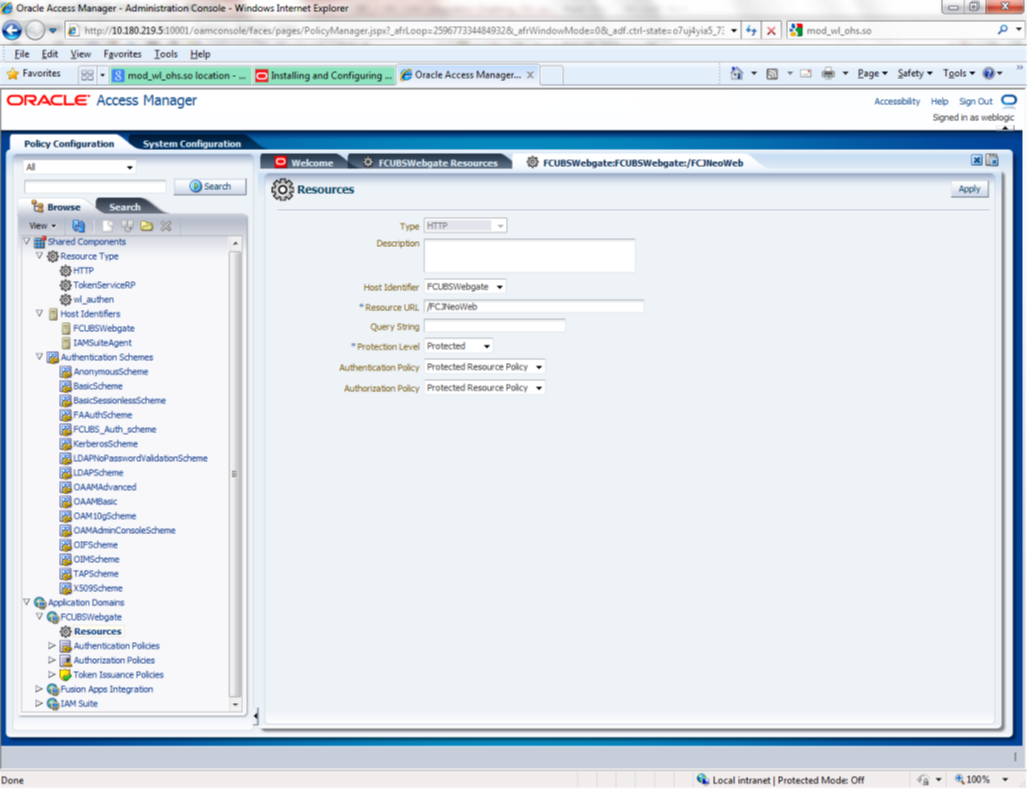
Description of the illustration picture11.png
- Adding Authorization Policy
Check whether the resources available in the authentication policies are available in Authorization Policy. During web gate creation these values are defaulted.
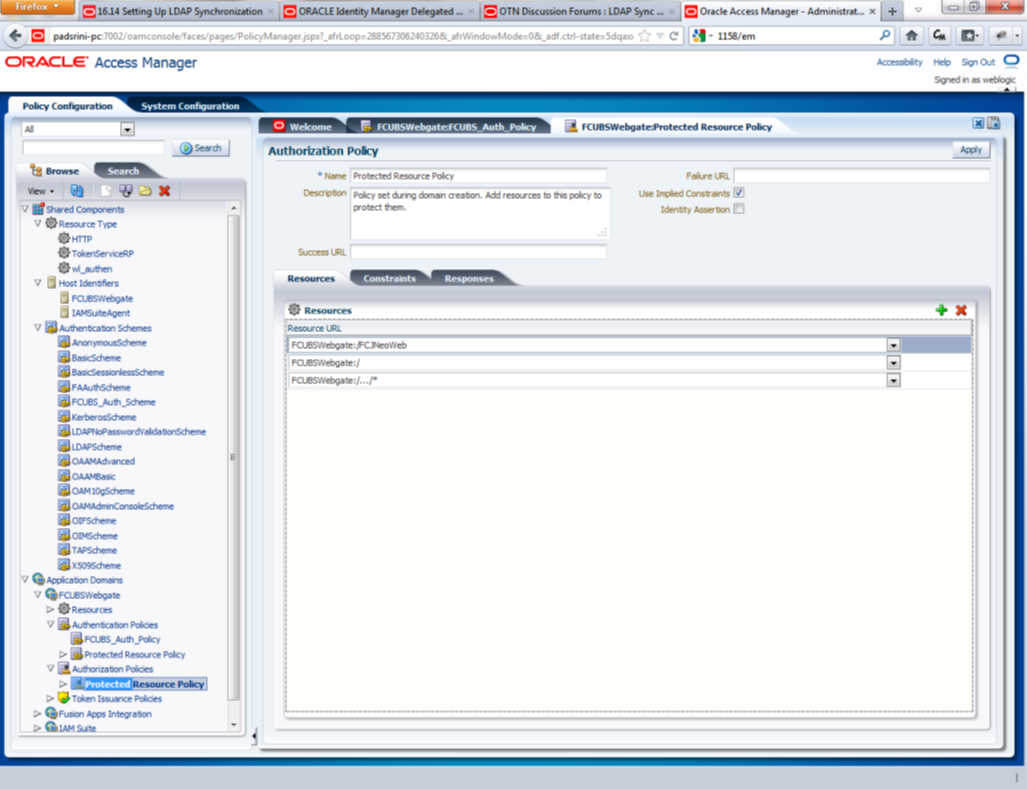
Description of the illustration picture12.pngAdd DN in the Responses section. Enter the value as $user.attr.dn. The responses maintained in the tab will be added in the response header during the authorization.
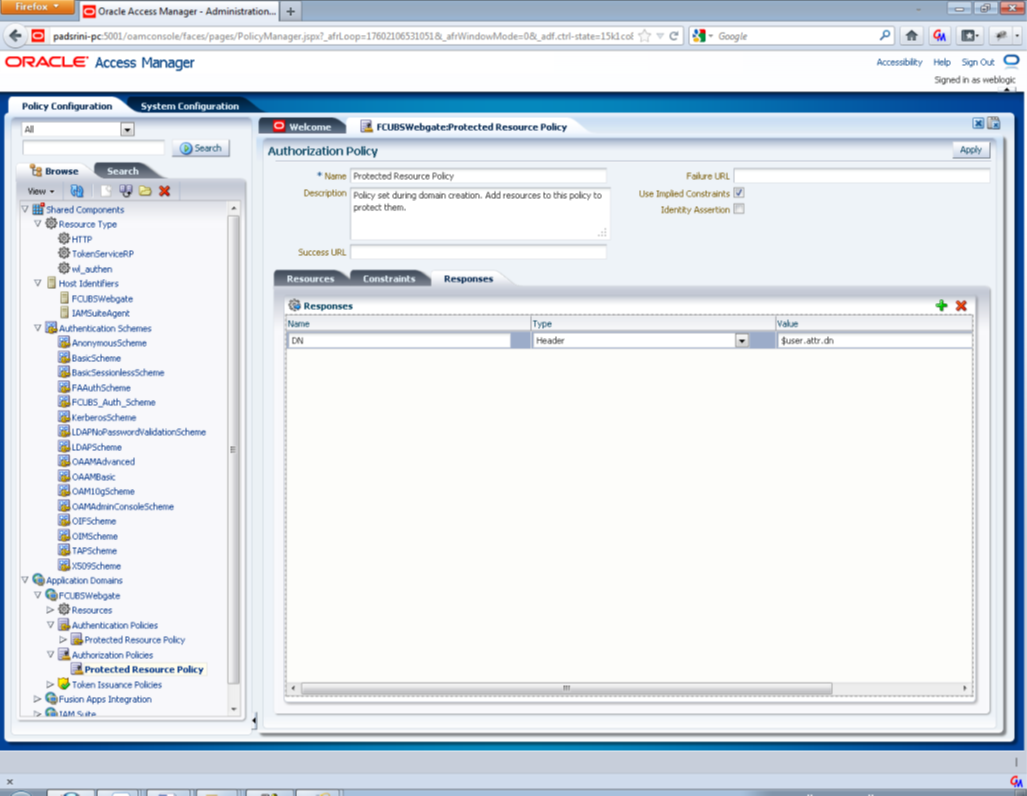
Description of the illustration picture13.png - Configuring mod_wl_ohs for Oracle Weblogic server Clusters
To enable the Oracle HTTP Server instances to route to applications deployed on the Oracle Weblogic Server Clusters, add the directive shown below to the mod_wl_ohs.sh file available in <Weblogic Home> /Oracle_WT1/instances/instance1/config/OHS/ohs1.
<Location /console>
SetHandler weblogic-handler
WebLogicHost idmhost1.mycompany.com
WeblogicPort 7001
</Location>
- Checking the Webgate 12c Agent Creation
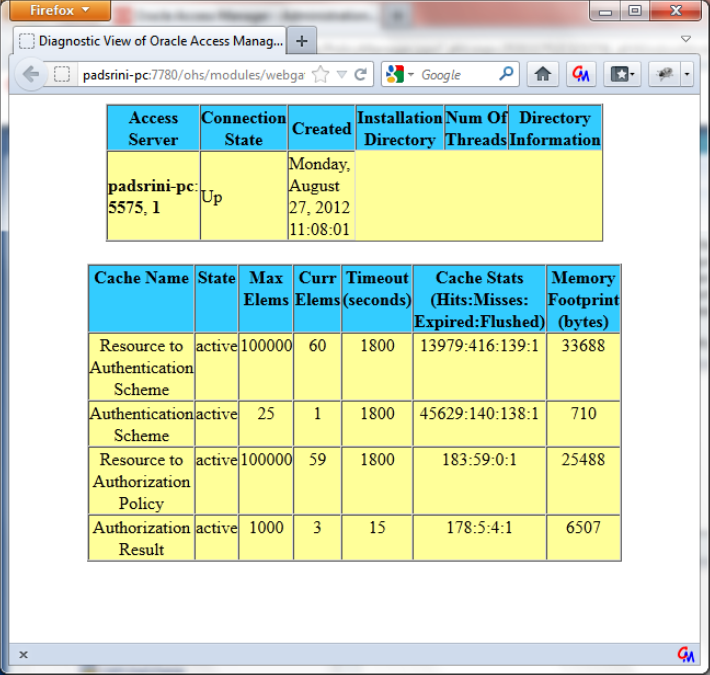
After configuration of webgate 12c agent launch the URL
http://<hostname>:<ohs_Port>/ohs/modules/webgate.cgi?progid=1 to verify whether the webgate configuration is fine. If the URL launches a screen as below then the webgate configuration is working fine.
Description of the illustration picture14.png - Using OAM Test Tool (This step is not mandatory)
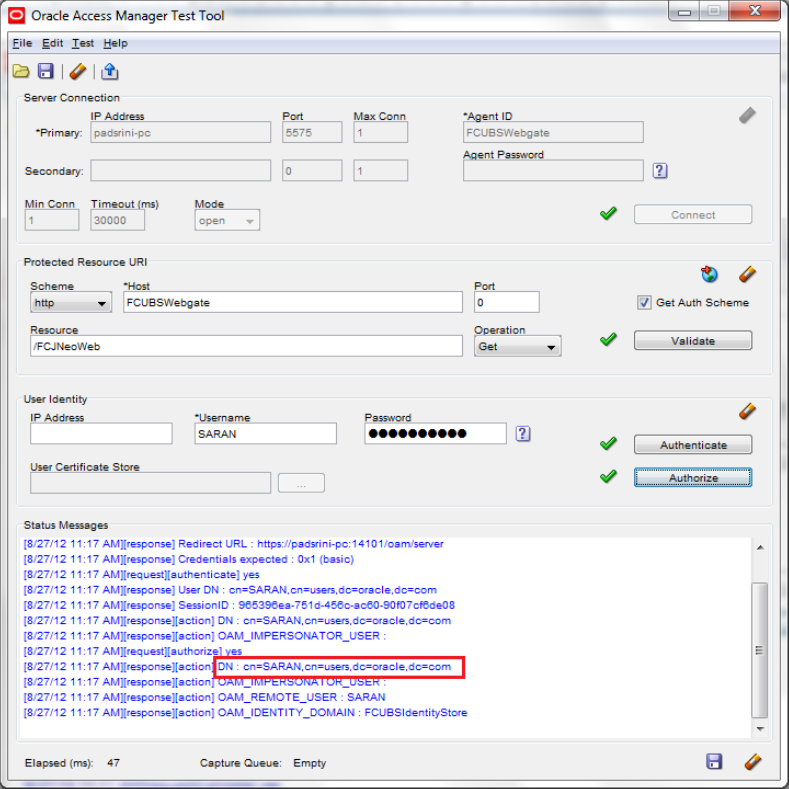
There is a test tool provided in OAM software which helps us to check the response parameter values. The test tool is available in <OAM Install Dir>\ oam\server\tester.
For eg. D:\weblogic\Middleware\Oracle_IDM1\oam\server\tester
Use java -jar oamtest.jar to launch the OAM test tool.
Description of the illustration picture15.png