- Reports DSN Entries Utility
- Reports DSN Entries Utility
- Setting up Reports DSN Entries
1.2 Setting up Reports DSN Entries
In order to setup the reports DSN entries, follow the steps given below.
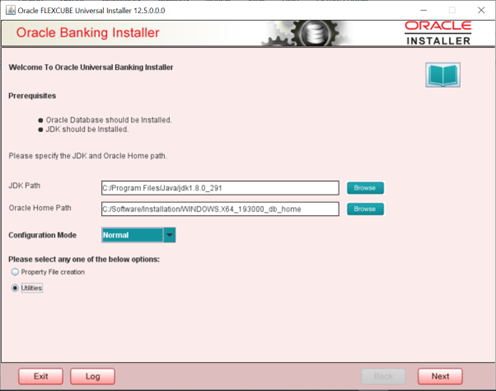
- Start Oracle Banking Trade Finance Installer.
- Specify the following details:
Table 1-1 Prerequisites
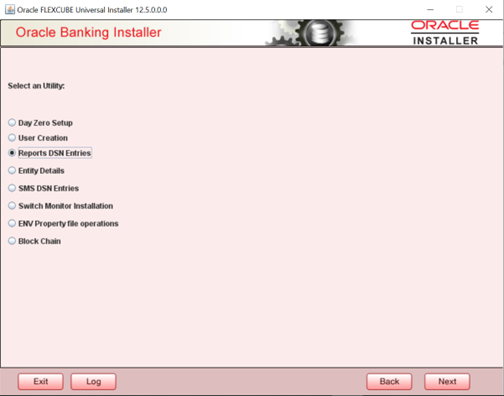
Field Description JDK Path Specify the location of the JDK. You can use the directory button to browse to the JDK location. Oracle Home Specify the location of the Oracle Home installation. You can use the directory button to browse to the location. - Select Utilities and Click ‘Next’. The following screen is displayed.
- Select Reports DSN Entries and click
Next.The following screen is displayed.
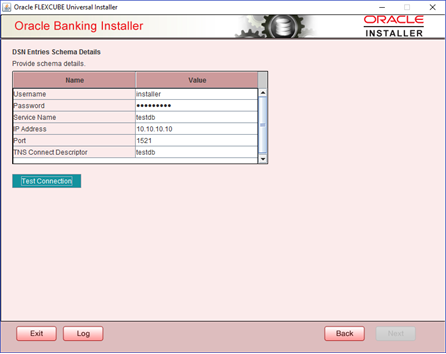
- Specify the following schema details:
Table 1-2 Field Description - DSN Entries Schema Details
Field Description User Name Specify the user name to access the schema. Password Specify the schema password. Service Name Specify the service name of database. IP Address Specify the IP address of the system where the database schema is installed. Port Specify the port number. TNS Connect Descriptor Specify a valid connect string that contains the details for database connectivity. - Once you have entered the details, you can test the database schema connection
using ‘Test Connection’ button.
Note:
If the connection is established, the installer displays a message ‘Connection Successful’.Note:
If there is an error in establishing the connection, the system displays the message ‘Invalid DB Credentials’.If the TNS entry is not proper, the installer displays the message ‘TNS entries are not proper’.
- After testing the connection successfully, click ‘Next’. The following screen
is displayed.
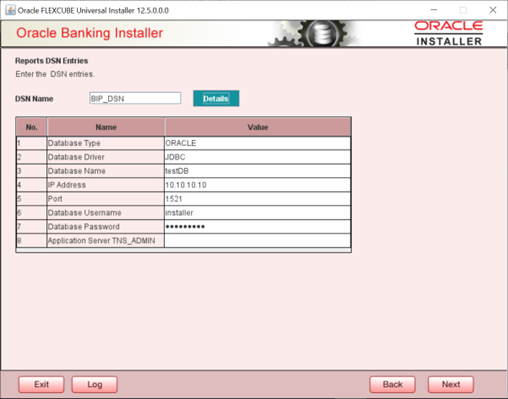
- Specify the following details:
Table 1-3 Field Description - Reports DSN Entries
Field Description DSN Name Specify the DSN name. Database Type Specify the database type. Database Driver Specify the database driver. Database Name Specify the name of the database. IP Address Specify the IP address of the system where the database schema is installed. Port Specify the port number. Database User Name Specify the user name to access the database. IP Address Specify the IP address of the system where the database schema is installed. Database Password Specify the password to access the database. Application Server TNS_ADMIN This new field is for future use. - Once the details are inserted click ‘Next’ .The following screen is displayed.
- Click ‘Next’ and the following message is displayed:
Note:
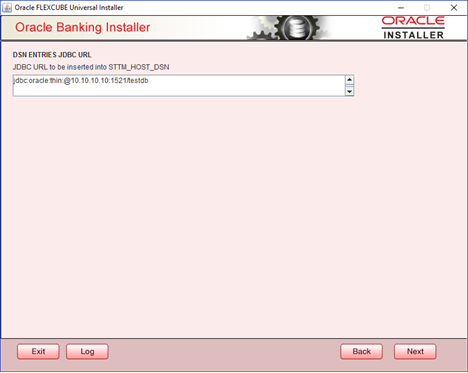
For the RAC data source the JDBC URL needs to be manually edited. RAC Database JDBC URL is given below as an example.jdbc:oracle:thin:@(DESCRIPTION =(ADDRESS=(PROTOCOL=TCP)(HOST=10.184.87.199)(PORT=1521))(ADDRESS=(PROTOCOL=TCP)(HOST=10.184.86.219)(PORT=1522))(CONNECT_DATA=(SERVICE_NAME = testdb)))
Description of the illustration message.png
Parent topic: Reports DSN Entries Utility
