- Exchange Traded Derivatives User Guide
- Define Deal Products
- Liquidation Deals
- Process Liquidation Deals
6.4.1 Process Liquidation Deals
While entering the details of a liquidation deal you should necessarily use an LQ product that exists in the system. You can select the appropriate product code from the available list.
- On the Home page, type EDDLQONL in the text box, and then click next arrow.
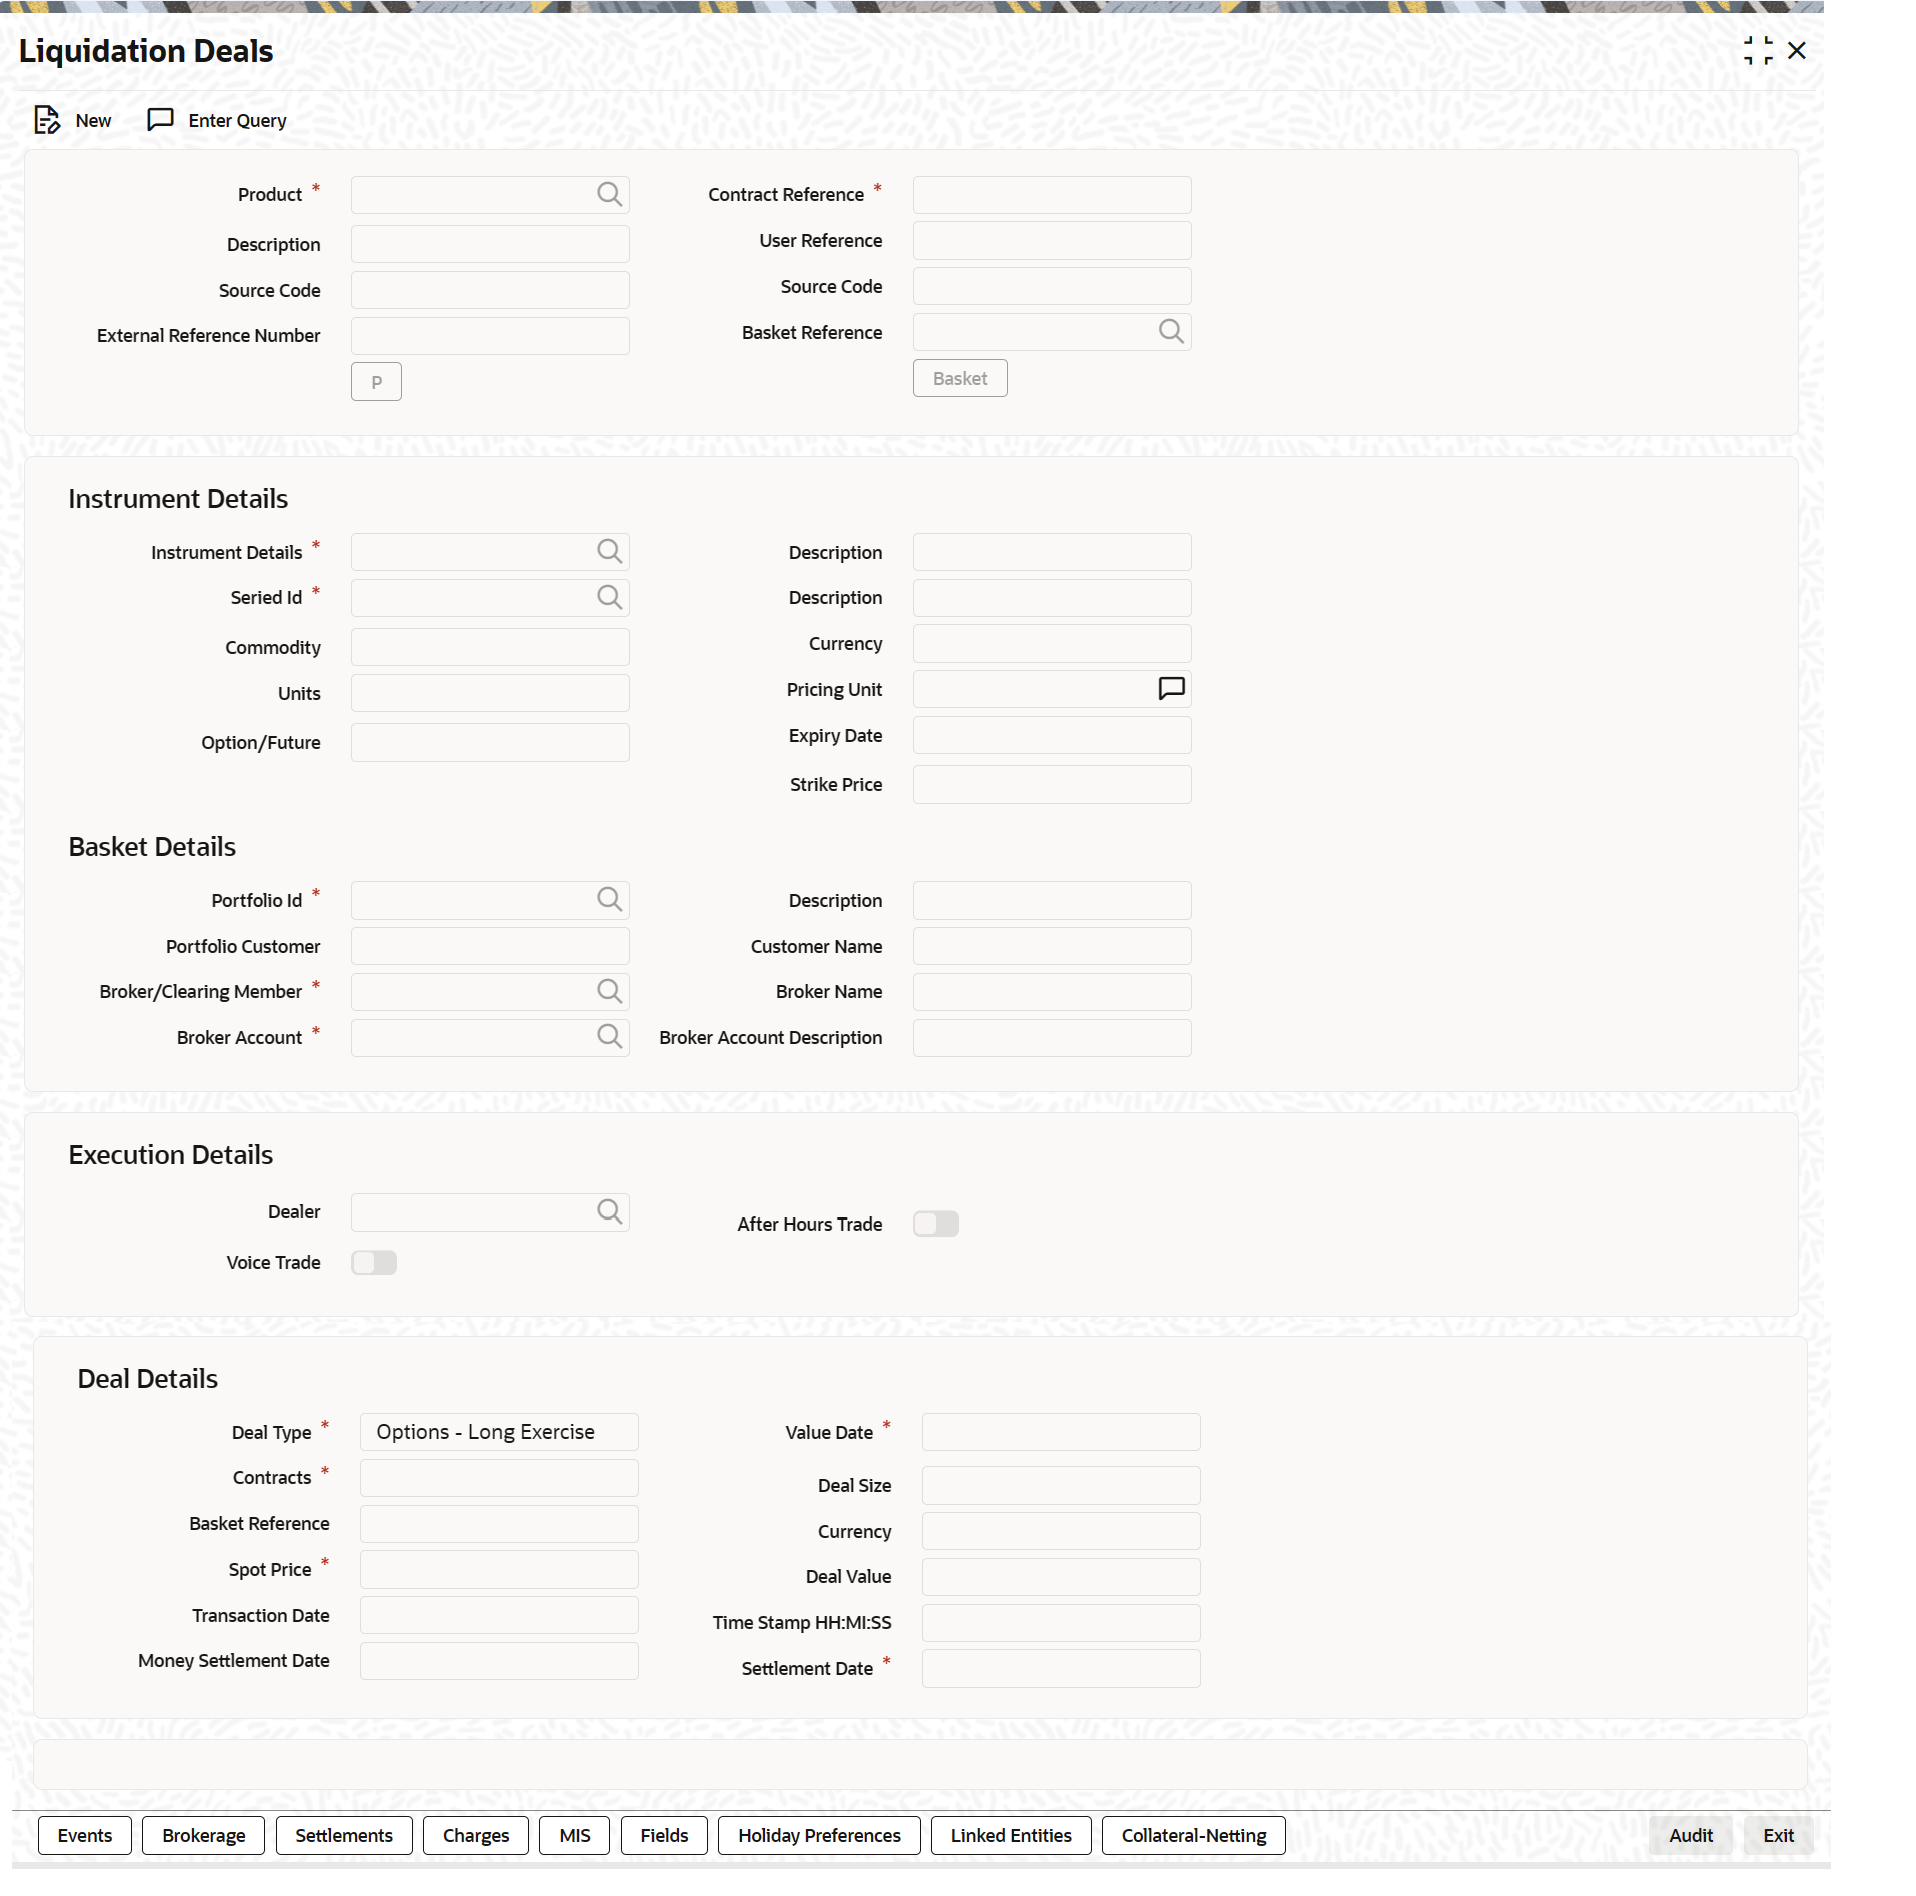
The Liquidation Deals screen is displayed.
While entering the details of a liquidation deal, you should necessarily use an LQ product that exists in the system. You can select the appropriate product code from the available list.
- On the Liquidation Deals screen, click New.
- On the Liquidation Deals screen, specify the following details, and then click Enter Query.
For more information on the fields, refer to the below Field Description table.
Table 6-15 Liquidation Deals - Field Description
Field Description User Reference
Specify the identification for the deal in the external source, as the external reference number.
Reversed Reference
System displays the reference number of the contract that which is being reversed and re-booked.
Source
Indicate the source from which deal is to be uploaded.
Basket Reference
After you identify the product, which should be used to capture the details of the deal you have to specify the Basket to which the deal belongs. Select the Basket Reference number from the list of options alongside this field. After selecting the reference number, click Basket button.
On indicating the Basket reference number the following details about the basket are displayed:
- Portfolio ID
- Instrument ID
- Series ID
- Broker
- Broker Account
If you are processing a Customer Deal, the name of the customer involved in the portfolio will be displayed as well.
Note:
The current balance in the basket will also be displayed for your reference. You have to identify the basket to which the deal you are liquidating belongs.If you select the portfolio, the instrument and the broker, and for this combination that you have specified, there is no Basket Reference Number, the basket will be created and the balance of the same will be updated. If the liquidation amount of the contracts is more than the balance available in the basket, the system will save the liquidation deal, but at EOD display the message ‘Insufficient Balance in Basket’.
Clearing House
The system displays the clearing house maintained at the Instrument level.
Option/Future
Specify the deal as Option or Future.
Contracts
The number of contracts that have been liquidated in the basket defaults as the current balance in the basket. You can change this default value and indicate the number of contracts within the basket that have to be liquidated.
Execution Broker
Specify the execution broker for the deal. The adjoining option list displays all valid execution brokers maintained for the portfolio. You can choose the appropriate one.
Execution Broker Name
The system displays the name of the execution broker specified.
Dealer
Specify the dealer involved for the deal. The adjoining option list displays all valid dealers maintained in the system. You can choose the appropriate one.
Trading Venue
Specify the trading venue for the deal.
Voice Trade
Check this box to indicate that voice trade is allowed for this deal.
After Hour Trade
Check this box to indicate that after hour or day time trade is allowed for this deal.
Deal Type
After identifying the number of contracts, which you have to indicate the type of liquidation that has to be performed on the contracts. The options available are:
- Exercise of Options
- Assignment of Options
- EFP of Futures Long
- EFP of Futures Short
Select the appropriate option from the list.
Spot Price
Specify the Spot Price of the underlying asset involved in the instrument. The spot price is to be expressed in terms of the Underlying Pricing Unit as maintained in the Underlying Asset Definition screen.
Value Date
The Value Date represents the date on which the basket is to be liquidated. This is the date that the accounting entries will be posted for booking the liquidation gains and losses.
Time Stamp and Transaction Date
You have to capture the exact time at which the deal transaction took place in the exchange.
The transaction date is the date on which you entered the deal into Oracle Banking Treasury Management. The system puts today's date as the transaction date. You cannot change this date.
Settle Date
If the basket involves the physical settlement of the underlying asset, you have to indicate the date on which the physical settlement of futures should be done.
Note:
The ETD module of Oracle Banking Treasury Management does not support any processing with respect to the physical settlement of deals.Money Settlement Date
If there is any money settlement involved in the liquidation deal you are processing, you can indicate the date on which the money settlement of liquidation gains/losses is to be done.
Other details of the LQ Details screen
The following details of the Liquidation details screen are picked up from the Instrument Definition screen and displayed in their respective fields on saving your entries:
- Strike Price at which the option buyer can purchase the asset for a call option or sell the asset in the case of a put option.
- Underlying Asset involved in the deal
- Basket Reference number involved in the deal
- Expiry Date of the series
- Additional information about the instrument pertaining to the instrument itself, or the underlying asset, the physical settlement of the deal or the money settlement of the deal is displayed in the Standard field.
- On the Liquidation Deals screen, click Settlements.
- On the Settlements screen, specify settlement details.
The settlement accounts are the accounts, which will be impacted (debited/credited) for settling the liquidation gains and losses. For more information, refer to the Settlements User Manual.
- On the Liquidation Deals screen, click Charges.
- On the Charge Details screen, specify charge details.
You can specify the charges that should be levied on every LQ deal that is booked in the ETD module. The charge components linked to the deal product will be defaulted to the LQ deal.
You can choose to recover the charges either from the Broker or the Portfolio Customer.
During liquidation, the relevant accounting entries are passed based on the accounting entry set-up for the deal product.
- On the Liquidation Deals screen, click Events.
- On the Events Accounting Entries and Overrides screen, specify event details.
The charge components associated with the liquidation product will be defaulted to the deal. You can view the GL/SLs that will be impacted when accounting entries are posted for booking (EBOK) the liquidation deal through the Liquidation Events Accounting Entries and Overrides screen.
The accounting entries will be displayed along with the overrides that were encountered while processing the transaction.
- On the Liquidation Deals screen, click Advices.
- On the Advice screen, specify advice details.
The details of the advices applicable for an event are displayed in the Advices screen. The party ID to whom a specific advice should be sent is picked up automatically based on the Party/Advice mapping done for the counter party.
- On the Liquidation Deals screen, click Fields.
- On the Fields screen, specify field details.
You can view the UDFs only if you have maintained the same for the product involved in the deal.
You can add to the list of fields defaulted from the product but you will not be allowed to remove a field from the defaulted list.
You can change the values defaulted from the product to suit the deal you are processing.
For more details on defining custom fields in Oracle Banking Treasury Management, refer the User Defined Fields User Manual.
The list of fields and default values specified for the product to which the deal is associated is displayed.
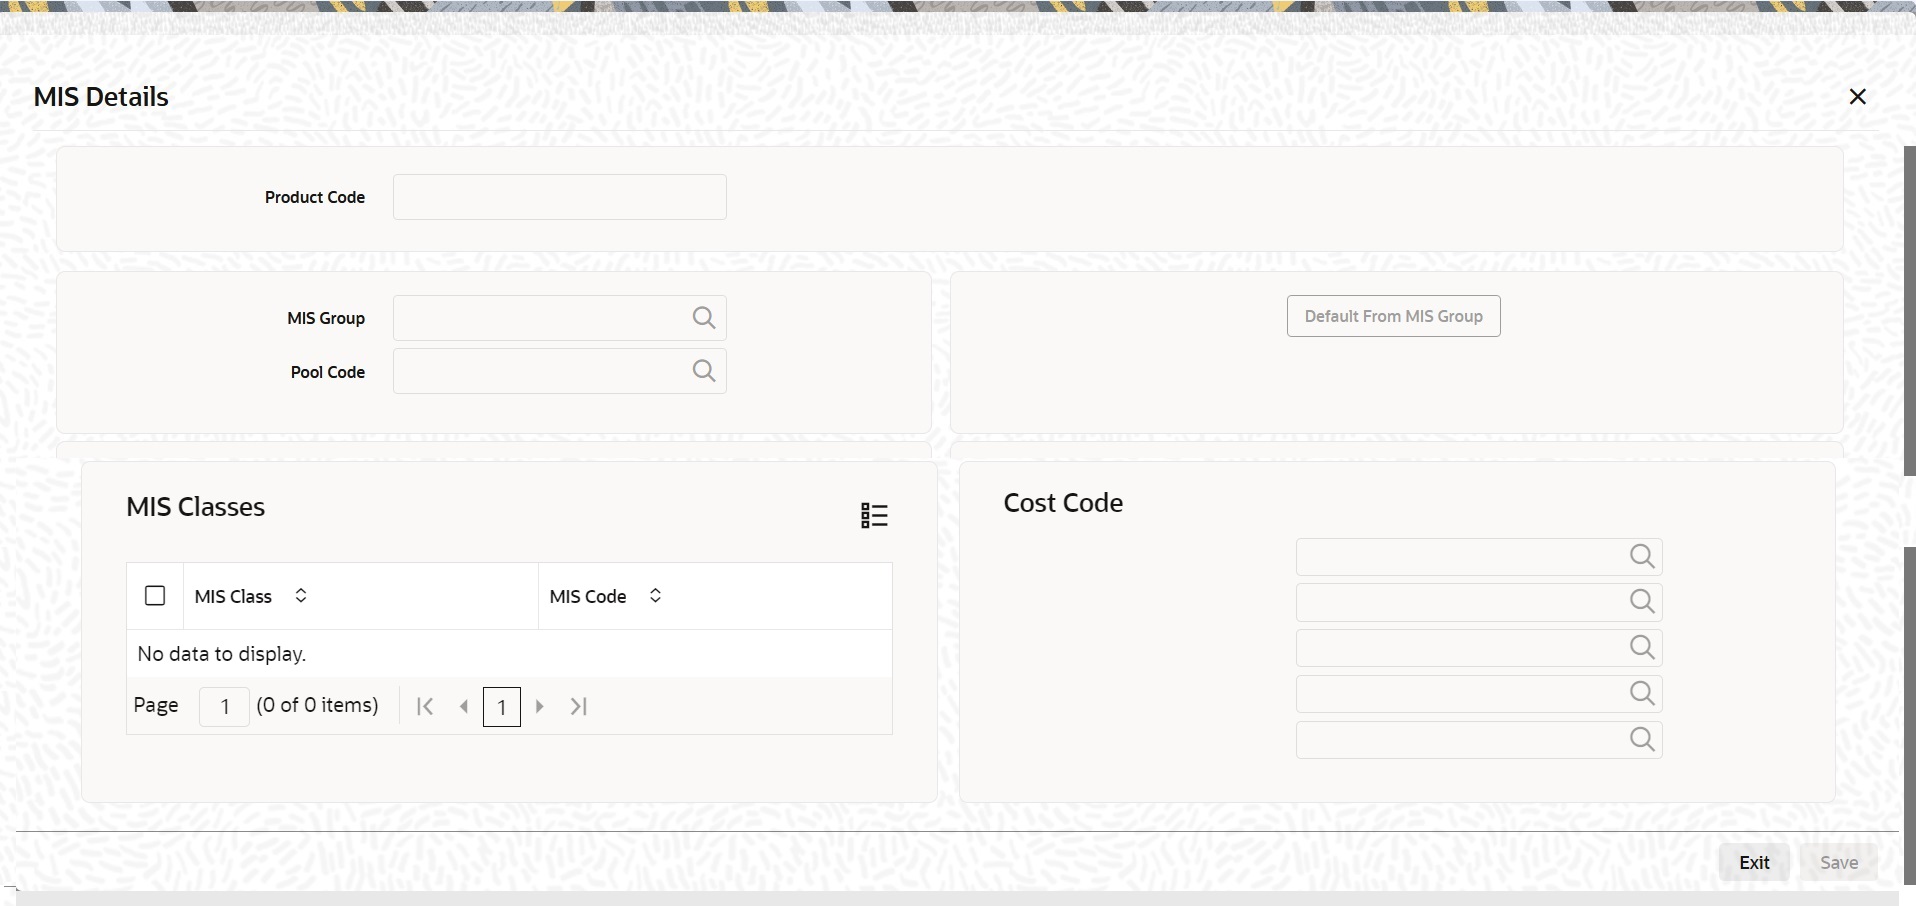
- On the Liquidation Deals screen, click MIS.The MIS Details screen is displayed
- On the MIS Details screen, specify MIS details.
You can choose to perform MIS Refinancing on a daily basis for all bill contracts, only if this option has been enabled in the Bank-wide Preferences screen. If the MIS refinancing has been set to a daily frequency, you have to indicate the refinance rate pick up specification through the transaction MIS sub-screen while processing the contract.
In this screen, the transaction type of MIS class, the cost code and pool code are picked up from the product under which the deal is processed. The composite MIS code is picked up from the definition made for the customer, on behalf of whom the deal is being processed.
You have to indicate whether the system should pick up the MIS Rate associated with the pool linked to the contract or whether you would like to maintain a rate specific to the contract. You can indicate your choice by selecting any one of the following options:
- Pool Code – indicating that the MIS Rate maintained for the pool code should be used for refinancing.
- Contract Level – indicating that you would like to maintain a specific MIS Rate for the particular contract.
Refer the MIS User Manual for more details on maintaining MIS related information for a product and contract.
- On the Liquidation Deals screen, click Brokerage.
- On the Brokerage screen, view brokerage details.
For further information on the Brokerage screen, refer to the section on Brokerage in the Long and Short Deals in this chapter.
- On the Liquidation Deals screen, click Holiday Preferences.
- On the Holiday Preferences screen, specify the details as required.
For more Information on Holiday Preferences, see the section Holiday Preferences section.
Parent topic: Liquidation Deals

