8.3.1 Maintain an Event Accounting Entries and Advices Class

This topic describes the systematic instructions to maintain event accounting entries and advice class.

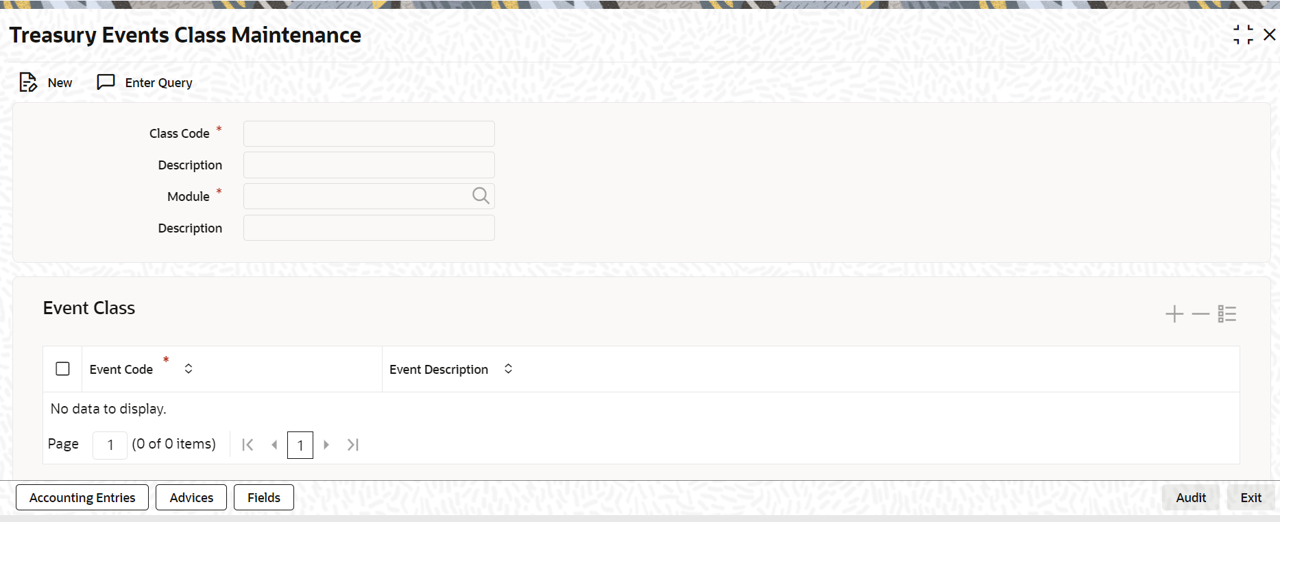
An Events Class is identified with a unique Code and a Description. When you define an Events Class, you choose, first of all, the set of events that would belong to the class. Events are, usually, unique to a module. For instance, events like Securities Purchase from Long Position and Accrual of Securities Discount Earned are specific to Portfolios in the Securities module. Therefore, to build an Events Class that you would associate with a service offered in the Securities (Portfolio) module, choose the event from a list of events specific to the Securities (Portfolio) module. The events that you would like to include in an Events Class can be identified through the Events Accounting Entries and Advices Class Maintenance screen. This screen is invoked from the Application Browser.

  1. On the Home page, specify CSDTREVM in the text box, and click next arrow.

    Treasury Event Class Maintenance screen is displayed.

    Description of ecm_accounting_enttries.png follows
    Description of the illustration ecm_accounting_enttries.png
  2. On the Treasury Event Class Maintenance screen, specify the fields.

    For every event constituting the class being built, you have to specify the accounting entries that should be passed (if any), and the advice that should be generated.

  3. On the Event Class Maintenance screen, click Accounting Entries.

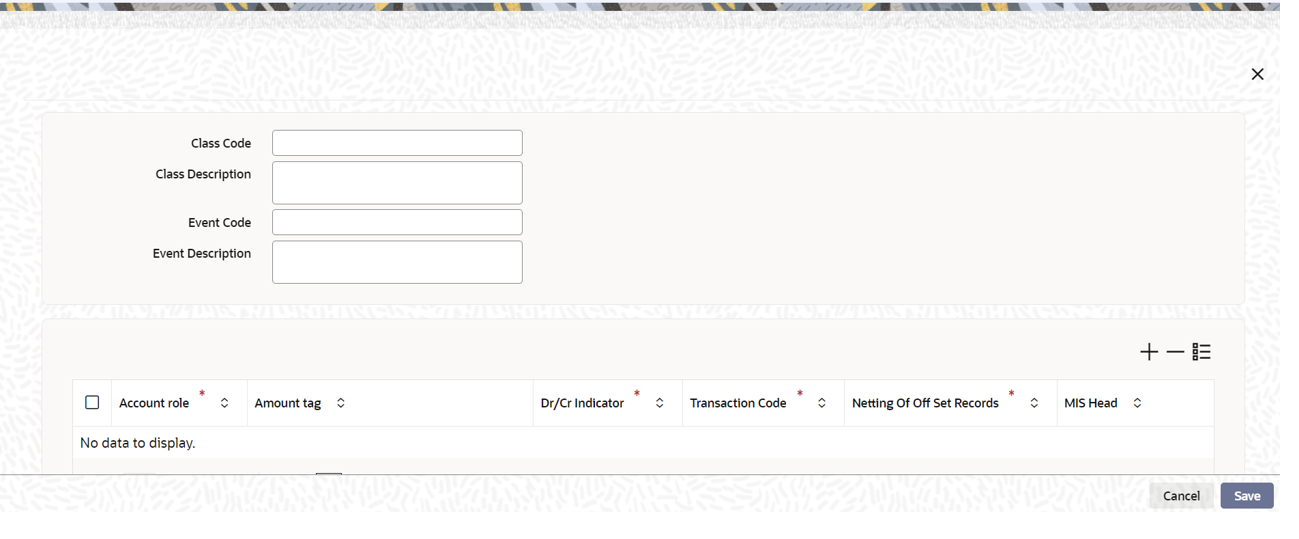
    Accounting Entries screen is displayed.

  4. On the Accounting Entries screen, specify the fields.

    As part of the Accounting Entry details of an event, you should specify the following details:

    • The accounting role
    • The amount item
    • If a debit or a credit
    • The transaction code
    • If the entries are to be netted
    • The MIS Head

    If accounting entries are to be passed for an event, you have to indicate the different Accounting Roles. At an event in the life cycle of a deal, involving a product to which you associate the class, the appropriate entries will be passed, under the specified Accounting Roles.

    Table 8-3 Accounting Entries - Field Description

    Field Description

    Specifying the Amount Tag

    Choose a tag by double-clicking on it.

    The amount (i.e. the principal, the brokerage, the charge amount, etc.) that is to be posted for an event, is referred to as the Amount Item. The tag associated with an Amount Item is the Amount Tag. Process a list of the number of tags that are maintained in the Amount Tag field.

    Choose a tag by double-clicking on it.

    Indicating if a debit or credit

    Choose the Debit or Credit indicator.

    You have already specified the type of account to which an entry should be passed, and the tag which identifies the amount (principal, brokerage, the charge amount, etc.) that should be passed. In this field, you must indicate if the amount is to be debited from credited to the specified account.

    Choose the Debit or Credit indicator.

    Transaction Codes

    Every accounting entry in Oracle Banking Treasury Management involves a Transaction Code that describes the nature of the entry. This code and its description are available whenever you retrieve contract information in reports such as the Transaction Journal. The transaction code must be indicated in this field. Click the adjoining option list icon, to invoke a list of the transaction codes that are maintained. Double click on the Code that you would like to enter in this field.

    The Transaction Code for both legs of the transaction would be the same.

    Netting

    Click the add icon confirms the association of an accounting role with the corresponding Amount Tag, Transaction Code, MIS Head, and the Debit/Credit and Netting indicators. If you would like to disassociate a role from the other details, click the delete icon.

    If two or more accounting entries for a particular event are to be passed to the same account and on the same Value Date, these entries can be netted while posting to the account. Specify whether such entries should be netted in this field by choosing either the Yes or the No indicator.

  5. On Events Class Maintenance fields, click Advice.

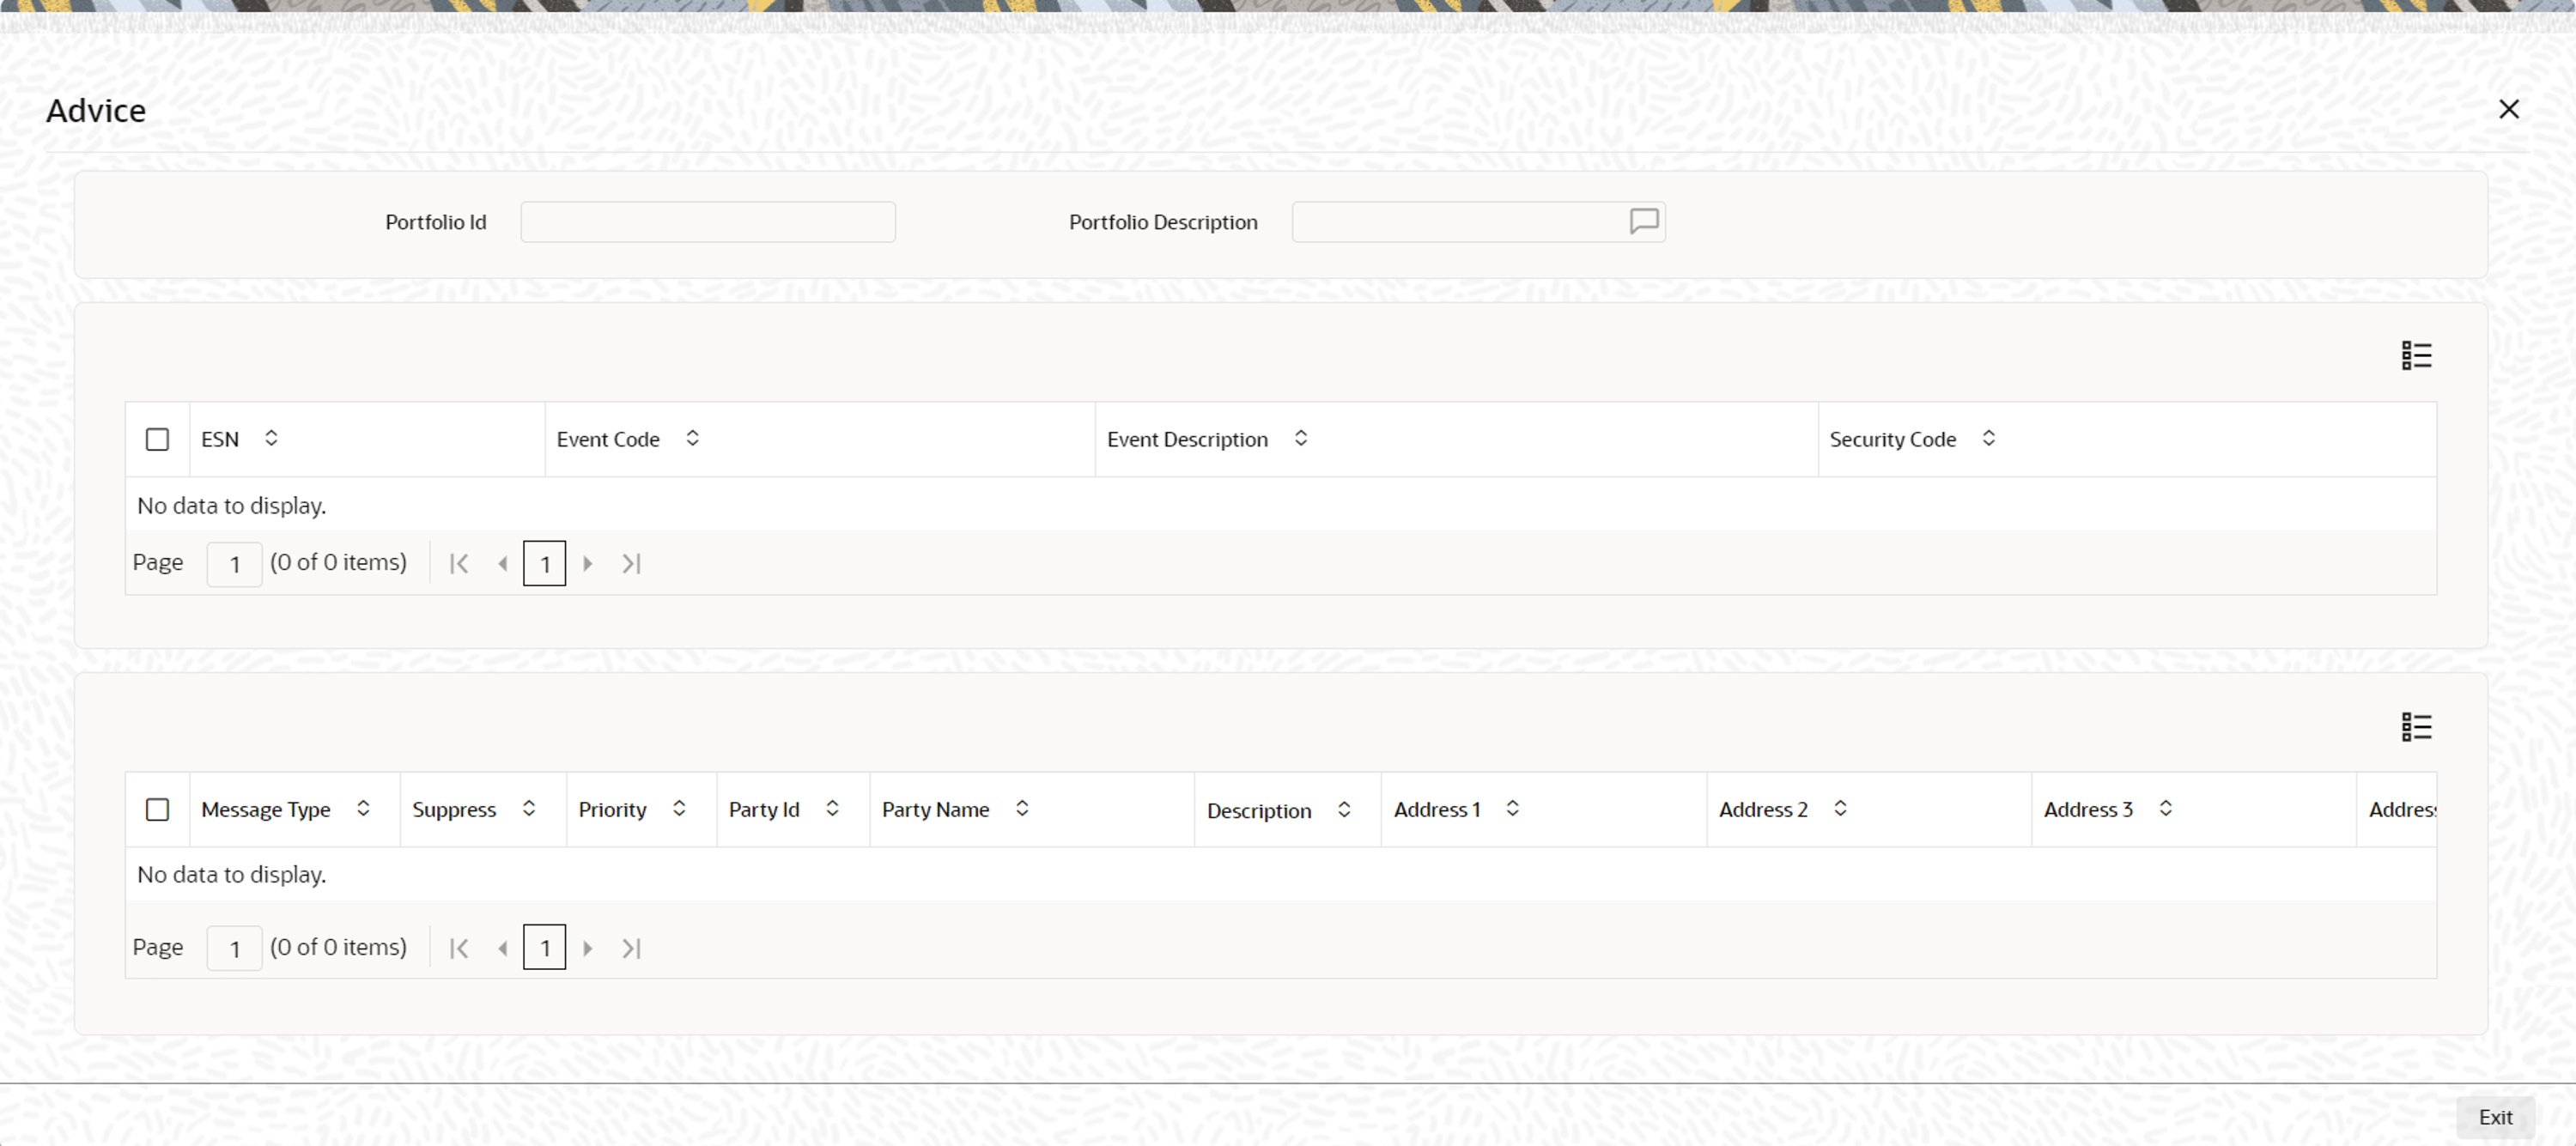
    Advice screen is displayed.

  6. On the Advices screen, specify the fields.

    Table 8-4 Advice screen - Field Description

    Field Description

    Indicating the Advices to be Generated

    Define the advices that you would like to generate for an event, in the Advice Name column.

    Indicating when the Advice is to be Generated

    You now need to indicate when the advice that you have chosen needs to be generated. To do this, you have to choose either the Input or the Authorize option from the Generation Time Field. You can also set the priority with which the advice should be generated. To suppress advice, choose the Yes option in the Suppress column.