- Procedures User Guide
- Getting Started with Oracle Banking Treasury Management
- Application Toolbar
- Execute User Actions
1.4.5 Execute User Actions
This topic describes the systematic instructions to execute the user actions.
Oracle Banking Treasury Management allows you to execute certain user actions from the Application Browser.
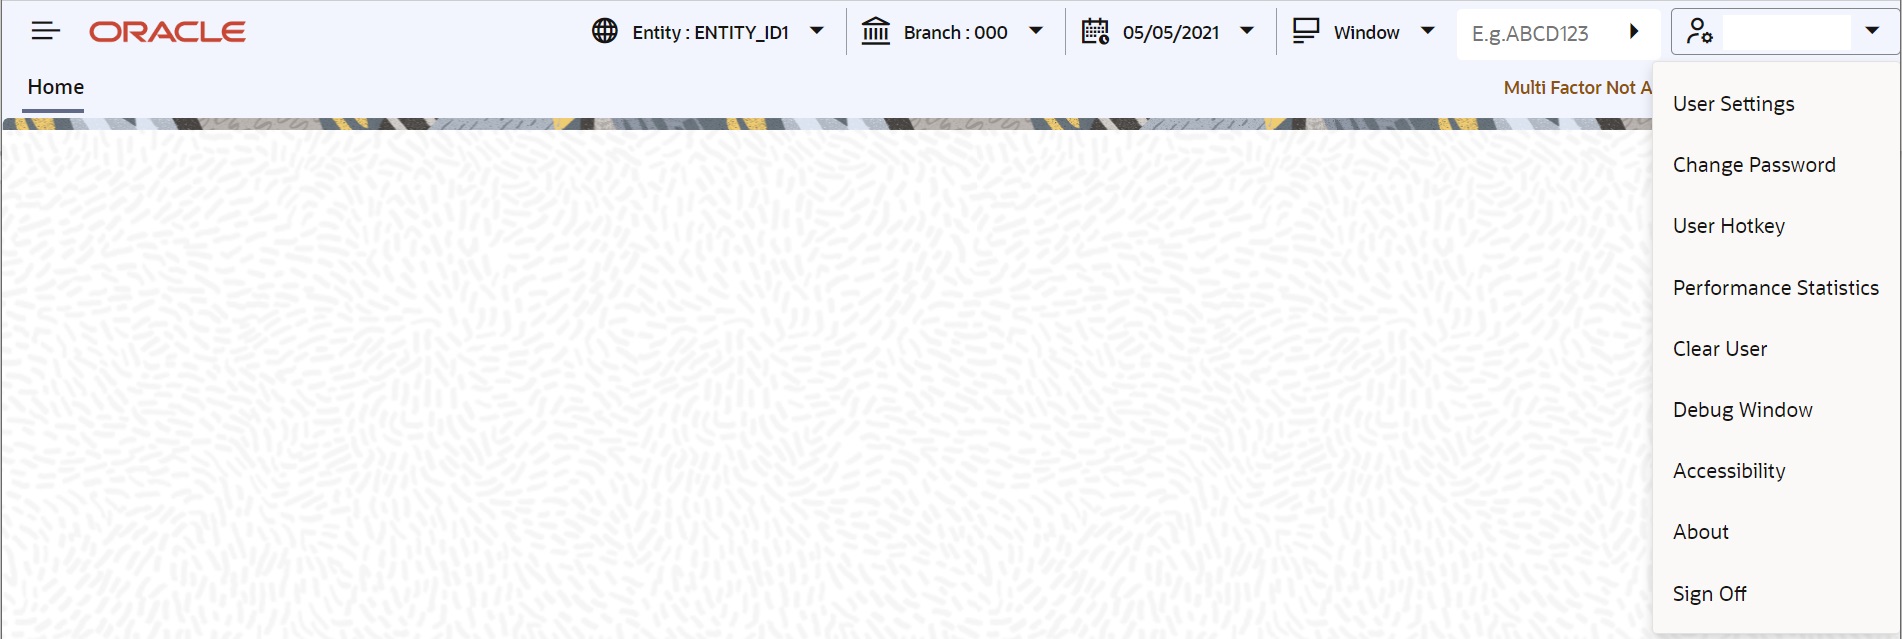
- On the application toolbar, mouse over the logged user name.The drop-down list displays.You can perform the following user actions:
- User Hotkey
- User Settings
- Change Password
- Performance Statistics
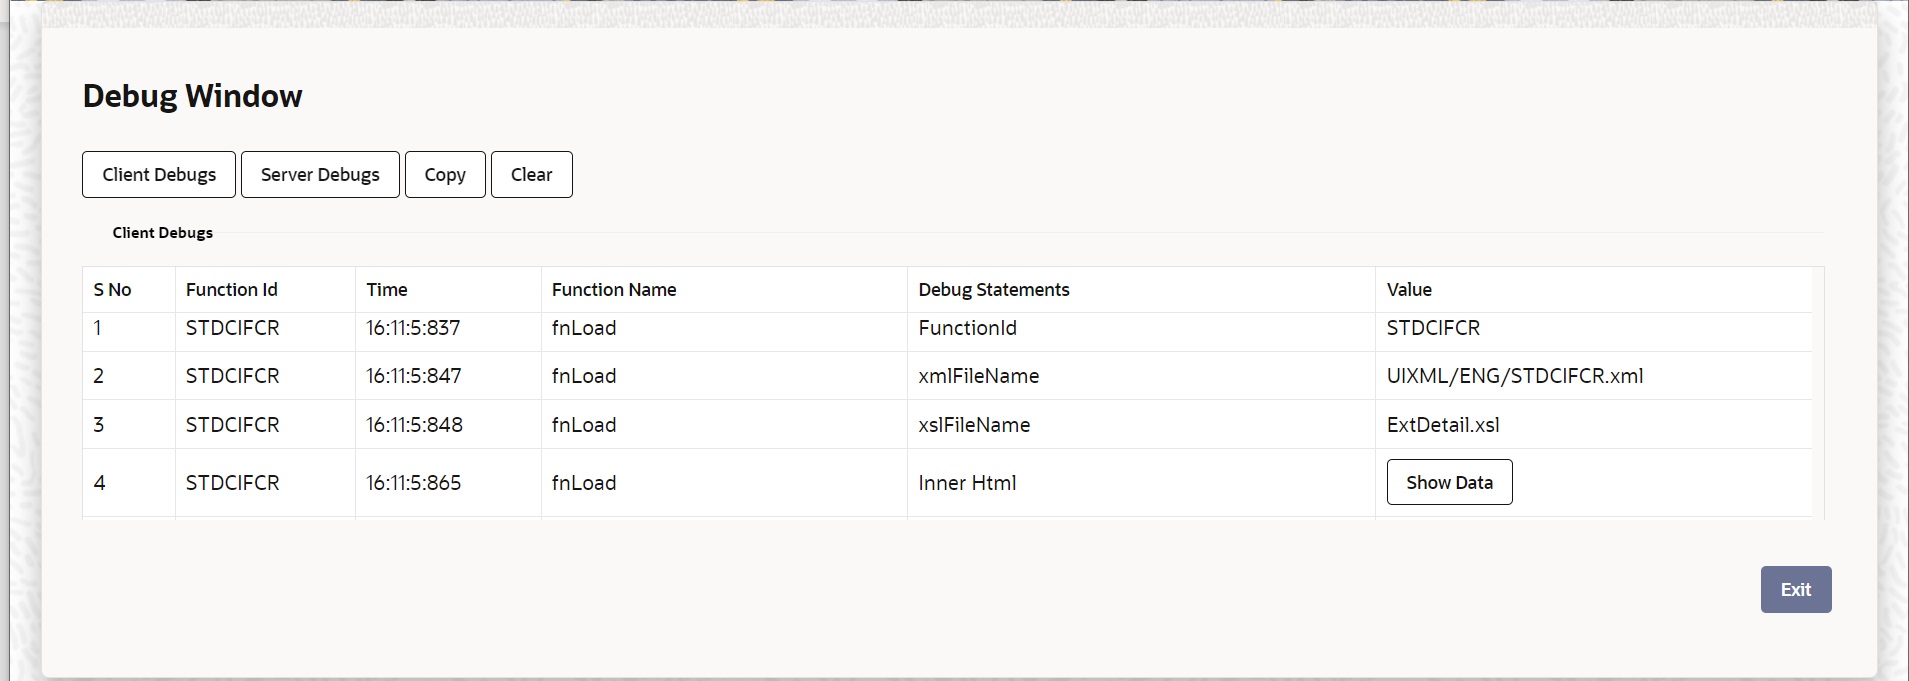
- Debug Window
- Clear User
Parent topic: Application Toolbar
1.4.5 Set User Hotkey
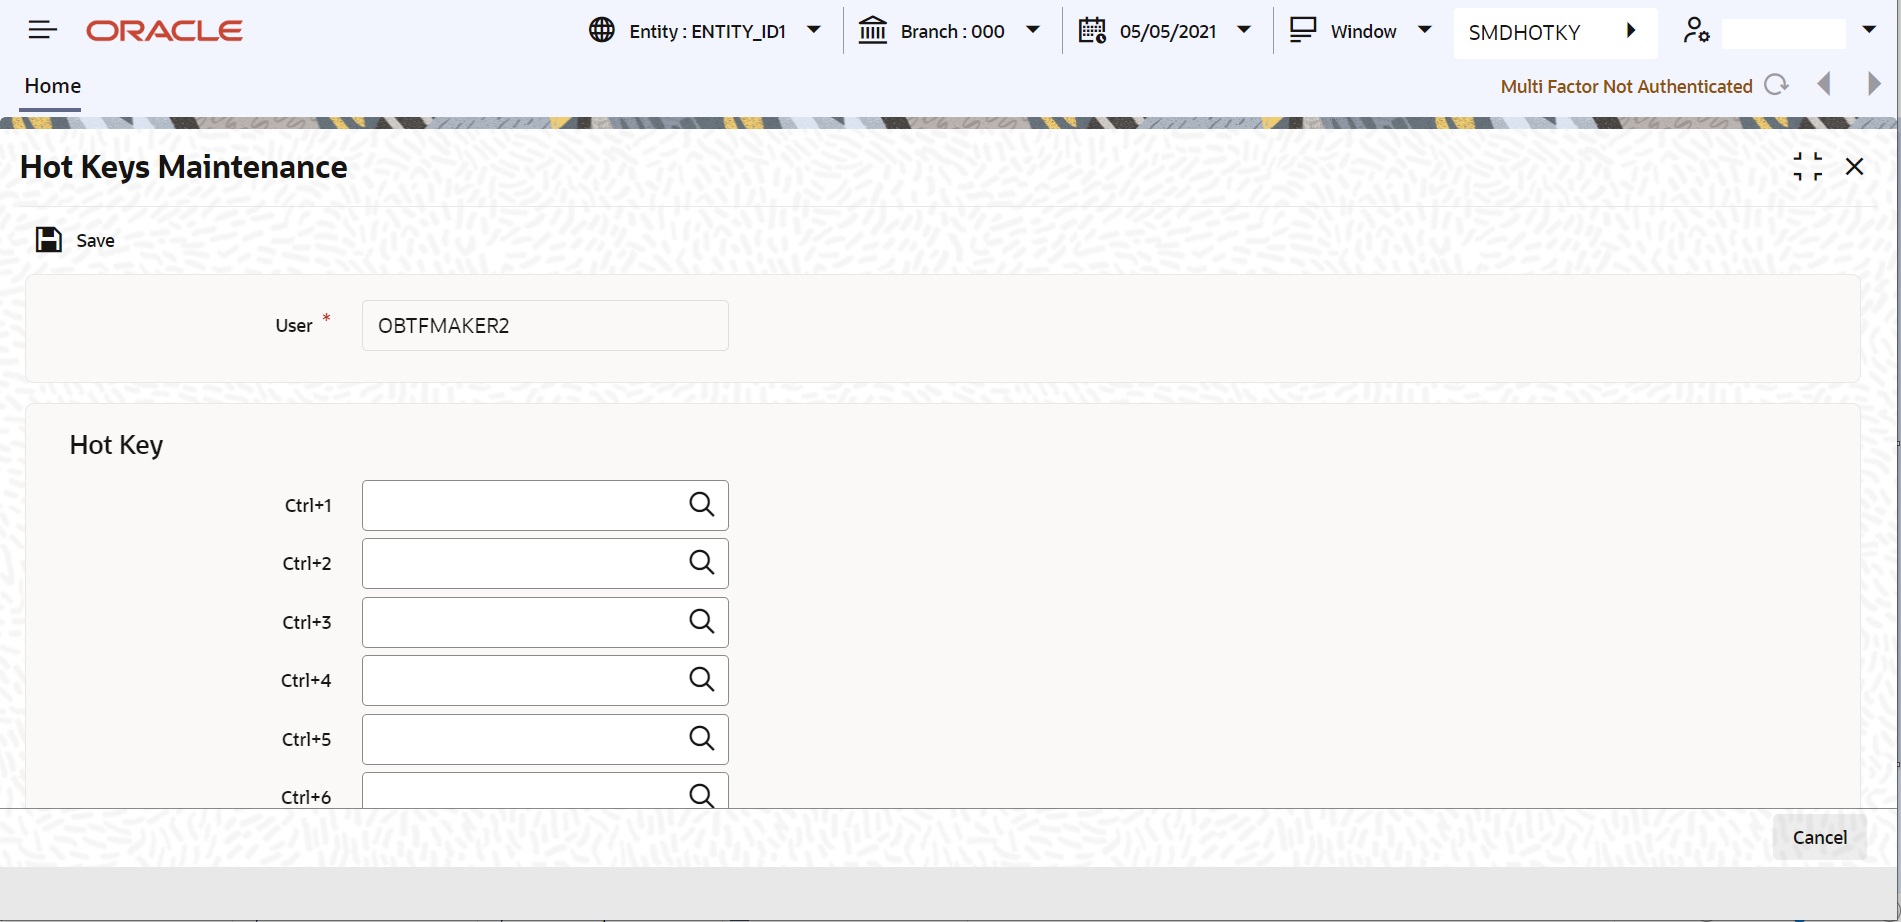
Oracle Banking Treasury Management allows you to configure hotkeys or shortcut keys for specific function IDs that are frequently used. Once you configure such hotkeys, you can launch a specific screen using the hotkeys set for the corresponding function ID. You need to map each required function ID to a hotkey using the Hot Key Maintenance screen.
- Click the User Hotkey option from the
User Action or type
SMDHOTKY in the text box, and click next.The Hot Keys Maintenance screen displays.
- On Hot Keys Maintenance screen, specify the
fields.For more information on fields, refer to the field description table.
Note:
The fields which are marked in red asterisk are mandatory.Table 1-3 Hot Keys Maintenance - Field Description
Field Description User The system displays your user ID. The hotkeys configured using this screen will be applicable to the user ID displayed here. Hot Key You can map a function ID against each hotkey. The option list displays all valid function IDs available in Oracle Banking Treasury Management. You can choose the appropriate one. - Click the Exit button to close the screen.
1.4.5 User Settings
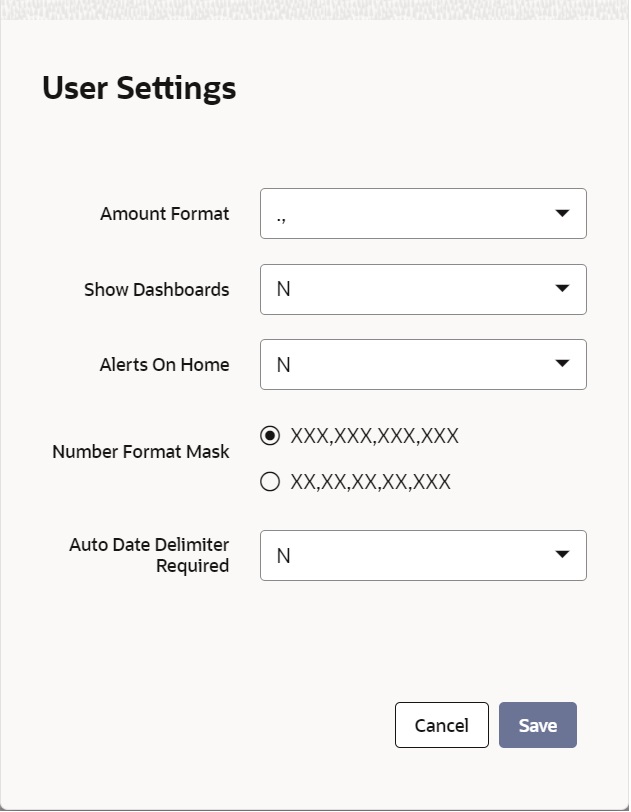
- Click the User Settings option from the User Action screen.The User Settings screen displays.
- On User Settings screen, specify the fields.For more information on fields, refer to the field description table.
Table 1-4 User Settings -Field Description
Field Description Amount Format Specify the amount format. Choose the appropriate one from the drop-down list. Date Format Specify the date format. Choose the appropriate one from the drop-down list. Font Size Select the font size from the drop-down list. The system displays the following values: - Medium
- Small
- Large
Theme Specify the theme. Choose the appropriate one from the drop-down list. The system displays the following values: - Cadet Green
- Glaucous Dark
- Sepia
Show Dashboards Select an appropriate option to view the Dashboards assigned to you on the landing page, from the adjoining drop-down list. This list displays the following values: - N – Select if you do not want to view the Dashboards.
- Y – Select if you want to view the Dashboards.
Alerts On Home Select an appropriate option to view the Alerts on the landing page, from the adjoining dropdown list. This list displays the following values: - N – Select if you do not want to view the Alerts.
- Y – Select if you want to view the Alerts.
Screensaver Intervals (in seconds) The system defualts the screensaver interval based on the value maintained at the SMS Bank Parameters Maintenance screen. However, you can modify it. Number Format Mask Select the number field format of mask number either in Million or in / Lakh from the following options: - XXX,XXX,XXX,XXX
- XX,XX,XX,XX,XXX
Auto Date Delimiter Required Select an appropriate option to view the Auto Date Delimiter on the landing page, from the adjoining dropdown list. This list displays the following values: - N – Select if you do not want to view the Auto Date.
- Y – Select if you want to view the Auti Date.
Note:
Once you have set your preferences, click Save button to apply the changes. The changed value for the screensaver interval gets reflected in User creation screen. To exit the screen without changing the preferences, click Cancel button.The system does not support the screensaver functionality if SSO is enabled.
1.4.5 Change Password
Oracle Banking Treasury Management allows you to change the user password at will.
- Click the Change Password option from the
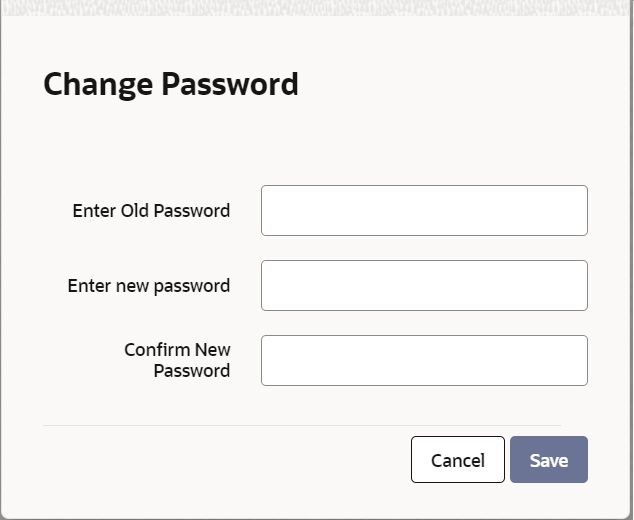
User Action.The Change Password screen displays.
- On Change Password screen, specify the fields.For more information on fields, refer to the field description table.
Table 1-5 Change Password - Field Description
Field Description Enter Old Password Specify the current user password. Enter New Password Specify the new user password. Confirm New Password Specify the new user password again. The system will match it with the new password entered in the Enter New Password field. - Click the Save button, Once you have entered the
above details.On a successful password change, the system logs you out. You need to log in to the system again using the new password.
1.4.5 Performance Statistics
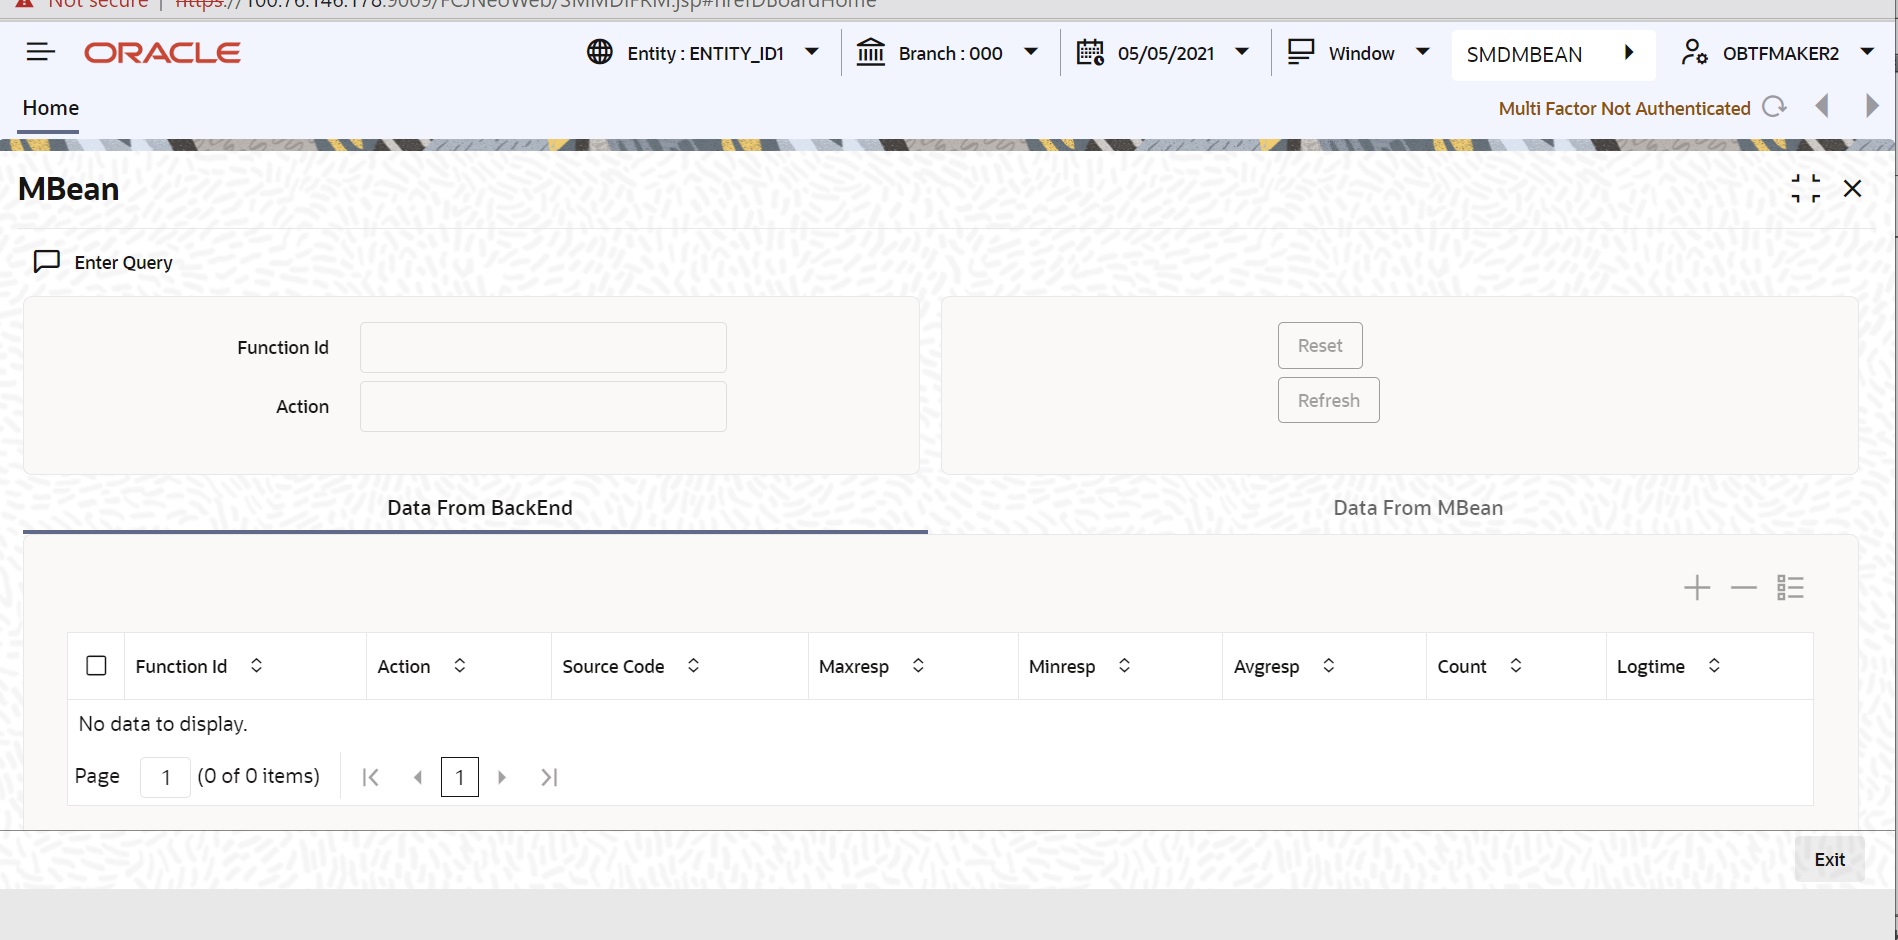
You can view the performance statistics for function IDs and actions using
MBean screen. The MBean screen
displays the information available in the server (MBean) and the information from
the database.
- Click the Performance Statistics option from the
User Action or type
SMDMBEAN in the text box, and click next.The MBean screen displays.
- On MBean screen, specify the fields.For more information on fields, refer to the field description table.
Table 1-6 MBean - Field Description
Field Description Function ID Specify the function ID of the screen whose performance you want to view. The system will display the performance statistics of the function ID specified here. Action Specify the action. The system will display the performance details of the above function ID for the action specified here. The system displays the following details based on the specified values:- Function ID – function ID of the screen
- Action – action performed for this function id
- Source Code - specify the source code
- Maxresp – maximum time taken for a particular action
- Minresp – minimum time taken for a particular action
- Avgresp – average time taken for a particular action
- Count – number of occurrences of a particular action
- Logtime – log time of the action
- Menu Options
- Click the Exit button to close the screen.
