- Customer and Accounts User Guide
- Account Structure
- Create Account Structure
9.1 Create Account Structure
This topic describes the systematic instructions to create or modify the account structure for a customer.
The user can configure charge funding account for structure level charges.
Specify User ID and Password, and login to Home screen.
- On Home screen, click Virtual Account Management. Under Virtual Account Management, click Accounts.
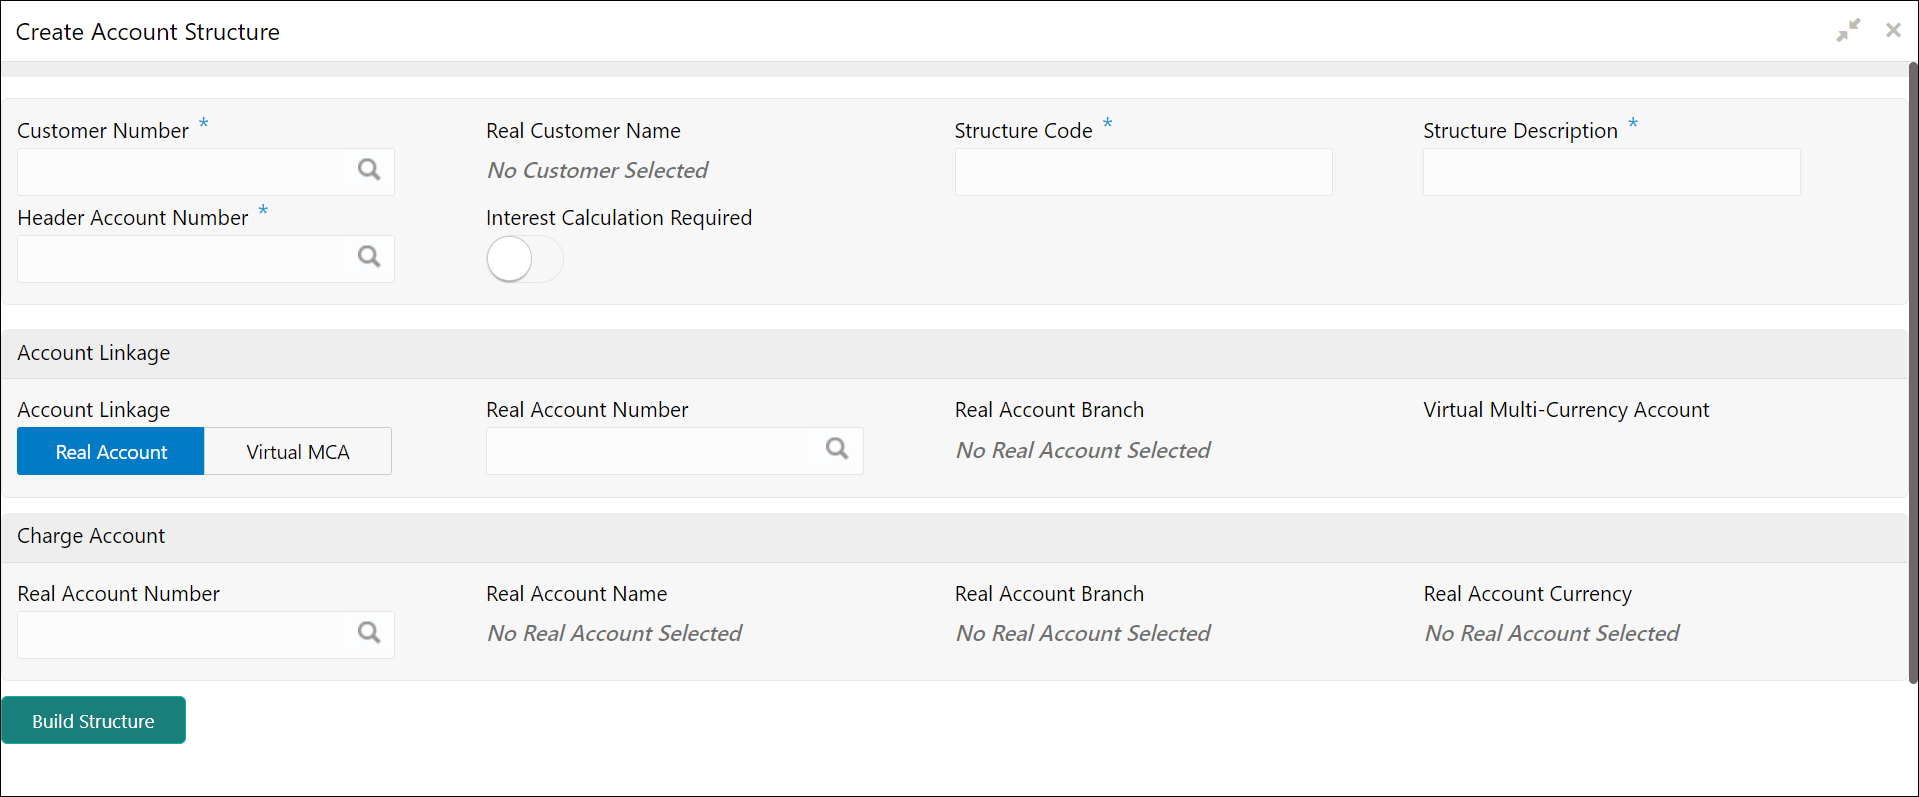
- Under Accounts, click Account Structure. Under Account Structure, click Create Account Structure.The Create Account Structure screen displays.
- Specify the fields on Create Account Structure screen.For more information on fields, refer to the field description table.
Note:
The fields, which are marked with an asterisk, are mandatory.Table 9-1 Create Account Structure – Field Description
Field Description Customer Number Click Search icon to view and select the required customer number. Real Customer Name Based on the Customer Number selected, the information is auto-populated. Structure Code Specify a code for the structure. A maximum length of eight alphanumeric characters are allowed.
Structure Description Specify additional information for the structure. Header Account Number Click Search icon to view and select the required header account number. This is the root node for the structure and is always a virtual account.
Interest Calculation Required If enabled, indicates the interest calculation required at the account structure level. Account Linkage Select one of the options below: - Real Account: If selected, the user can configure an account structure for a real account. The Real Account Number and the Real Account Branch are enabled to select the account.
- Virtual MCA: If selected, the user can configure an account structure for a virtual multi-currency account. The Virtual Multi-Currency Account is enabled to select the account.
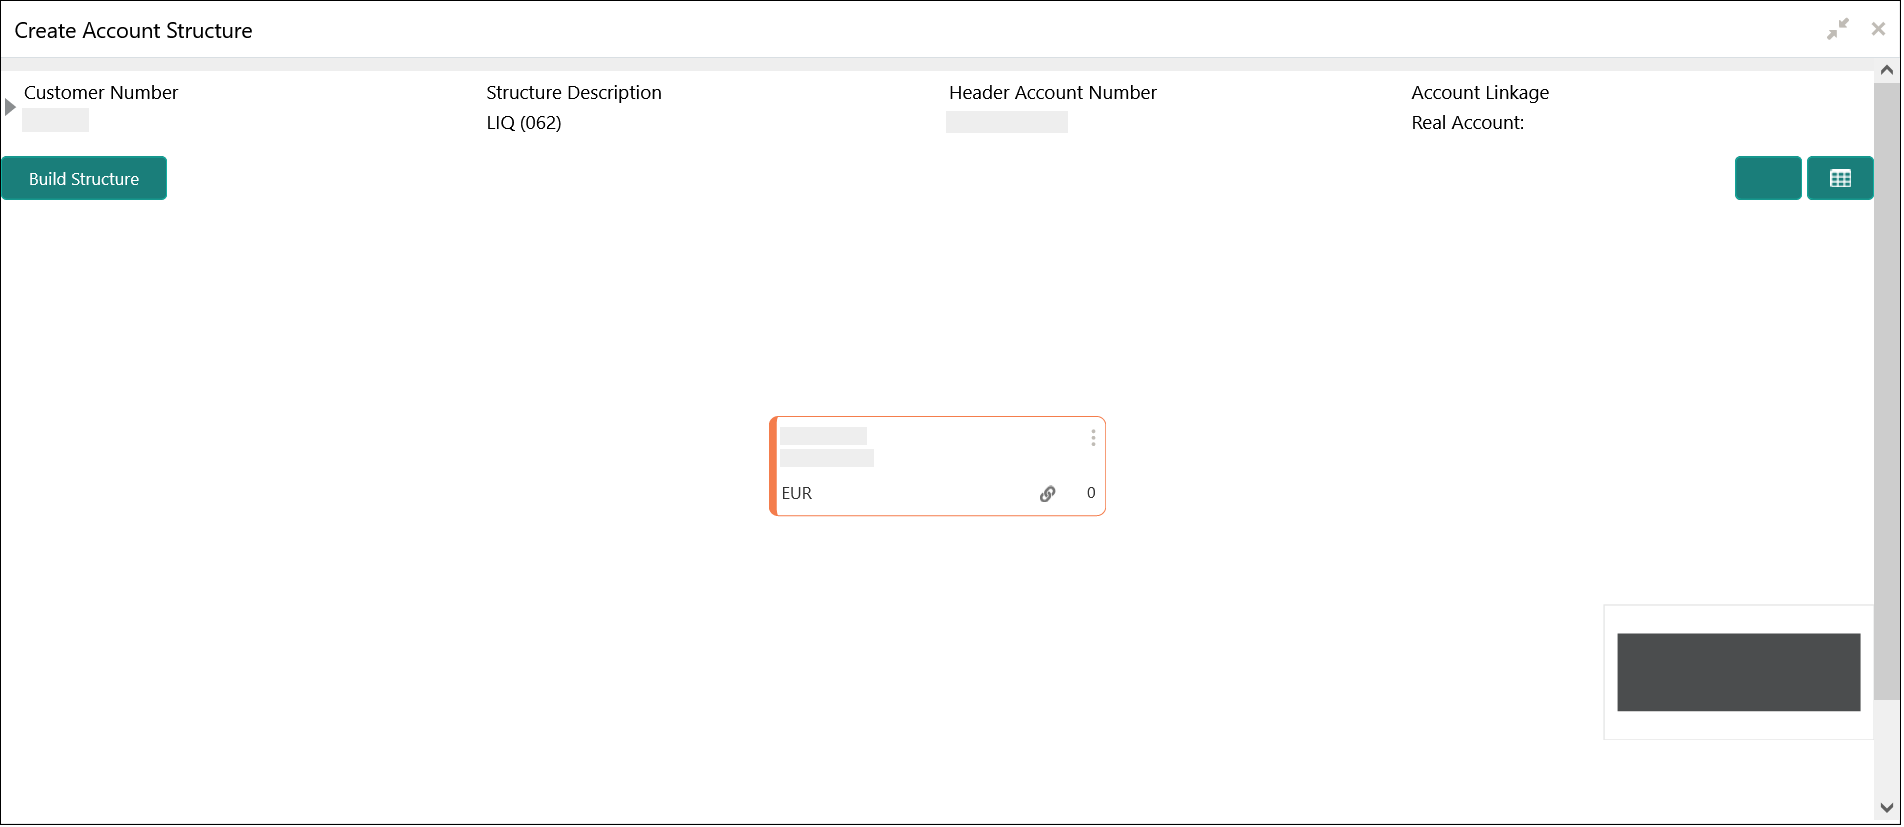
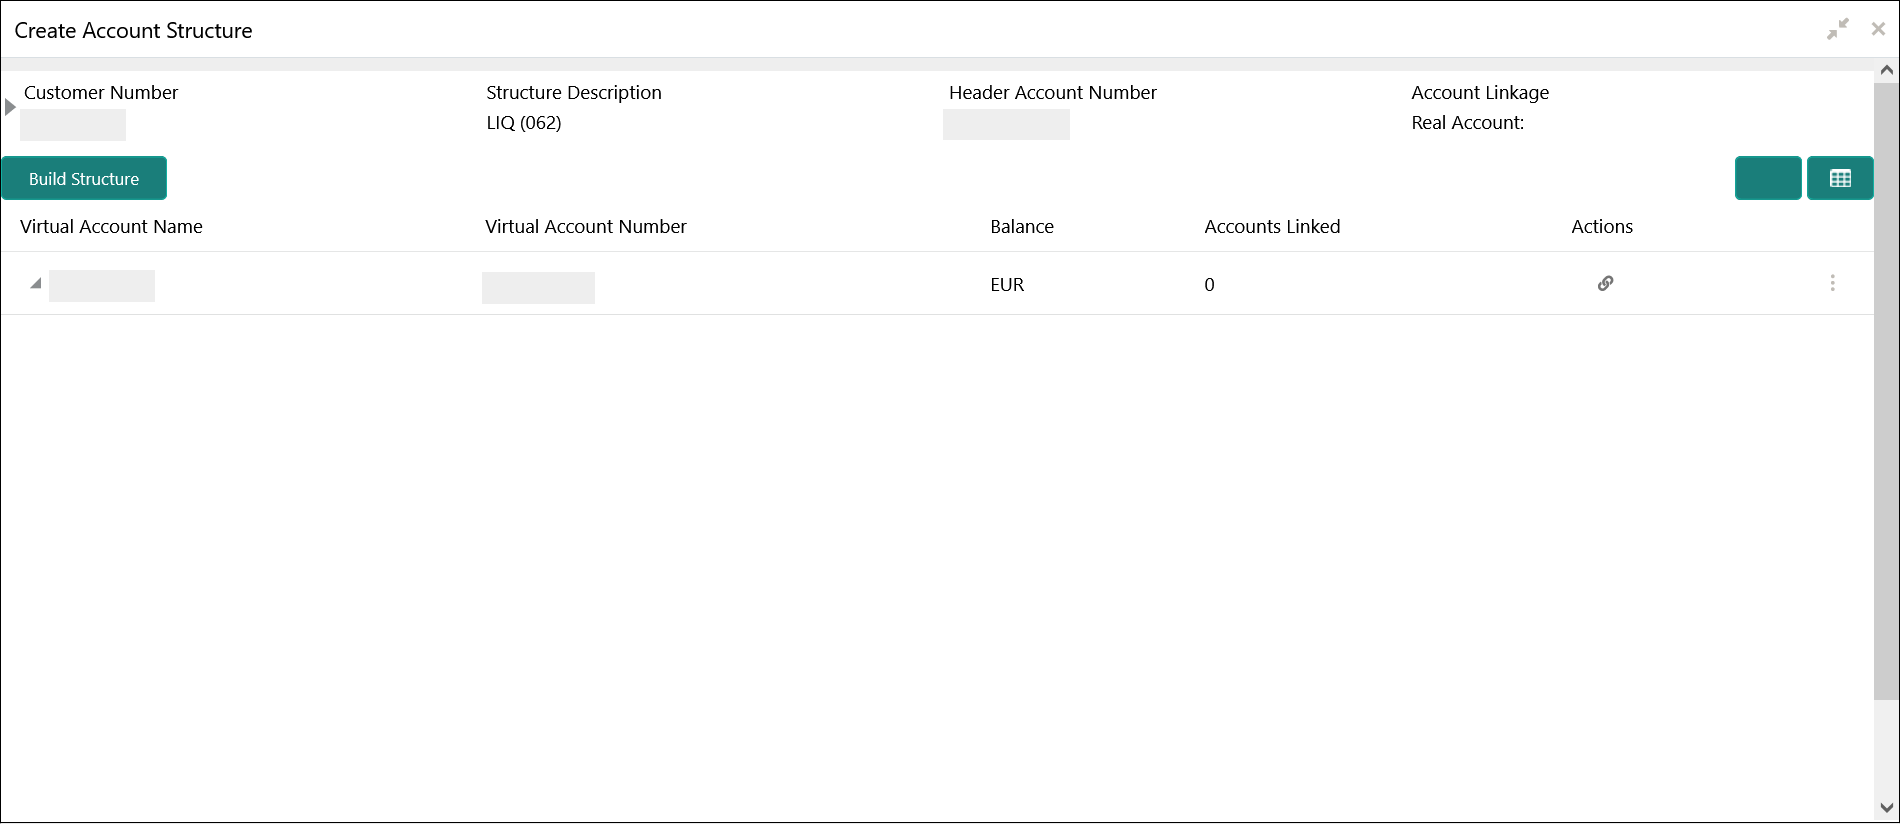
Real Account Number Click Search icon to view and select the required real account number. Real Account Branch Based on the Real Account Number selected, the information is auto-populated. Virtual Multi-Currency Account Click Search icon to view and select the required virtual multi-currency account. Real Account Number Click Search icon to view and select the required real account number. Real Account Name Based on the Real Account Number selected, the information is auto-populated. Real Account Branch Based on the Real Account Number selected, the information is auto-populated. Real Account Currency Based on the Real Account Number selected, the information is auto-populated. - Click Build Structure to define the account structure using Diagram View or Detail View.The selected Header Account Number displays as the first node.
Figure 9-2 Create Account Structure - Header Account Number
Diagram View
- For Diagram View, follow the below steps:
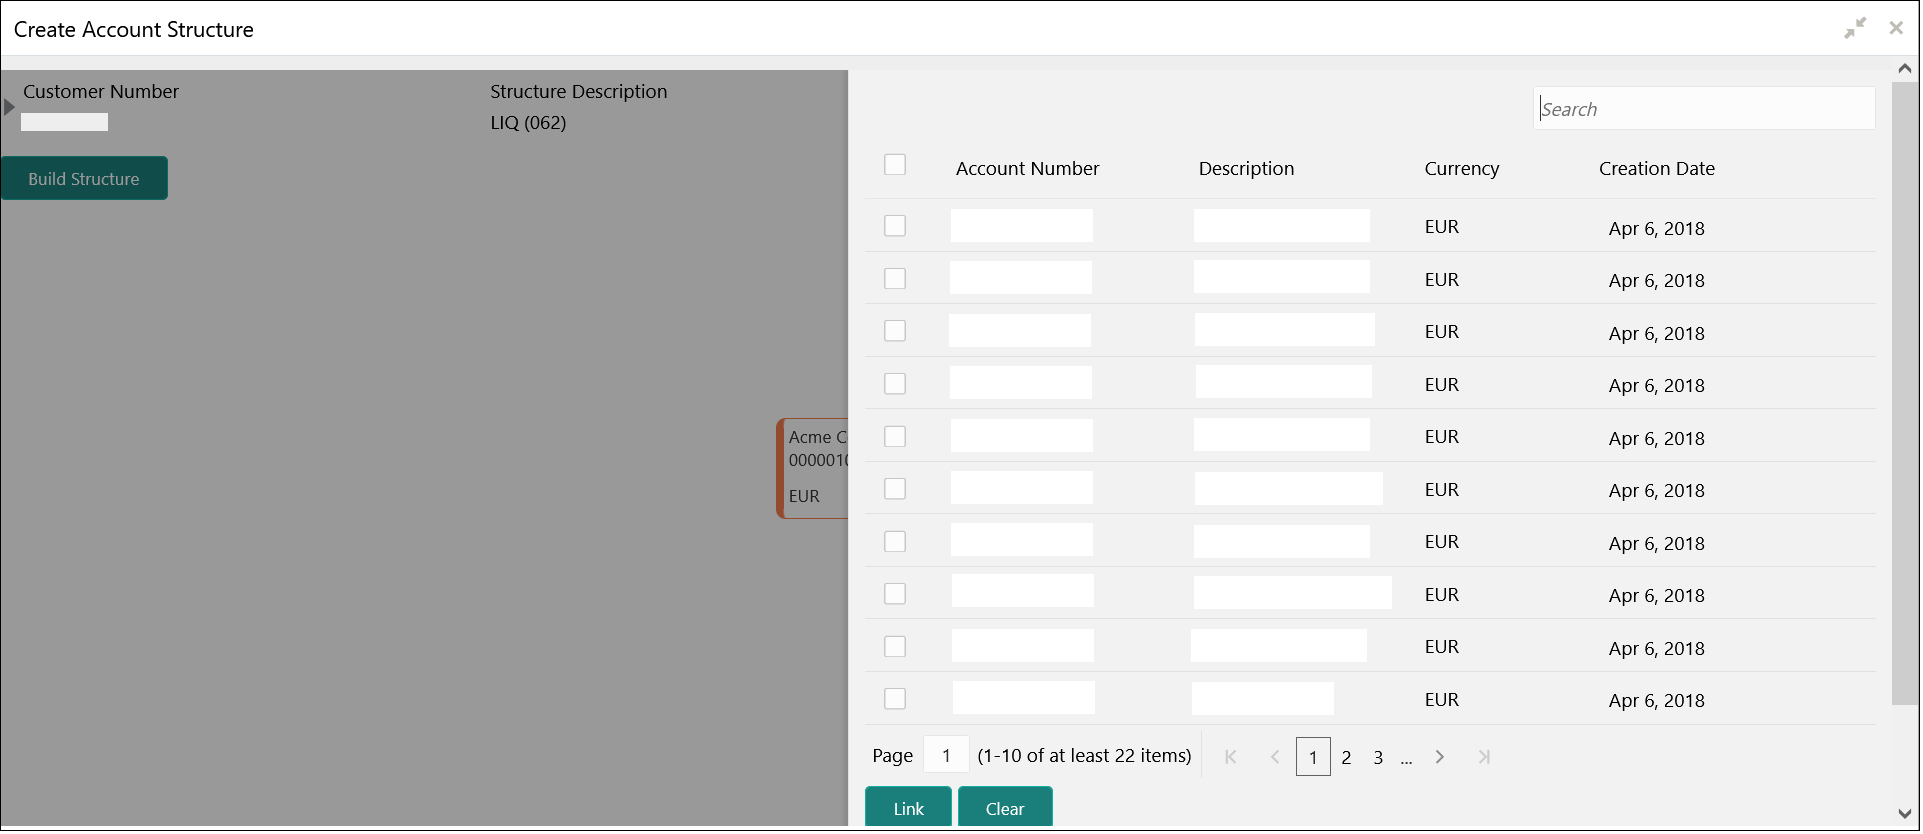
- Click on the Link button to link the virtual accounts to the structure.
Figure 9-3 Create Account Structure - Diagram View - Link Account
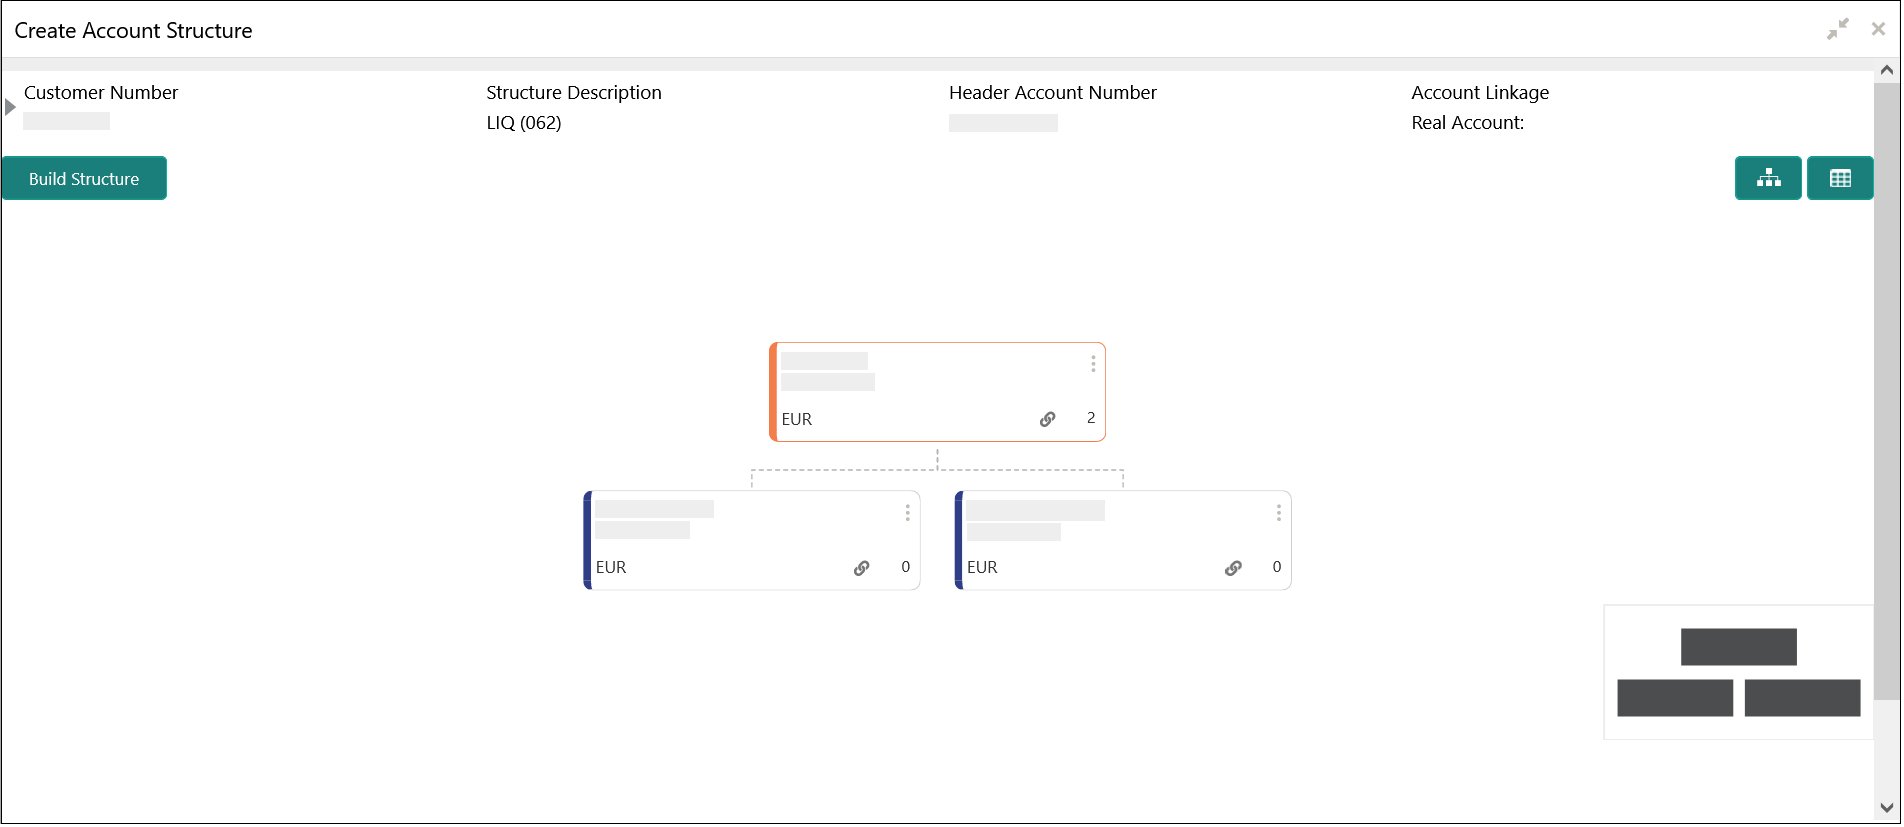
- Select the virtual account number from the list which needs to be linked and click Link.
Figure 9-4 Create Account Structure - Diagram View
- The user can select a node, click on three dots symbol, and click on Account Details to view more details of the account.
- The user can select a node, click on three dots symbol, and click on Undo Link to remove the newly added linkage before submitting the request.
- Click on the Link button to link the virtual accounts to the structure.
Detail View
- For Detail View, follow the below steps:
- Click Detail View to change the view and provide the details in a tabular format.
Figure 9-5 Create Account Structure - Detail View - Header Account Number
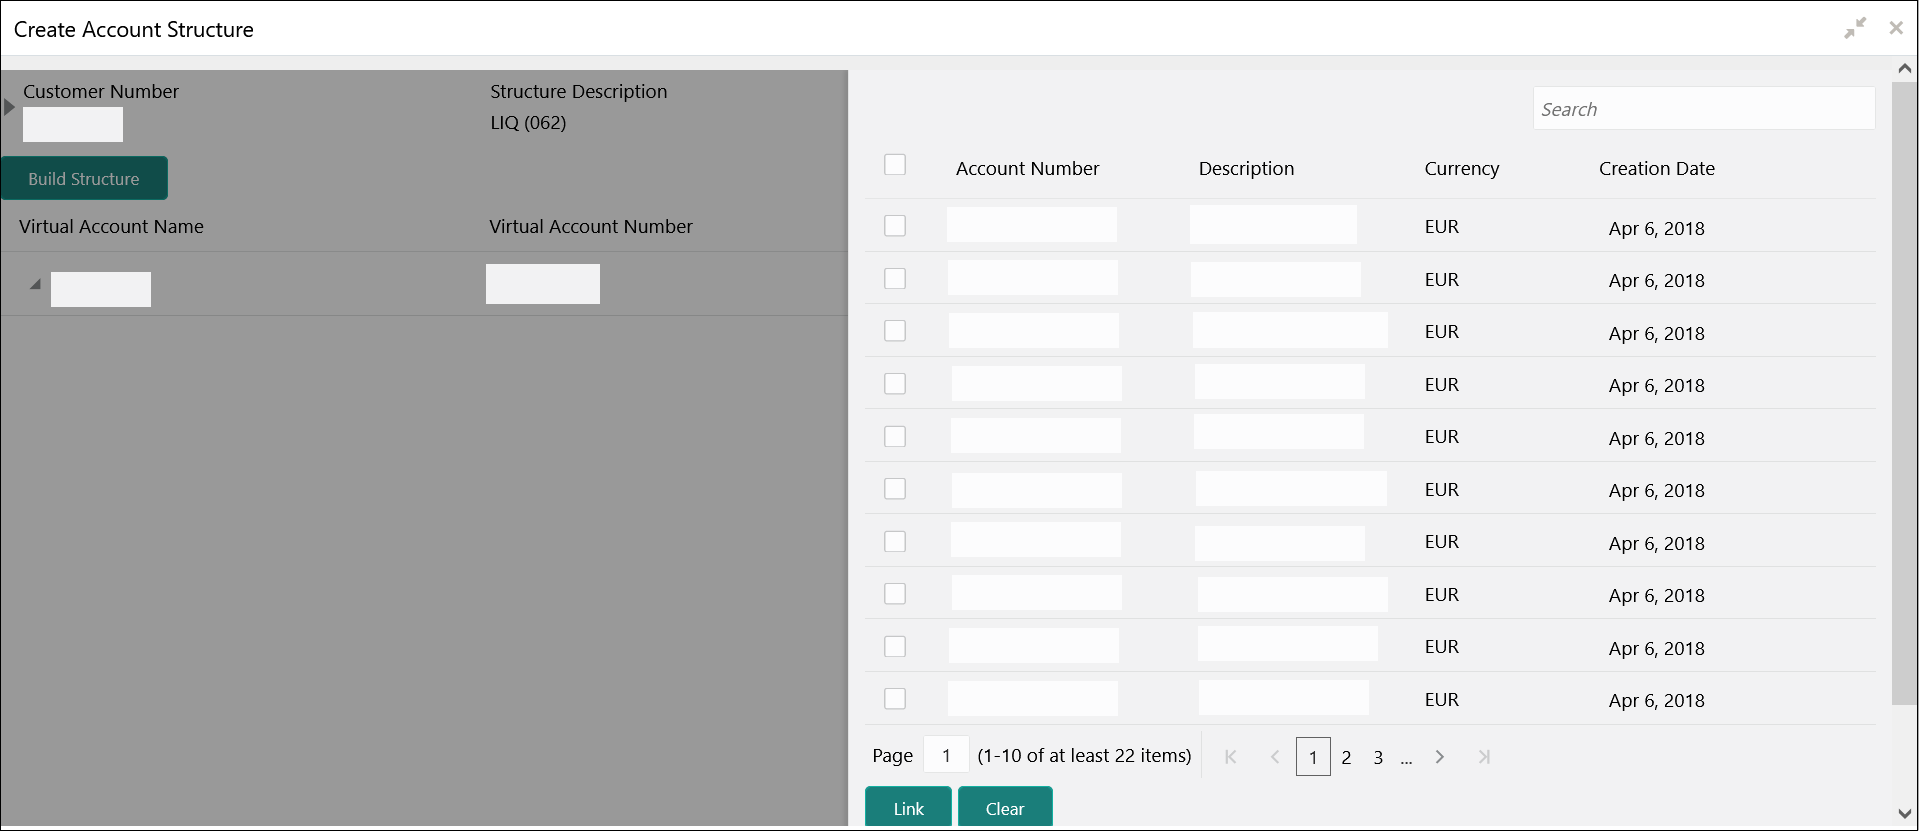
- Click Link button to link the virtual accounts to the structure.
Figure 9-6 Create Account Structure - Detail View - Link Account
- Select the virtual account number from the list which needs to be linked and click Link.
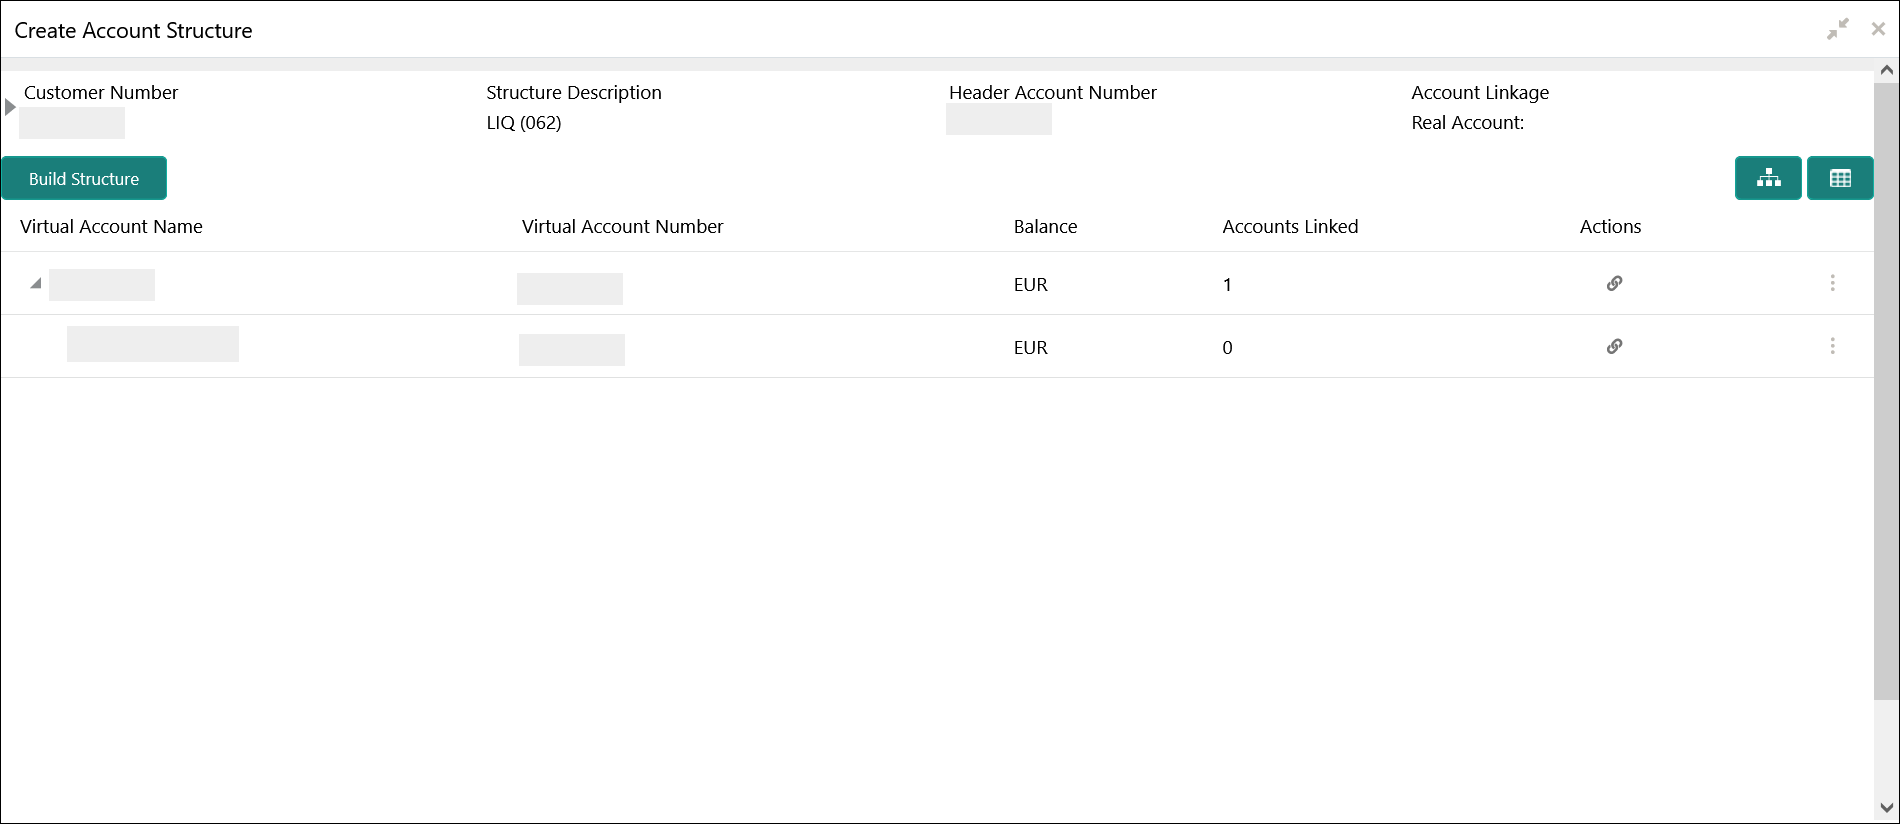
Figure 9-7 Create Account Structure - Detail View
- The user can select a node, click on three dots symbol, and click on Account Details to view more details of the account.
- The user can select a node, click on three dots symbol, and click on Undo Link to remove the newly added linkage before submitting the request.
- Click Detail View to change the view and provide the details in a tabular format.
- Click Export to download the account structure in .csv format.
Note:
The Account Structure displays in the Diagram View when all the available rows of the Detail View has relevant data. - Click Save to save the details.The user can view the configured account structure details in the View Account Structure.
Note:
Once the Virtual Account Structure is closed and authorized, the linked virtual accounts will automatically be delinked and will be available to be linked to a new or existing Virtual Account Structure. A closed Virtual Account Structure cannot be re-opened.
Parent topic: Account Structure
