- Transactions User Guide
- Transactions
- Internal Transfer
- Create Internal Transfer
2.2.1 Create Internal Transfer
This topic describes the systematic instructions to configure internal transfer from one virtual account to another within the structure mapped to the same account of the customer.
Specify User ID and Password, and login to Home screen.
- On Home screen, click Virtual Account Management. Under Virtual Account Management, click Transactions.
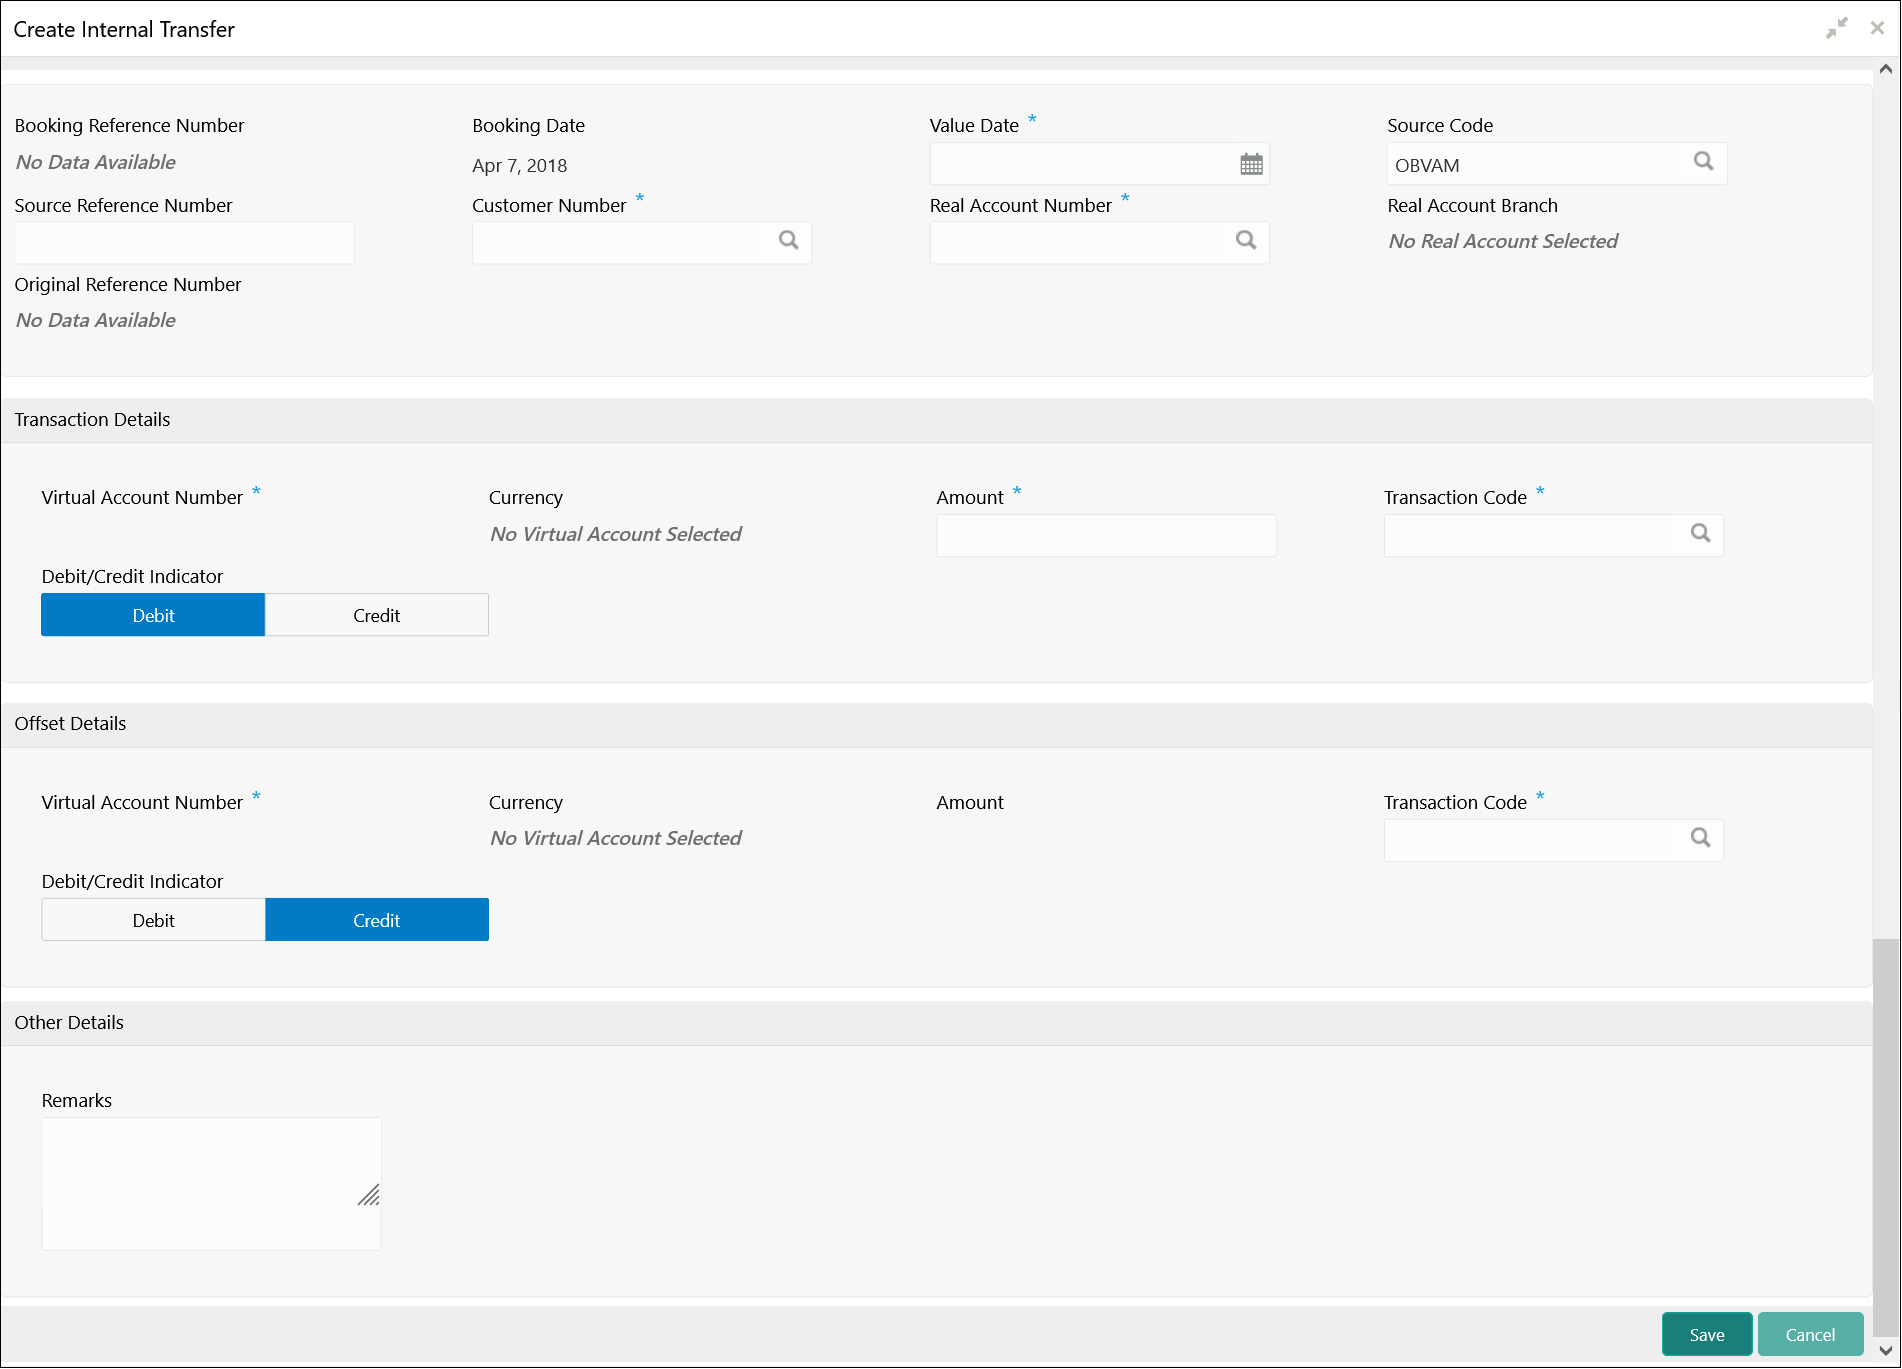
- Under Transactions, click Internal Transfer. Under Internal Transfer, click Create Internal Transfer.The Create Internal Transfer screen displays.
- Specify the fields on Create Internal Transfer screen.For more information on fields, refer to the field description table.
Note:
The fields, which are marked with an asterisk, are mandatory.Table 2-4 Create Internal Transfer – Field Description
Field Description Booking Reference Number The system generates the booking reference number. Booking Date By default, the application date is selected as the booking date. Value Date Click Calendar to select a value date from the drop-down calendar. Source Code Click Search icon to view and select the source code. Source Reference Number Specify the source reference number. Customer Number Click Search icon to view and select the customer number. Real Account Number Click Search icon to view and select the account number. Depending on the real account number selected, the associated virtual account number are populated in the Virtual Account Number fields of Transaction Details and Offset Details.
Real Account Branch Based on the Real Account Number selected, the information is auto-populated. Original Reference Number The system generates the original reference number. Virtual Account Number Click Search icon to view and select the virtual account number. Currency Based on the Virtual Account Number selected, the information is auto-populated. Amount Specify the amount. Transaction Code Click Search icon to view and select the transaction code. To create a new transaction code, refer to Transaction Code in the Oracle Banking Common Core User Guide. Debit/Credit Indicator Select one of the options to indicate if the transaction is debit/credit. Virtual Account Number Click Search icon to view and select the virtual account number. Currency Based on the Virtual Account Number selected, the information is auto-populated. Amount The system populates the amount entered in the Transaction Details. Transaction Code Click Search icon to view and select the transaction code. Debit/Credit Indicator Select one of the options to indicate if the transaction is debit/credit. If the Transaction Details is selected as Debit, the Offset Details is automatically selected as Credit. As both cannot be debit/credit.
Remarks Specify additional information about the internal transfer fund. - Click Save to save the details.The user can view the configured internal transfer details in the View Internal Transfer.
Parent topic: Internal Transfer
