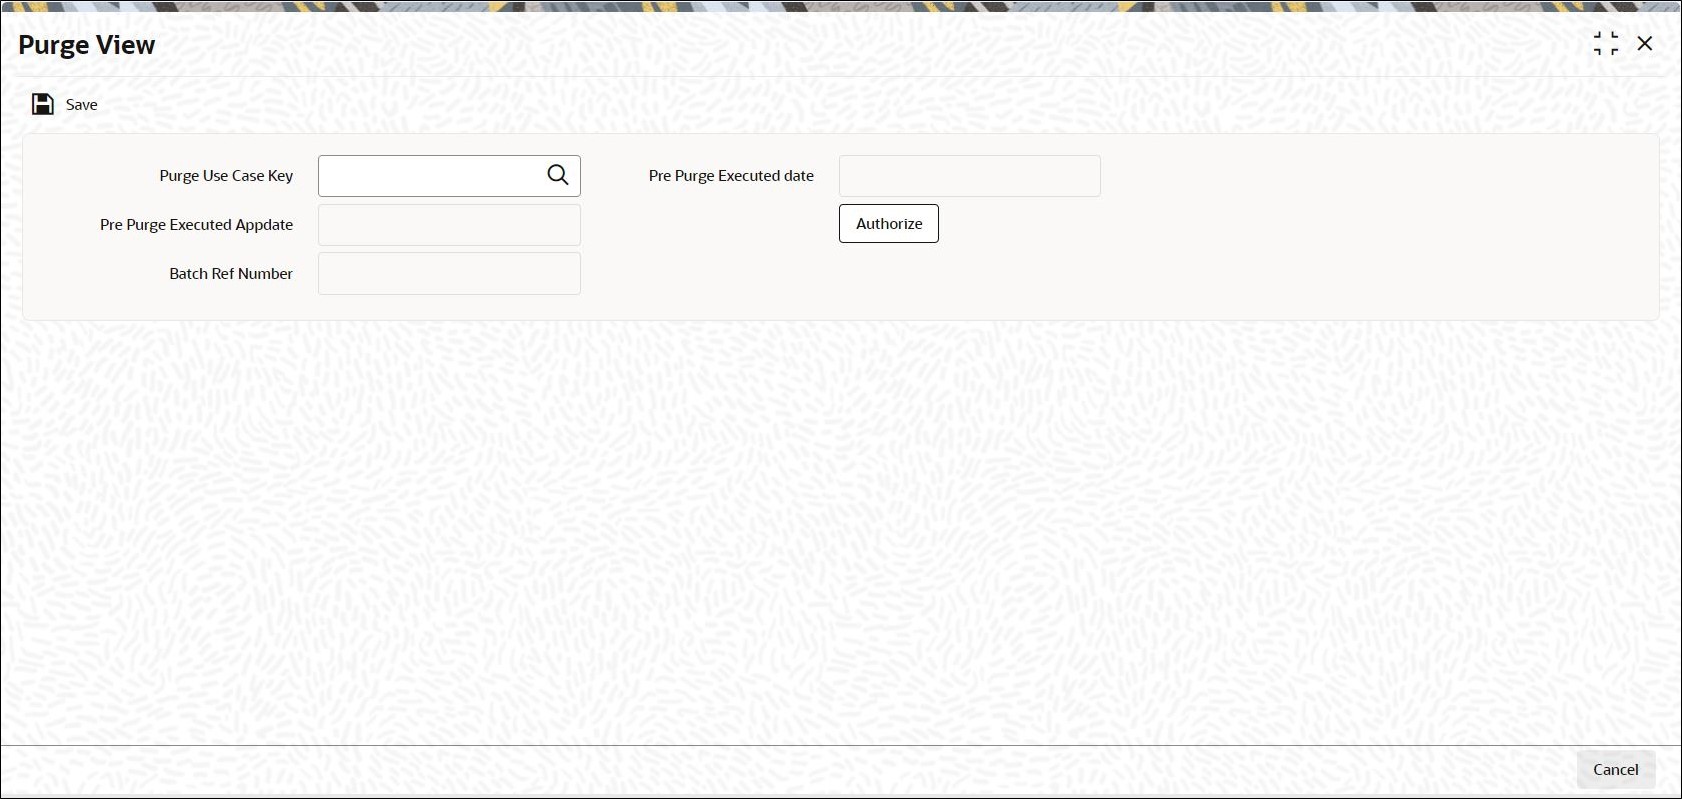
1.5 Process Purge View

This topic provides the systematic instructions to view the purge details.

You can authorize the pre-purge records. Once the record is authorized, the system will generate an interface file to verify the pre-purge records.
  1. On Home screen, type UTDPURVW in the text box, and click Next.
    The Purge View screen is displayed.
  2. On Purge View screen, click New to enter the details.
    For more information on fields, refer to the field description table.

    Table 1-3 Purge View - Field Description

    Field Description
    Purge Use Case Key

    Alphanumeric; 100 Characters; Optional

    Specify the purge use case key. Alternatively, you can select purge use case key from the option list. The list displays all valid purge use case key maintained in the system.

    Pre Purge Executed date

    Display

    The system displays the pre purge executed date based on the selected purge use case key.

    Pre Purge Executed Appdate

    Display

    The system displays the pre purge executed app date based on the selected purge use case key.

    Batch Ref Number

    Display

    The system displays the batch reference number.

  3. Click Authorize.
    The system will authorize the records. Once authorized, the system will purge/ archive record where validations are successful as per purge schedule.
  4. Extract a interface file in text format and place in the export file path.
    The interface file generated is extracted.
  5. Use this extract to pre-purge records to verify the data being purged.