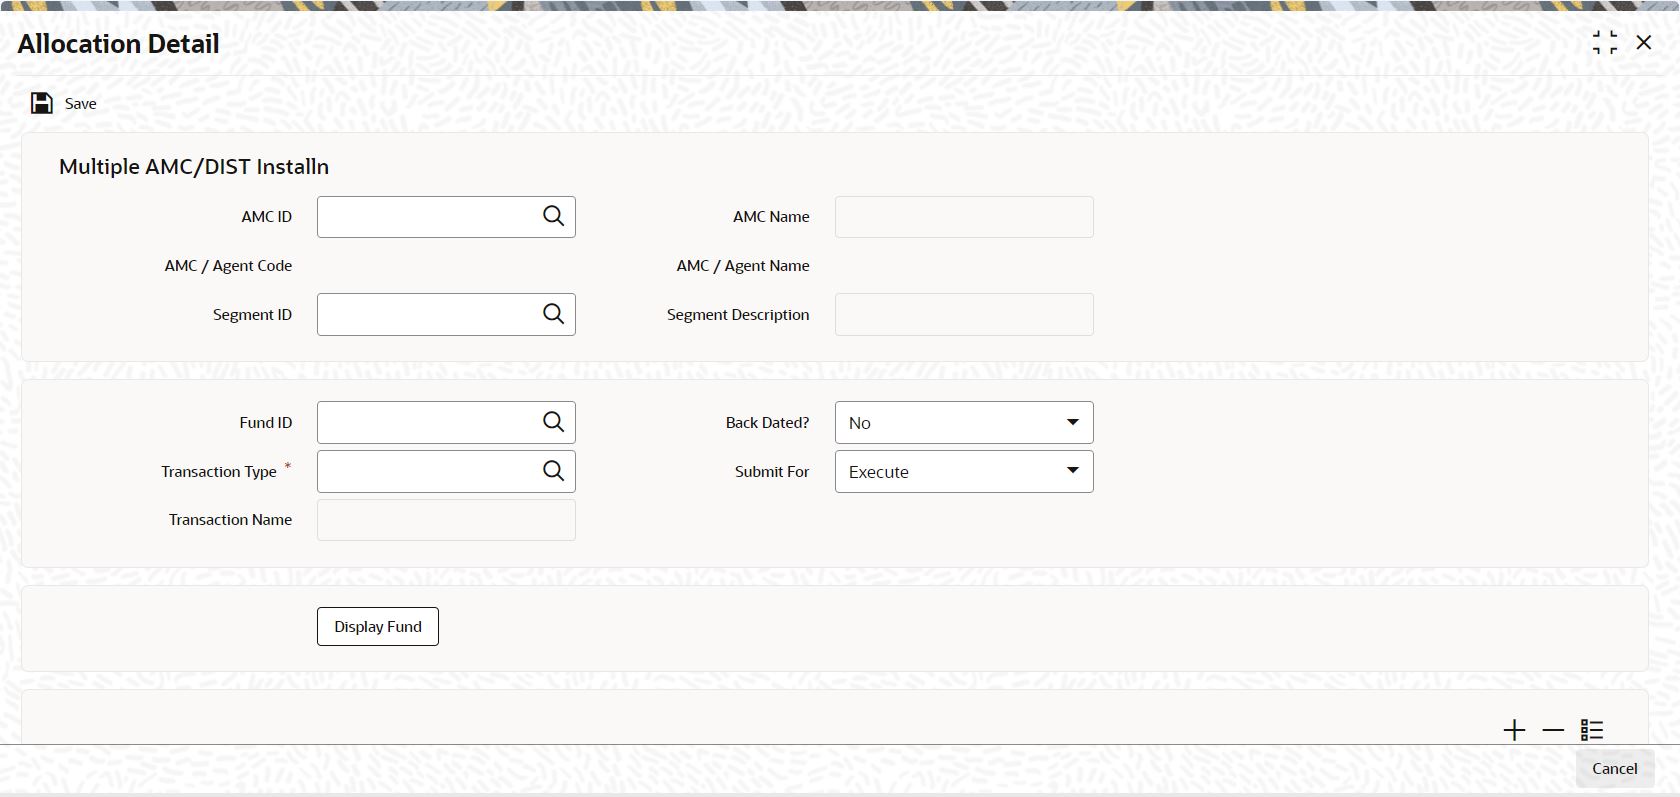
1.1.2 Trigger Manual Allocation through End of Day Menu
This topic provides the systematic instructions to initiate manual allocation of units.
- On Home screen, type UTDALLOC in the text box, and click Next.The Allocation Detail screen is displayed.
- Execute the allocation process manually for any type of transaction, for a fund or all funds by the operator at the Fund Manager component depending upon the necessity.
- Click the appropriate menu item from the End of Day menu category. In case of GTA Setup, Segment ID is mandatory whereas for Non-GTA setup either AMC code or Agent Code must be entered.
- You can trigger the allocation process in the Allocation Detail screen.The allocation process is initiated manually for any type of transactions. The type of transactions or funds can be as follows:
- For all transactions of all types for a specific fund, a selection of funds, or all funds.
- For a specific type of transaction for all funds, a selection of funds, or a single fund.
- For backdated transactions of all types in all funds, a selection of funds, or a single fund.
- For backdated transactions of a specific type in all funds, a selection of funds, or a single fund.
- On Allocation Detail screen, click New to enter the details.For more information on fields, refer to the field description table.
Table 1-1 Allocation Detail - Field Description
Field Description AMC ID Alphanumeric; 100 Characters; Mandatory
Specify the AMC ID. Alternatively, you can select the AMC ID from the option list. The list displays all the valid AMC ID maintained in the system.
AMC Name Display
The system displays the AMC name for the selected AMC ID.
AMC / Agent Code Specify the Agent Code. Alternatively, you can select the Agent Code from the option list. The list displays all the valid Agent Code maintained in the system.
AMC / Agent Name The system displays the Agent name for the selected Agent Code.
Segment ID Alphanumeric; 12 Characters; Optional
Specify the Segment ID. Alternatively, you can select the Segment ID from the option list. The list displays all valid Segment IDs maintained in the system.
Note: Segment ID is mandatory in Global Transfer Agency(GTA) Setup. In Non GTA Setup, Segment ID will be defaulted to value FMG.
Segment Description Display
The system displays the description of the selected Segment ID.
Fund ID Alphanumeric; 6 Characters; Mandatory
Specify the fund ID. Alternatively, you can select the fund ID from the option list. The list displays all the valid fund ID maintained in the system.
Transaction Type Alphanumeric; 3 Characters; Mandatory
Specify the transaction type. Alternatively, you can select the transaction type from the option list. The list displays all the valid transaction type maintained in the system.
Transaction Name Display
The system displays the transaction name for the selected transaction type.
Back Dated? Optional
Select if allocation is back dated or not from the drop-down list. The list displays the following values:- Yes
- No
Submit For Optional
Select submit for details from the drop-down list. The list displays the following values:- Process
- Execute
Click the Display Fund button to view the fund details.
Fund ID Display
The system displays the fund ID.
Fund Name Display
The system displays the fund name.
Fund Identification Number Display
The system displays the fund identification number.
Select Optional
Select Yes or No from the drop-down list. The list displays the following options:- Yes
- No
- Select the transaction type in the Transaction Type
field. You can select the
ALLoption to allocate transactions of all types.The list of funds maintained in the system is displayed. - You can select a fund in the list by checking the box alongside it. Click Select All link to select all funds.
- Check the Back Dated box to indicate allocation of backdated transactions.
- Click Execute when you have chosen the type of transaction to be allocated, and the fund.
Note:
Menu allocation is not supported for the Dilution Levy Applicable fundsThe job is submitted and the Asynchronous Process screen is opened. This screen indicates the current status of the allocation process. When complete, the system displays a completion message in the Asynchronous Process screen.
Parent topic: Allocation Method and Transaction Types
