1.1 Set up Cross Schema Grants
This topic provides the information about setting up Cross Schema Grants Utility.
- Double-click FCUBSInstaller.bat batch file to start
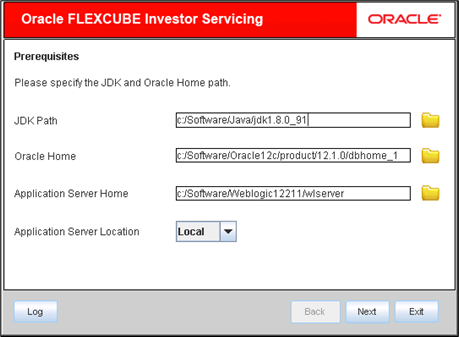
Oracle FLEXCUBE Universal Installer.The Oracle FLEXCUBE Universal Installer screen is displayed.
Figure 1-1 Oracle FLEXCUBE Universal Installer
- On Oracle FLEXCUBE Universal Installer screen, enter the
following details.Refer to the table for JDK and Oracle Home path.
Table 1-1 JDK and Oracle Home path
Field Description JDK Path Provide Home folder path of JDK1.8.
Oracle Home Provide home folder path of Oracle Client or Database.
Application Server Home Provide home folder path of Application Server.
Note: In case any of the selected directories is incorrect, the Installer will display an appropriate error message. In that case, you need to correct the directory path and proceed.
Application Server Location Select location of the application server either as local or remote.
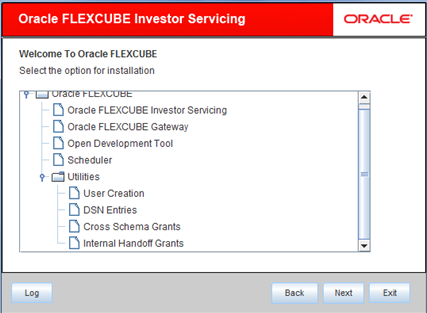
- Click Next to select the utility option for installation.
- Select Cross Schema Grants from the lists of
Utilities option.The options available for installation are displayed.
- Click Next to specify FC Home folder path.The following screen is displayed.
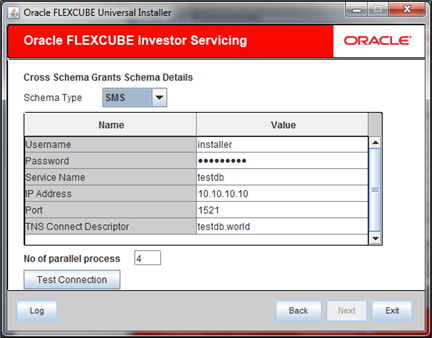
- Specify the following schema details.This is the schema on which scripts of other schema are to be executed. Refer to the table for schema details.
Table 1-2 Cross Schema Grants schema details
Field Description Schema Type Specify schema type from the drop-down list.
If LOB or PENSION type is selected, then CTX Index Tablespace must be entered.
CTX Index Tablespace Specify the name of CTX index tablespace.
User Name Specify the user name to access the schema.
Password Enter the schema password.
Service Name Provide service name of Database.
TNS Connect Descriptor Specify a valid connect string that contains the details for database connectivity.
IP Address Specify the IP address of the system where the database schema is installed.
Port Specify the port number.
Number of Parallel Process Specify number of parallel process for recompilation.
Figure 1-4 Cross Schema Scripts Schema Details_Schema Type_SMS
- Enter the CTX Index Tablespace details after selecting
the Schema Type as
LOB/PENSION.
Figure 1-5 Cross Schema Scripts Schema Details_Schema Type_LOB
- Click the Test Connection button to check the status of
the connection to database.
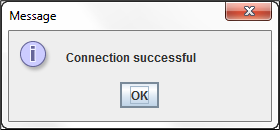
- If the connection is established, the installer displays a message Connection Successful.
- If there is an error in establishing the connection, the system displays the message Invalid DB Credentials.
- If the TNS entry is not proper, the installer displays the message TNS entries are not proper.
Once the connection is established, the following message is displayed.Figure 1-6 Information Message on Successful Connection
- Click Next after testing the connection
successfully.The following screen is displayed.
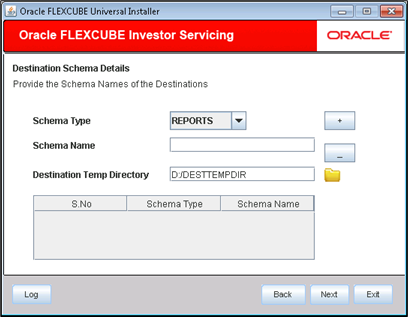
- Specify the Destination Schema details:
- Schema Type: Specify the target Schema pointing to which scripts are to be executed in the current schema.
- Schema Name: Specify the name of the Destination schema.
- Destination Temp Directory: Specify the destination directory.
It can have any value.In case any of the selected directories is incorrect, the Installer will display an appropriate error message. In that case, you need to correct the directory path and proceed.
- Click Add icon once the details are updated.This will insert the details in the multi entry table.
- Continue to change the Schema Type to include all other
target schema as applicable. Add the details and click
Add icon.The above process need to be done for all the below combinations.
Table 1-3 From and Destination Schema
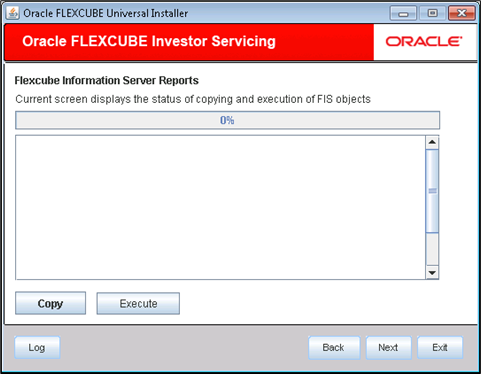
From Destination Schema REPORTS LOB SMS SP SMS LOB SP REPORTS PENSION SP LOB SMS REPORTS PENSION LOB SMS SP REPORTS PENSION SMS SP - Click Next to view the status of the execution.The following screen is displayed.
Figure 1-8 Execution Status of Cross Schema Scripts
- Click Copy to copy the cross schema scripts to the Destination folder.
- Click Execute to execute the cross schema scripts in the current folder.
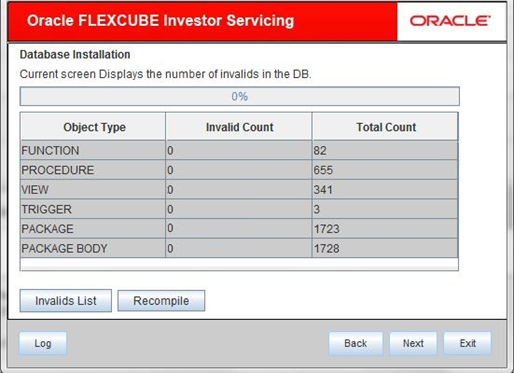
- Click Next to view the number of invalids in the
DB.The following screen is displayed.
- Click the Invalid List button to view
InvalidList.txtcreated in the destination directory under the folder DBScripts. - Use the Recompile button to do a cyclic recompilation.
This will reduce the invalid objects count.The Installer allows you to use Recompile button multiple times in order to reduce the invalid objects count.
Parent topic: Cross Schema Scripts Utility
