1 FCIS Application Remote Deployment
This topic provides the instructions to deploy FCIS Application into WebLogic server in remote deployment mode.
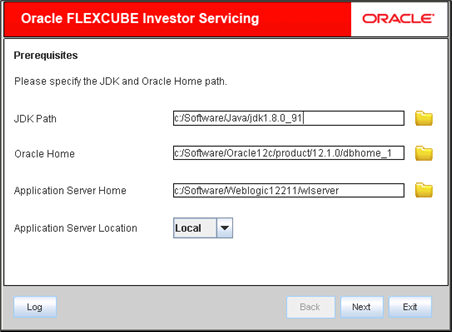
- Start Oracle FLEXCUBE Universal Installer.The Oracle FLEXCUBE Universal Installer is displayed.
Figure 1-1 Oracle FLEXCUBE Universal Installer
- On Oracle FLEXCUBE Universal Installer screen, enter the
following details.Refer to the table for JDK and Oracle Home path.
Table 1-1 JDK and Oracle Home path
Field Description JDK Path Provide Home folder path of JDK1.8.
Oracle Home Provide home folder path of Oracle Client or Database.
Application Server Home Provide home folder path of Application Server.
Application Server Location Select location of the application server either local or remote.
- Click Next to select the option for installation.
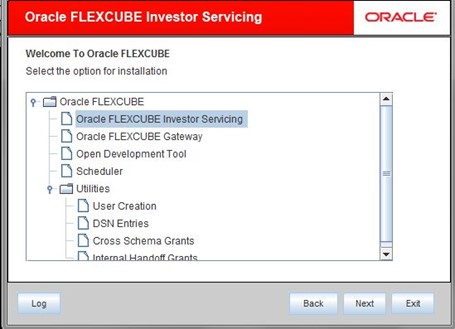
- Select Oracle FLEXCUBE Investor Servicing from the lists
of Oracle FLEXCUBE options.The following screen is displayed.
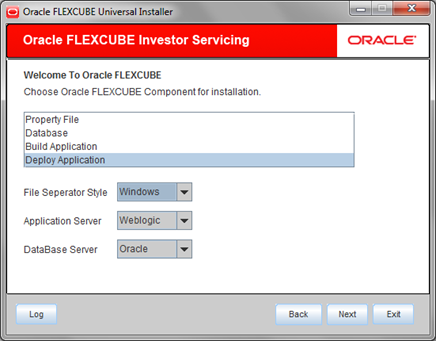
- Click Next to choose Oracle
FLEXCUBE component for installation.The following screen is displayed.
- Select Deploy Application.The available options Property File, Database, Build Application, and Deploy Application are displayed.
- Select the server’s operating system in which you are installing the FCIS application. Select the appropriate one from the adjoining drop-down list.
- Choose Weblogic from the Application Server drop-down.
- Select the database server in which you are installing the FCIS application. Select the appropriate one from the adjoining drop-down list.
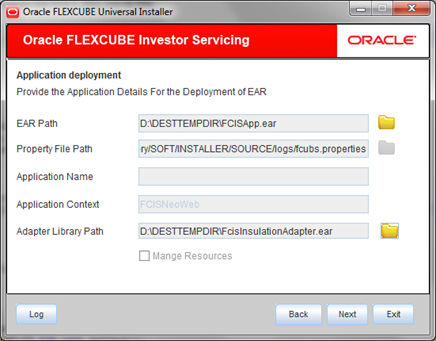
- Click Next to specify the application details for the
deployment of EAR.The following screen is displayed.
- Specify the following details:
- EAR Path: Specify the location of FCIS ear file. You can use the
directory button to browse and select the directory.The Application EAR path cannot be copied and pasted on to the text box, thereby demanding the use of the browse button to the select the EAR.
- Property File Path: If the property file is internal to the
application EAR, it gets displayed here on selection of EAR path. If the
property file is external, specify the location. You can use the
directory button to browser and select the directory.Below three fields are disabled in remote application server option:
- Application Name
- Application Context
- Manage Resources
- EAR Path: Specify the location of FCIS ear file. You can use the
directory button to browse and select the directory.
- Click Next. The installer prepares the files for remote
deployment.On successful deployment, the following message screen is displayed.
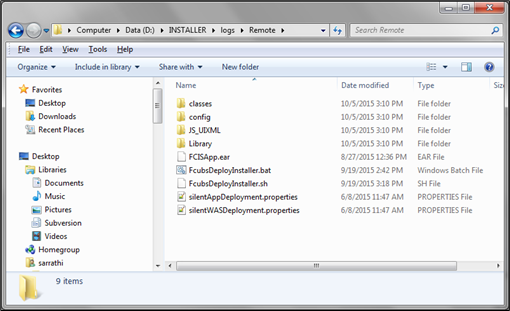
- Copy the files from the location (Remote folder) shown in message box and place
in the machine where the target Application server is installed.The content of the remote folder looks as below:
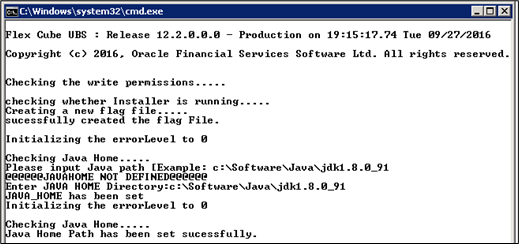
- Launch the Deployer by double cllicking
FcubsDeployInstaller.bat(windows OS) orFcubsDeployInstaller.sh(linux OS).The following message screen is displayed. - Enter JAVA Home, Oracle Home, and Application Server Home and Server location
when prompted. The installer will get launched and the following screen is displayed.
Figure 1-8 Oracle FLEXCUBE Universal Installer
- Click Next.The following screen is displayed.
- Click Ok to restart the installer after successful
message got displayed.The following screen is displayed.
Figure 1-10 Oracle FLEXCUBE Universal Installer
- Click Next.The following screen is displayed.
- Refer appropriate deployment document as per application server and FCIS
component.
Note:
EAR file will be under remote directory itself, this should be selected for deployment.If the Appserver is WebLogic and application is Gateway, then refer to the topic Gateway Application Deployment in Weblogic.
