1.1 Set up Open Development Tool
This topic explains the steps to set up the Open Development Tool Application.
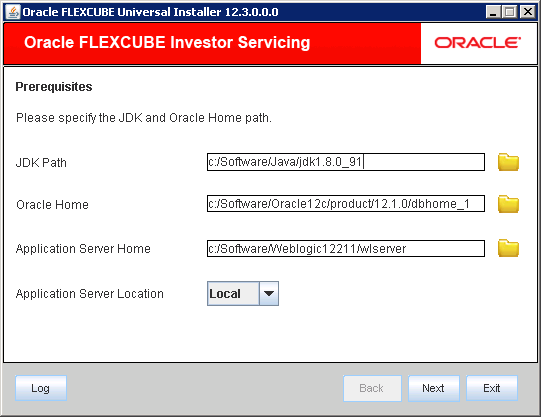
- Start Oracle FLEXCUBE Universal Installer.The Oracle FLEXCUBE Universal Installer is displayed.
Figure 1-1 Oracle FLEXCUBE Universal Installer
- On Oracle FLEXCUBE Universal Installer screen, enter the
following details.Refer to the table for JDK and Oracle Home path.
Table 1-1 JDK and Oracle Home path
Field Description JDK Path Provide Home folder path of JDK1.8.
Oracle Home Provide home folder path of Oracle Client or Database.
Application Server Home Provide home folder path of Application Server.
Application Server Location Select location of the application server either local or remote.
- Click Next to select the option for installation.
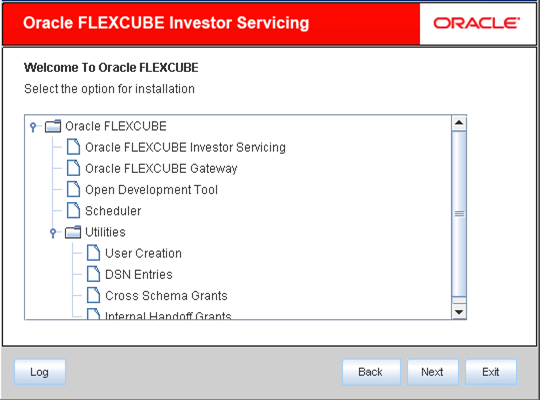
- Select Open Development Tool from the lists of
Oracle FLEXCUBE options.The available options for installation are displayed.
Figure 1-2 Oracle FLEXCUBE_Open Development Tool
- Click Next to choose Oracle FLEXCUBE component for installation.
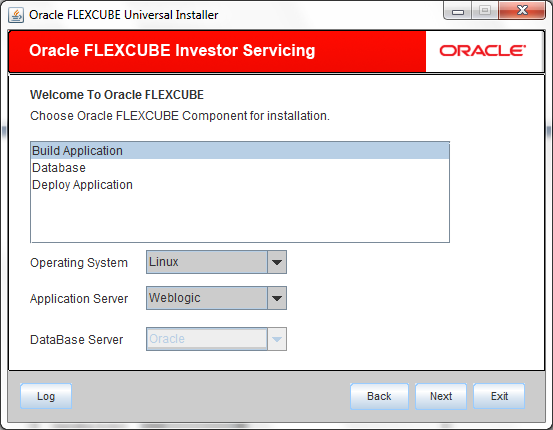
- Select Build Application.The available options Property File, Database, Build Application, and Deploy Application are displayed.
- Specify the operating system in which you are creating the property file. Choose the appropriate one from the drop-down list.
- Specify the application server in which you are creating the property file. Choose the appropriate one from the drop-down list.
- Specify the database server in which you are creating the property file. Choose the appropriate one from the drop-down list.
- Specify the FC Home details and click Next.The following screen is displayed.
- Select the console type and click Next.The following screen is displayed.
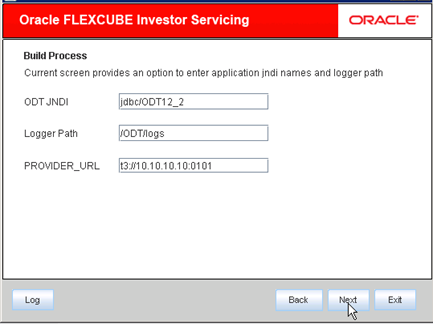
- Specify the following details:
- ODT JNDI: Specify the JNDI for the ODT.
- Logger Path: Specify the path where the logs have to be written.
- Provider_URL: Specify the provider URL.
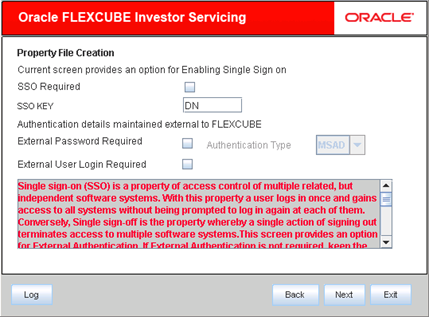
- In this screen, you are provided with an option to enable Single
Sign On.
- On Single Sign On screen, enter the following
details.Refer to the table for Single Sign On details.
Table 1-2 Single Sign On details
Field Description SSO Required Check this box to enable Single Sign On (SSO). If you check this box, you need to enter the SSO Key.
SSO KEY Specify the SSO key. If you have checked the box SSO Required, it is mandatory to specify the SSO key.
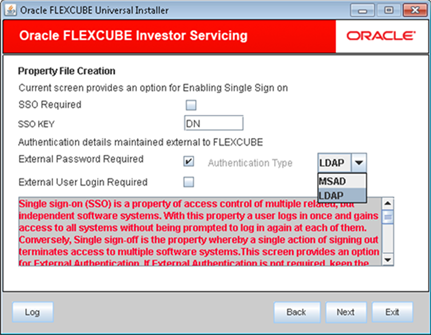
- Select the External Password Required to allow the user
login using MSAD/LDAP password irrespective of the user ID. This option is
unchecked by default.If you check this box, the user ID can be either the MSAD/LDAP user ID or the FCIS user ID. And the password can be MSAD/LDAP server password only.
Figure 1-7 Authentication Details maintained external to FLEXCUBE
- Select the External User Login Required to enable user
login using MSAD/LDAP user ID.If you check this box, the user can log in using MSAD/LDAP server user ID as well as FCIS user ID.
- Select the Authentication Type from the adjoining
drop-down list. This is the type of external server that is used.The following options are available:
- Microsoft Active Directory (MSAD) The default option is MSAD. However, you can change it.
- Lightweight Directory Access Protocol (LDAP)
- Choose the Authentication Type as
LDAP and click Next.The LDAP server details screen is displayed.
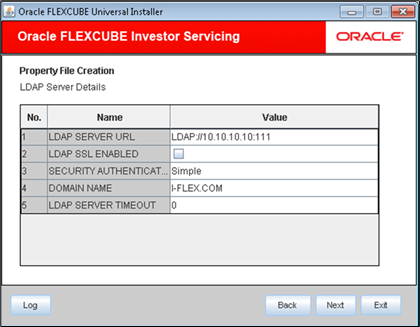
- On LDAP Server Details screen, enter the following
details.Refer to the table for LDAP Server details.
Table 1-3 LDAP Server details
Field Description LDAP Server URL Specify the URL to access the LDAP server where the external user Ids or passwords are maintained.
LDAP SSL Enabled Check this box if the LDAP server is SSL enabled.
Note: If you check this box, then you need to specify the SSL port in the field LDAP SERVER URL.
Security Authentication Type Depending on the authentication mechanism supported by the LDAP server, you need to select one of the following:- Simple
- Strong
Note: Different servers support different authentication mechanisms. By default, the security authentication type is Simple; however, you can change it.
Domain Name Specify the domain name.
LDAP Server Timeout Specify the LDAP server timeout in milliseconds.
Note:- By default, the LDAP server timeout is zero; however, you can change this.
- You must enter a positive integer value. For example, 1000, 10000, 5000, etc.,
- If the value specified is zero or less, it indicates that no read timeout is specified. Then, the wait for the response infinite until it is received.
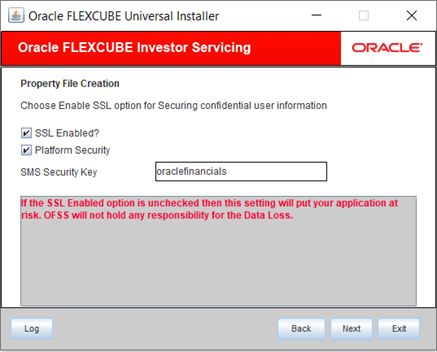
- Click Next after the LDAP server details are
specified.The following screen is displayed.
Figure 1-10 Enable SSL for Securing Confidential User Information
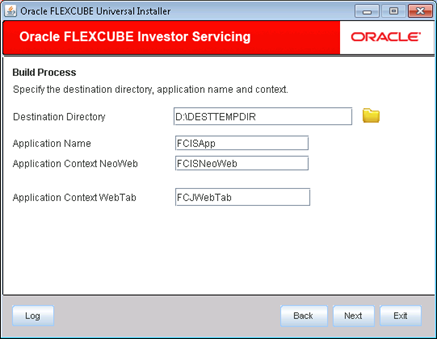
- On the Build Process screen, specify the following
details.Refer to the Build Process table.
Table 1-4 Build Process
Field Description Destination Directory Specify the destination folder where EAR will be built.
Application Name Specify the name of the application.
Figure 1-11 Application and Destination Details
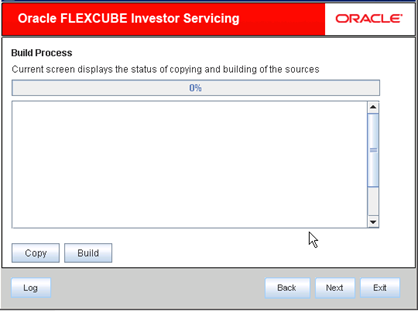
- Click Next to view the status of sources being
copied.The following screen is displayed.
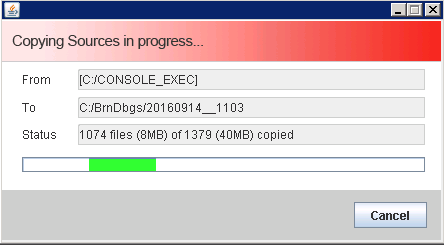
Figure 1-12 Status of sources being Copied
- Click Copy button.The installer copies the files.
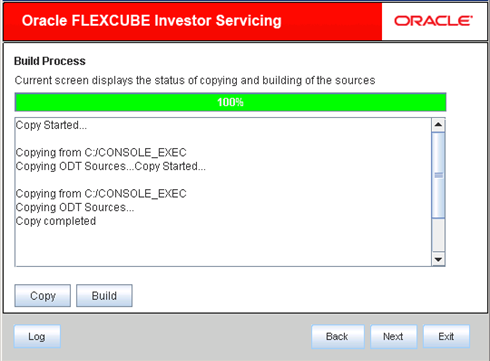
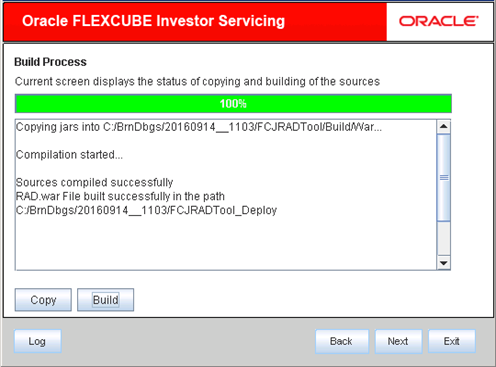
- Click Next to view the status of sources being
built.The following screen is displayed.
Figure 1-14 Status of sources being Copied
- Click Build button to start the build process.The installer builds the source files.
- Click Ok.The following screen is displayed.
Parent topic: Build EAR Files
