1.2.1 Custom Provider Configuration
This topic explains the details of the custom authentication.
FCUBS Custom Authenticator Provider configuration has to be done from the Weblogic console of SOA or manually update the config.xml of the SOA domain. Below steps needs to be followed to setup Custom Authentication Provider:
- Along with the FCIS Ear file, the Installer creates the
FCUBSAuthenticationProvider.jar file.
- Copy this file to the following path on the application server
host
<ORACLE_HOME>\wlserver\server\lib\mbeantypes.
- Copy this file to the following path on the application server
host
- Restart the Admin Server.
- Login to the Console.
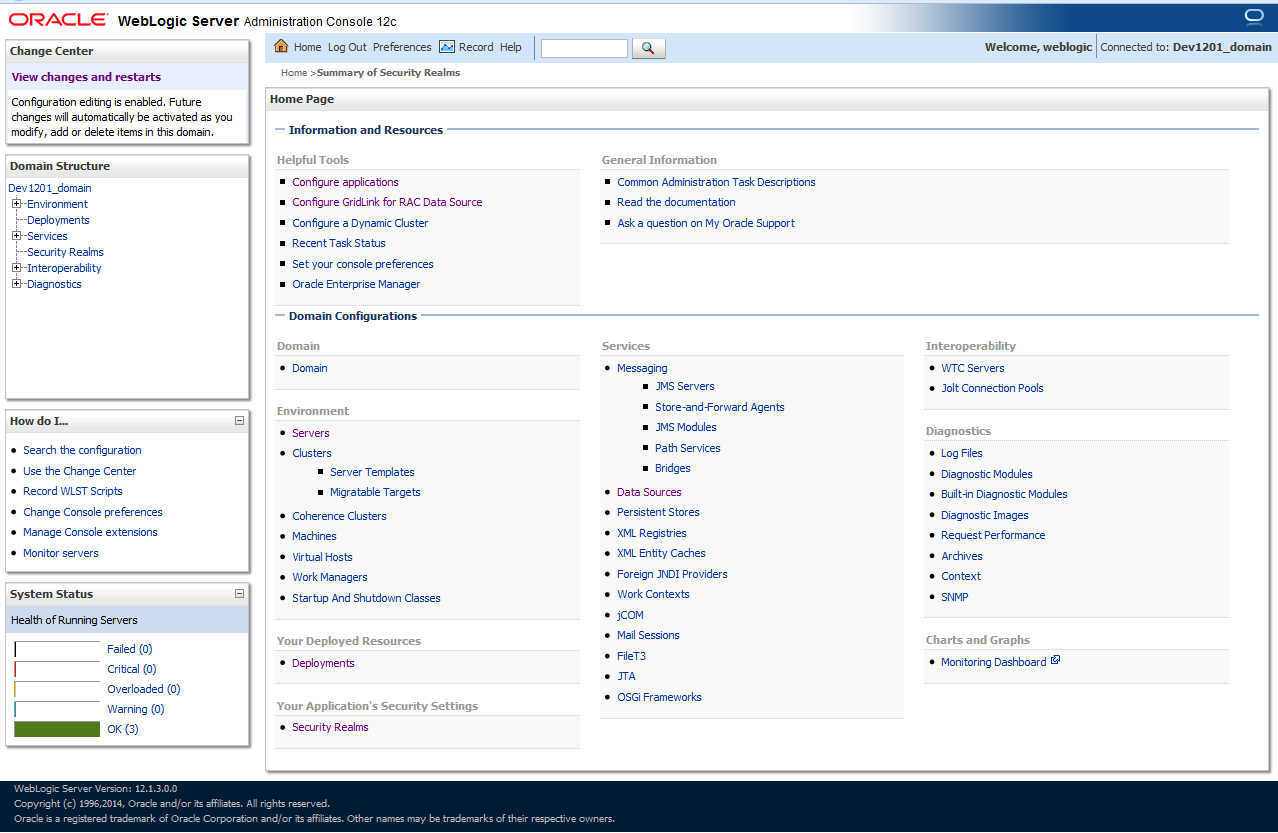
- Click on Security Realms.
Figure 1-1 Oracle Weblogic Server - Security Realms
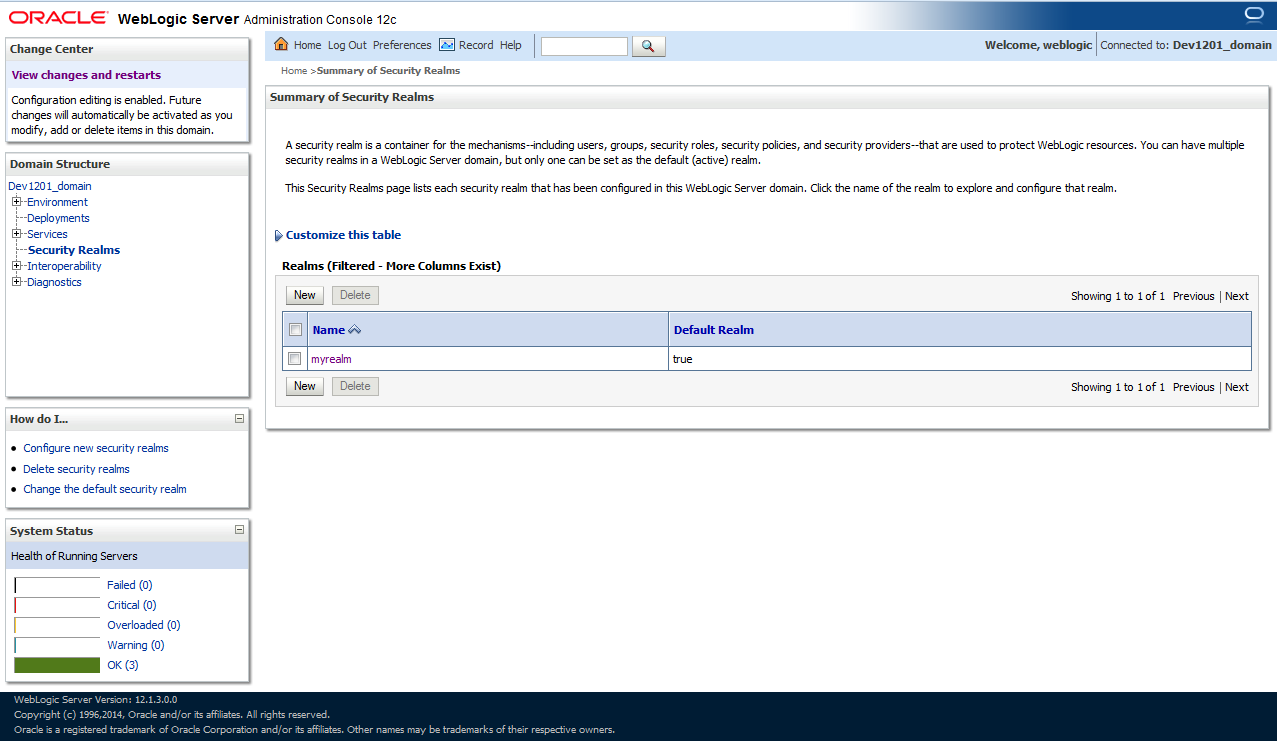
- Click on myrealm.
Figure 1-2 Oracle Weblogic Server - Security Realms - myRealm
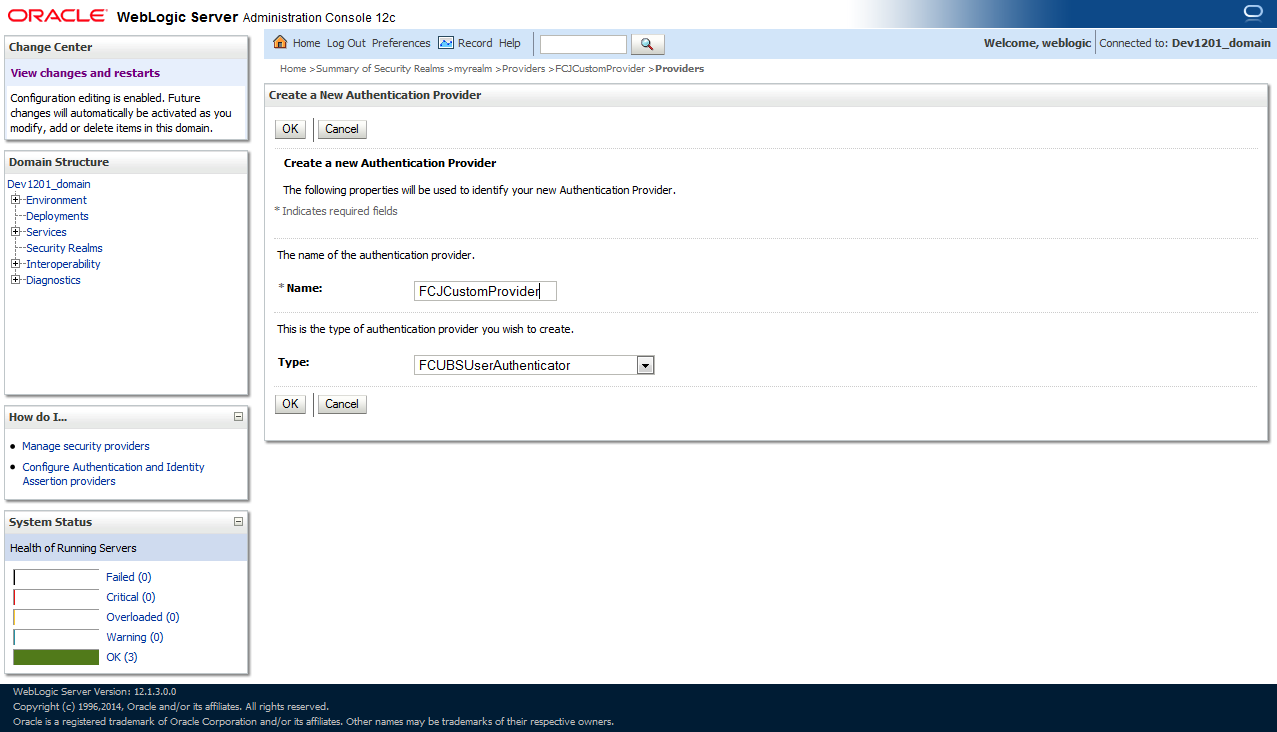
- Click on the Providers tab and click on the
New button to create a new authentication provider.
Figure 1-3 Oracle Weblogic Server - Providers - Create New Authentication Provider
- Give the Provider name as FCJCustomProvider and type as FCUBSUserAuthenticator.
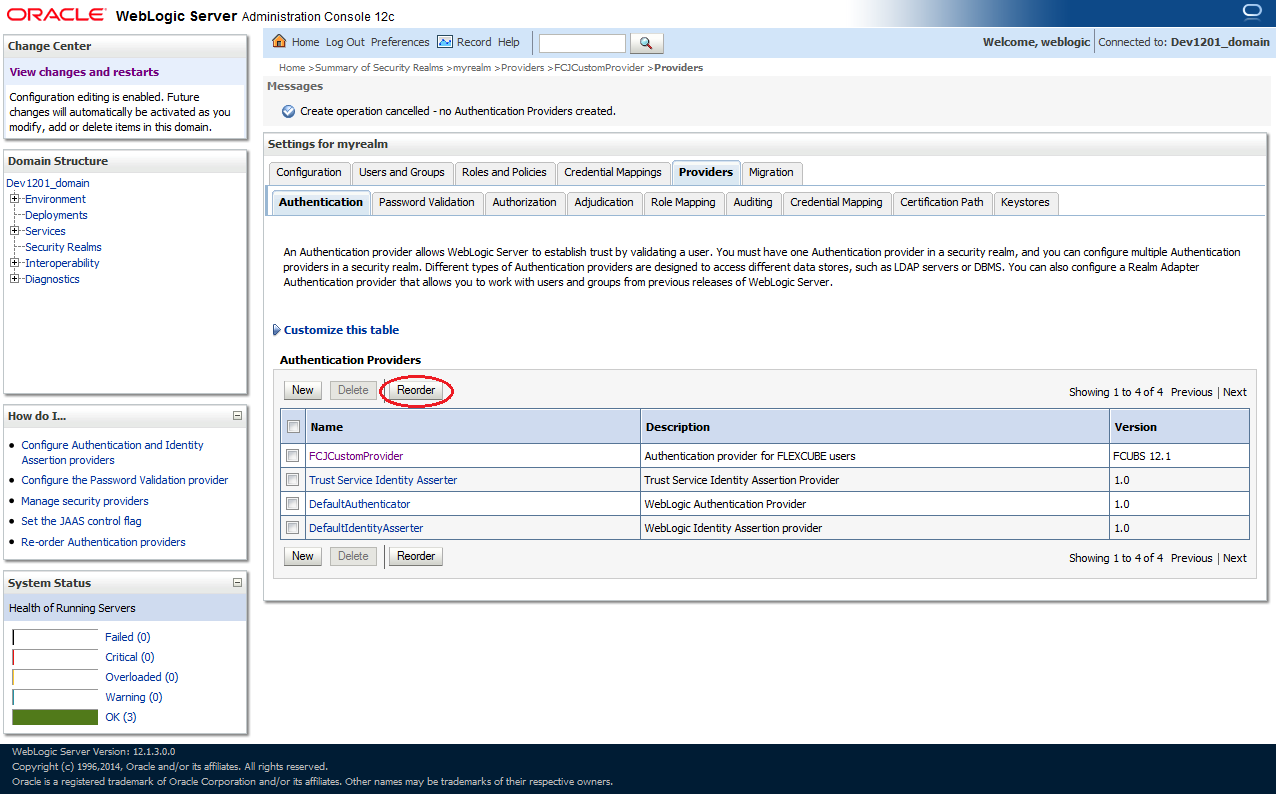
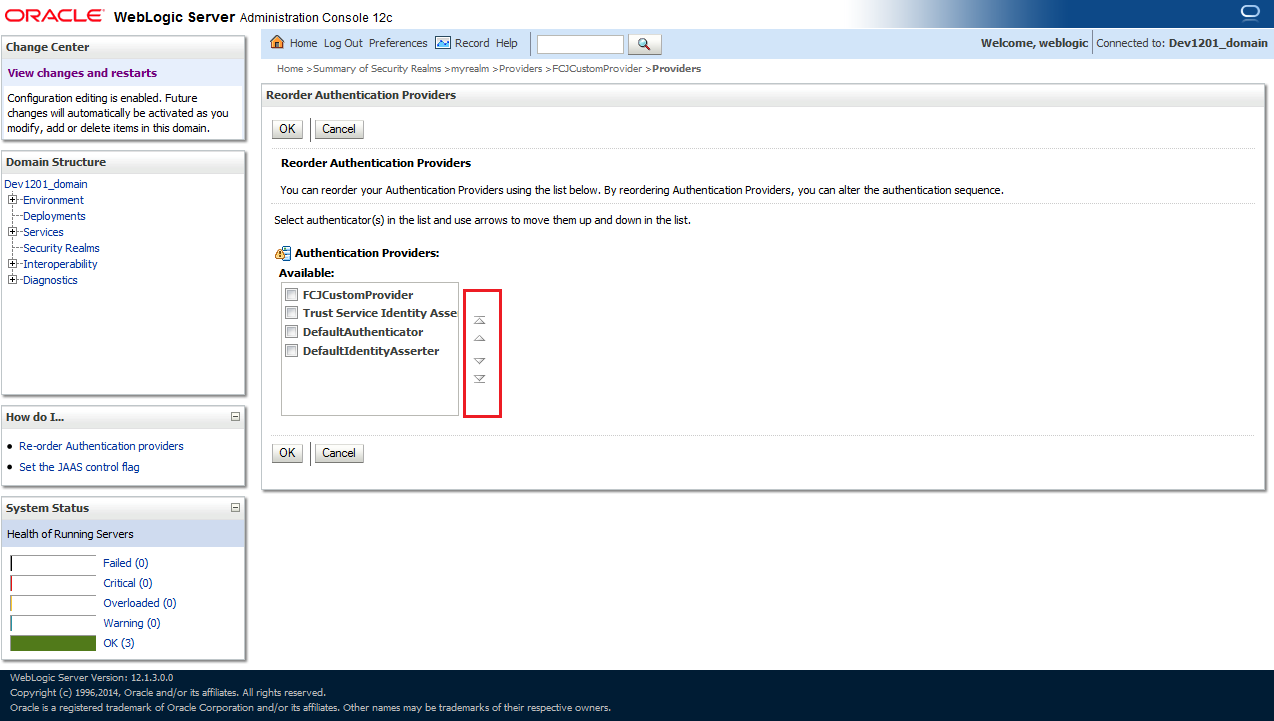
- Click the Reorder button to bring the newly created provider
to first of all providers and click the OK button.
Figure 1-4 Oracle Weblogic Server - Providers - Reorder
Figure 1-5 Oracle Weblogic Server - Providers - Reorder List
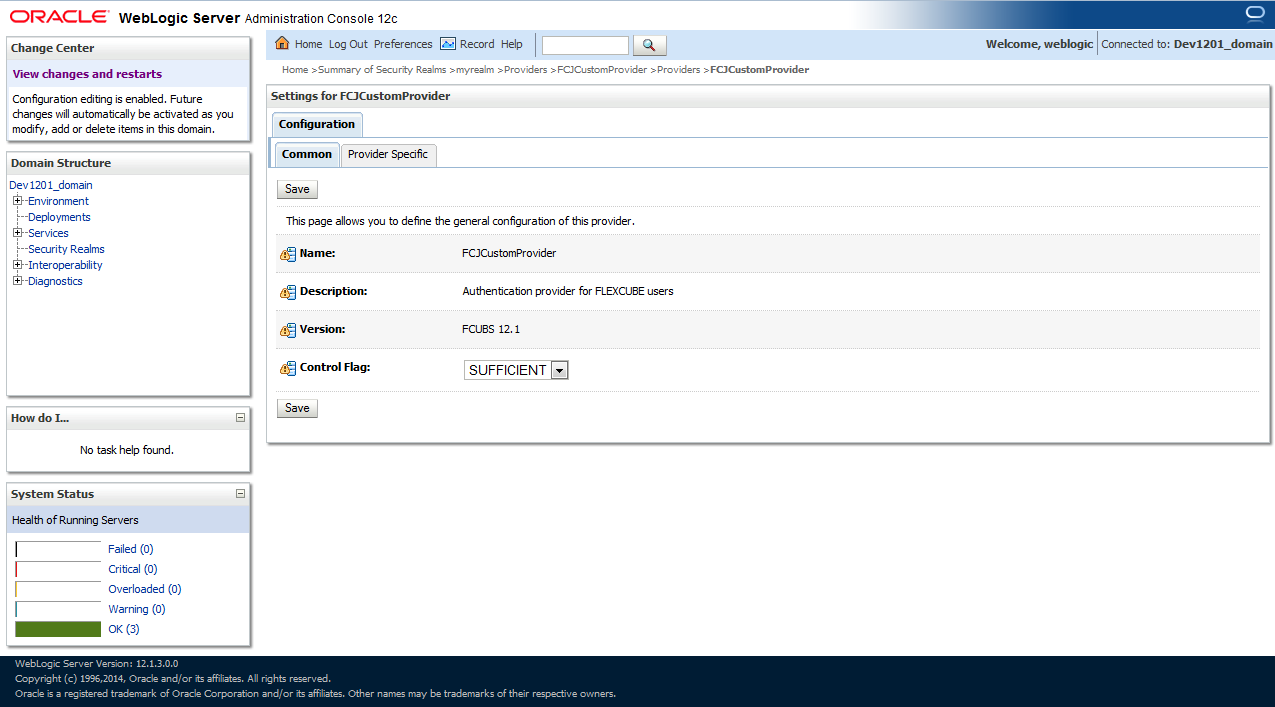
- Click on FCJCustomProvider.
- In the Common tab, change the control flag to SUFFICIENT.
Figure 1-6 Oracle Weblogic Server - Settings for FCJCustomProvider - Common
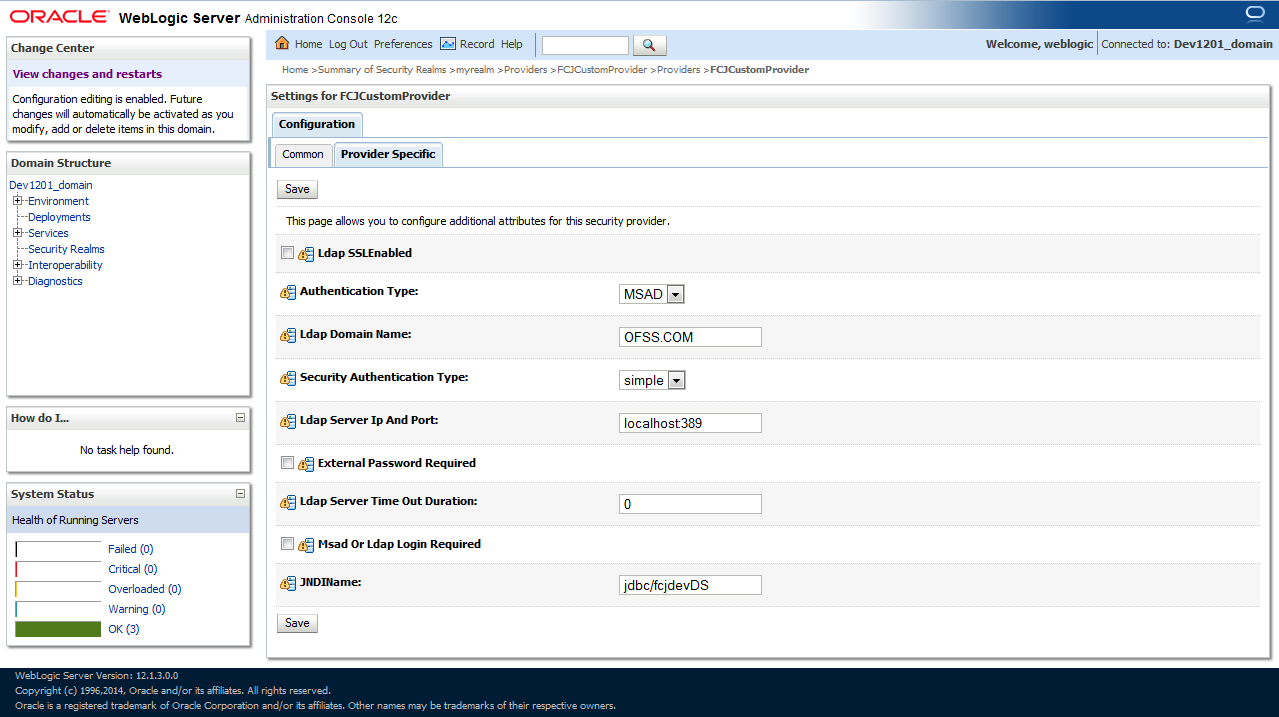
- In Provider Specific tab,
- Set JNDIName as Flexcube JNDI Name.
- If external authentications are used in FCIS, then Fill the LDAP/MSAD related fields.
Figure 1-7 Oracle Weblogic Server - Settings for FCJCustomProvider - Provider Specific
- For manually editing the config.xml go to
<ORACLE_HOME>\Middleware\user_projects\domains\base_domain\config\path and open the config.xml file.The following codes need to be added at proper locations in the config.xml.
- Search for <realm> tag and add the following code between
<realm> and </realm> tags.This should be the first child of the
realm
Node.
<sec:authentication-provider xmlns:n1="http://fcubs.ofss.com/security" xsi:type="n1:fcubs-user-authenticatorType"> <sec:name>FCJCustomProvider</sec:name> <sec:control-flag>SUFFICIENT</sec:control-flag> <n1:msad-or-ldap-login-required>true</n1:msad-or-ldap-login-required> <n1:external-password-required>true</n1:external-password-required> <n1:authentication-type>MSAD</n1:authentication-type> <n1:ldap-server-ip-and-port>LDAP://localhost:389</n1:ldap-server-ip-and-port> <n1:ldap-ssl-enabled>true</n1:ldap-ssl-enabled> <n1:security-authentication-type>simple</n1:security-authentication-type> <n1:ldap-domain-name>OFSS.COM</n1:ldap-domain-name> <n1:ldap-server-time-out-duration>0</n1:ldap-server-time-out-duration> </sec:authentication-provider> - Make sure tag values matches the value given during Property file creation.
- Search for <realm> tag and add the following code between
<realm> and </realm> tags.This should be the first child of the
realm
Node.
Parent topic: Integrating Oracle FLEXCUBE IS and BPEL
