1.2 Set Up Common Properties
This topic describes the process of setting common properties of Oracle FLEXCUBE Investor Servicing.
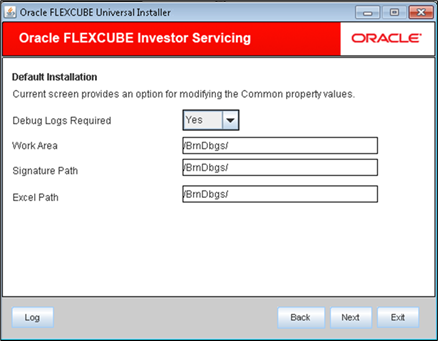
- You can choose an option for modifying the common property values.The following screen is displayed.
- On Common Properties screen of Default Installation, enter the following details.Refer to the table for Common Properties.
Table 1-2 Common Properties screen in Default Installation
Field Description Debug Logs Required Select Yes from the drop-down list if you require debug option. If you do not require debug option, select No.
Signature Path Specify the location at which the signature images will be placed.
Excel Path Specify the location at which the excel files will be generated.
Figure 1-12 Common Property Values in Default Installation
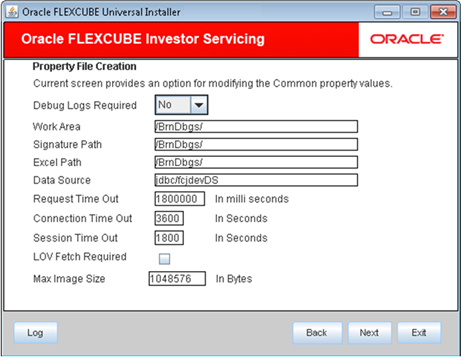
- On Common Properties screen of Custom Installation, enter the following details.Refer to the table for Common Properties.
Table 1-3 Common Properties screen in Custom Installation
Field Description Debug Logs Required Select Yes from the drop-down list if you require debug option. If you do not require debug option, select No.
Signature Path Specify the location at which the signature images will be placed.
Excel Path Specify the location at which the excel files will be generated.
Data Source Specify the JNDI location which points to SMS schema The standard format is jdbc/fcisdevDS.
Request Time Out Specify the database request timeout value in seconds. This is the maximum number of seconds the database will wait for a query to return the result.
Connection Time Out Specify the database connection timeout value in seconds. This is the maximum number of seconds the application will wait for a connection to the database to open.
LOV Fetch Required If you check this box, the option lists in Oracle FLEXCUBE Investor Servicing will display the matching values based on the first characters that you enter in a field.
That is, if you specify the first three characters of a value to be entered in an option list, the system will display the complete list of values that are matching the first three characters.
If you do not check this box, the option lists will not display the matching values based on the first few characters. You need to specify the complete value against the field.
Figure 1-13 Common Property Values in Custom Installation
- Click Next after the common properties details are specified.
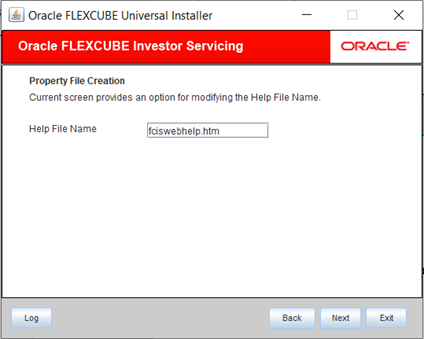
- You can modify the Help File Name using the Help File Name option.
- Enter Help File Name and click Next.
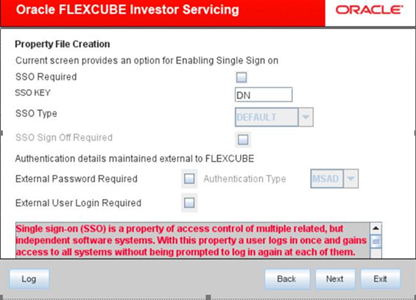
- In this screen, you are provided with an option to enable Single Sign On.
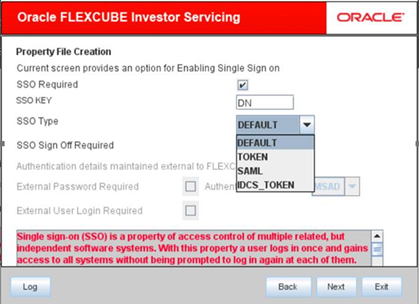
- On Single Sign On screen, enter the following details.Refer to the table for Single Sign On details.
Table 1-4 Single Sign On details
Field Description SSO Required Check this box to enable Single Sign On (SSO). If you check this box, you need to enter the SSO Key.
SSO KEY Specify the SSO key. If you have checked the box SSO Required, it is mandatory to specify the SSO key.
SSO Sign Off Required This screen will be available only if SSO Sign Off Required is checked.
This option needs to be selected if the application is required to call external SSO logout URL, when the user is logged off from the application.
Select the SSO Sign Off Required checkbox to enable the below fields:- SSO_SIGNOFF_URL
- SSO_SIGNOFF_POST_RD_URL
- SSO_REQ_PARAM_KEYS
SSO Type Specify the SSO type.
The options available are:- DEFAULT
- TOKEN
- SAML
- IDCS_TOKEN
- Select the DEFAULT option in the SSO Type, when the External SSO system needs to send the SSO User ID mapped to the application User ID in the SSO KEY parameter.For Example: If SSO KEY maintained is DN and SSO_USERID is fcubsuser@oracle.com, then SSO system needs to send SSO USERID in request header DN parameter when request is send to the application.The SSO UserID needs to be maintained in LDAP_USER field of User Maintenance (SMDUSRDF) screen.
- Select the TOKEN option in the SSO Type, if custom implementation is required for SSO authentication in the application. Select this option to process AuthenticateCustomToken.class when application login is performed. The required custom implementation method for SSO/SAML needs to be done in the custom class.
Exec File Path: INFRA\FCJNeoWeb\war\WEB-INF\classes\com\ofss\infra\sso\AuthenticateCustomToken.class can be referred for the method details.
Post Script: Configuration details on External SSO system will not be provided/available as part of Application documentation. This needs to be checked with the respective SSO provider.
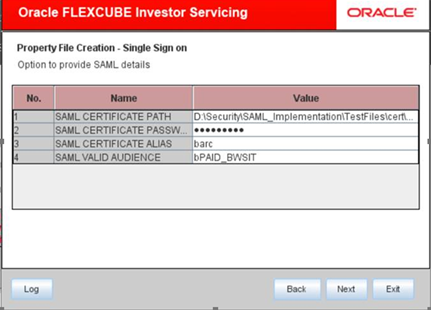
- Select the SAML option in the SSO Type, when the external system needs to send the SAML request xml in the SSO KEY parameter.
- Enter the details such as Certificate Path, Certificate Password, Certificate Alias, and Certificate Valid Audience for the SAML case.Application will validate the SAML signature using the Certificate Path and Certificate Password. Also the SAML Audience value provided should be the same as in SAML request sent to the application.
- Application will allow the user to login with the userID sent in the SAML request after the successful SAML validations.The SAML UserID sent in the SAML request needs to be maintained in LDAP_USER field of User Maintenance (SMDUSRDF) screen.
- Select the IDCS_TOKEN option in the SSO Type, if Oracle Identity Cloud Service (IDCS) is used as the Identify and Access Management system in cloud deployments.
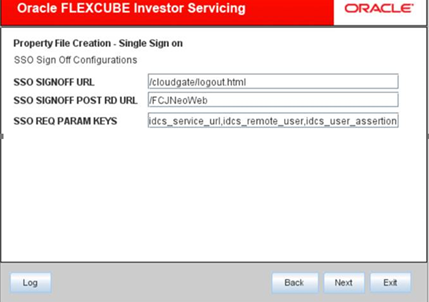
- On Single Sign Off Configurations screen, enter the following details.Refer to the table for Single Sign Off configurations details.
Table 1-5 Single Sign Off configuration details
Field Description SSO_SIGNOFF_URL The External SSO logout URL which needs to be invoked after application has been logged off, needs to be configured here.
Example: https://<host>/oam/server/logout.
SSO_SIGNOFF_POST_RD_URL This is applicable only if IDCS is used as IAM system. The URL/Context path which needs to be navigated post SSO signoff needs to be configured here.
Example: /FCJNeoWeb.
SSO_REQ_PARAM_KEYS This is applicable only if IDCS is used as IAM system. The keys required for the IDCS token validation needs to be specified here as comma separated.
Example: idcs_service_url,idcs_remote_user,idcs_user_assertion.
Figure 1-18 Single Sign Off Configurations
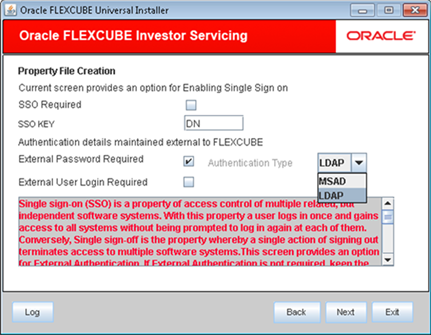
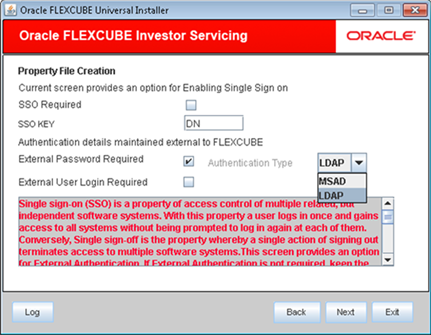
- Select the External Password Required to allow the user login using MSAD/LDAP password irrespective of the user ID. This option is unchecked by default.If you check this box, the user ID can be either the MSAD/LDAP user ID or the FCIS user ID. And the password can be MSAD/LDAP server password only.
Figure 1-19 Authentication Details maintained external to FLEXCUBE
- Select the External User Login Required to enable user login using MSAD/LDAP user ID.If you check this box, the user can log in using MSAD/LDAP server user ID as well as FCIS user ID.
- Select the Authentication Type from the adjoining drop-down list. This is the type of external server that is used.The following options are available:
- Microsoft Active Directory (MSAD) The default option is MSAD. However, you can change it.
- Lightweight Directory Access Protocol (LDAP)
- Choose the Authentication Type as LDAP and click Next.The LDAP server details screen is displayed.
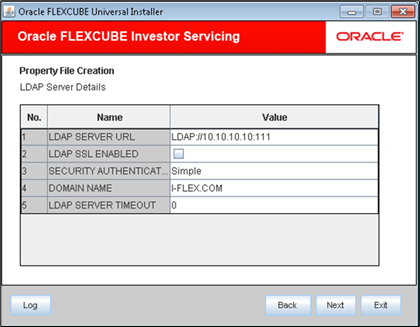
- On LDAP Server Details screen, enter the following details.Refer to the table for LDAP Server details.
Table 1-6 LDAP Server details
Field Description LDAP Server URL Specify the URL to access the LDAP server where the external user Ids or passwords are maintained.
LDAP SSL Enabled Check this box if the LDAP server is SSL enabled.
Note: If you check this box, then you need to specify the SSL port in the field LDAP SERVER URL.
Security Authentication Type Depending on the authentication mechanism supported by the LDAP server, you need to select one of the following:- Simple
- Strong
Note: Different servers support different authentication mechanisms. By default, the security authentication type is Simple; however, you can change it.
Domain Name Specify the domain name.
LDAP Server Timeout Specify the LDAP server timeout in milliseconds.
Note:- By default, the LDAP server timeout is zero; however, you can change this.
- You must enter a positive integer value. For example, 1000, 10000, 5000, etc.,
- If the value specified is zero or less, it indicates that no read timeout is specified. Then, the wait for the response infinite until it is received.
- Click Next after the LDAP server details are specified.The following screen is displayed.
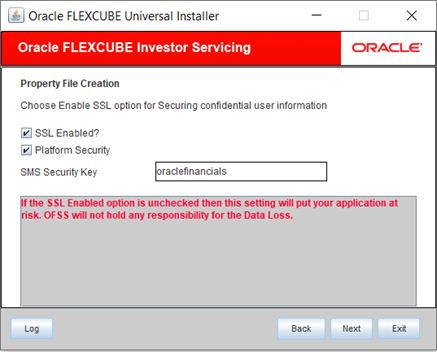
Figure 1-22 Enable SSL for Securing Confidential User Information
- Select the SSL Enabled option for securing confidential user information.If SSL is not enabled, the Installer will display a warning message. However, it is recommended to enable SSL.The following message window is displayed.
Figure 1-23 SSL Enabled Information Message
- Select the Platform Security option and is available only for weblogic.
If Platform Security is checked for weblogic, the symmetric key is not stored in the property file for security reasons. If Platform Security is enabled during property file creation, then DB details should be the actual database in which the application to be deployed.
If Platform Security is not checked, the symmetric key is available in the property file and a warning message is displayed to the user.
Figure 1-24 Platform Security Disabled Information Message
- Specify the SMS Security Key for the Encryption.In this case, it is oraclefinancials.
- Click Next after specifying the SSL details.The following screen is displayed.
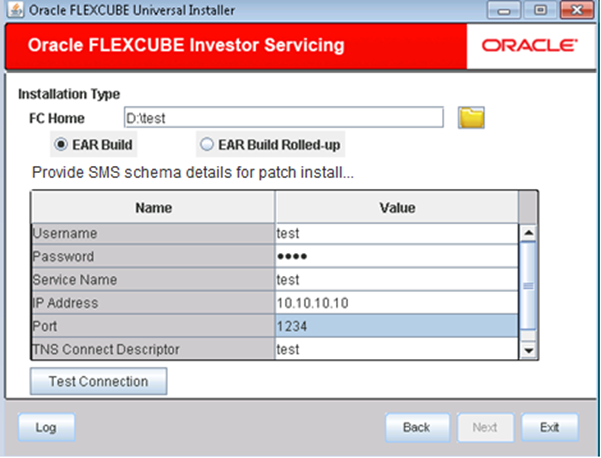
- Enter the source path in FC Home and provide the SMS schema details for patch installation.
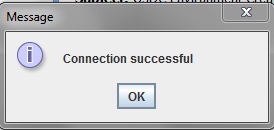
- Click Test Connection to test the connection with the Application server.On successful connection, the following message is displayed.
Figure 1-26 Information Message on Successful Connection
Parent topic: Create Property File
