1.2 Set up Manage Application Utility
This topic provides the information about setting up Manage Application Utility.
- Double-click FCUBSInstaller.bat batch file to start
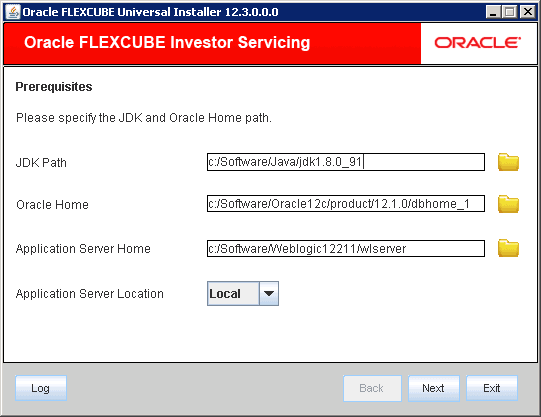
Oracle FLEXCUBE Universal Installer.The Oracle FLEXCUBE Universal Installer screen is displayed.
Figure 1-1 Oracle FLEXCUBE Universal Installer
- On Oracle FLEXCUBE Universal Installer screen, enter the
following details.Refer to the table for JDK and Oracle Home path.
Table 1-1 JDK and Oracle Home path
Field Description JDK Path Provide Home folder path of JDK1.8.
Oracle Home Provide home folder path of Oracle Client or Database.
Application Server Home Provide home folder path of Application Server.
Note: In case any of the selected directories is incorrect, the Installer will display an appropriate error message. In that case, you need to correct the directory path and proceed.
Application Server Location Select location of the application server either as local or remote.
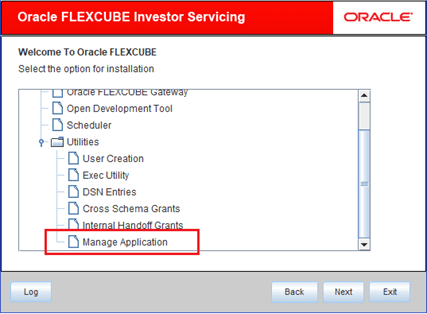
- Click Next to select the utility option for installation.
- Select Manage Application from the lists of
Utilities option.The options available for installation are displayed.
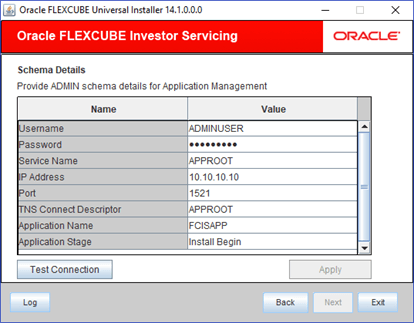
- Click Next to specify schema details.The following screen is displayed.
Figure 1-3 Schema Details for Application Management
- Specify the following schema details for application management.Refer to the table for schema details.
Table 1-2 Schema Details for Application Management
Field Description User Name Specify the user name to access the schema.
Password Enter the schema password.
Service Name Provide service name of Database.
TNS Connect Descriptor Specify a valid connect string that contains the details for database connectivity.
IP Address Specify the IP address of the system where the database schema is installed.
Port Specify the port number.
Application Name Application Name field will be defaulted from APPROOT_APPNAME of the installer.properties.
This defaulted Application Name should not be changed. This will be validated during Apply process.
Once the installation is executed in the application root environment then, APPROOT_APPNAME of the installer.properties value must not be changed. This will be operationally controlled.
Application Stage Select the operation that needs to be performed. This drop-down field will have the below options:- Install Begin
- Install End
- Upgrade Begin
- Upgrade End
- Sync
- Select the Install Begin option to initiate a new installation in the root application. It can be executed only once for that application.
- Select the Install End option to initiate a new installation in the root application. It can be executed only once for that application.
- Select the Upgrade Begin option to initiate the application upgrade from the current application version to next version. The version will be automatically incremented.
- Select the Upgrade End option to end the initiated upgrading process in the root application.
- Select the Sync option to sync the application PDB into
the initiated newly installed version or upgraded version for the root
application PDB.For each application PDB, this Sync should be executed separately.
- Click the Test Connection button to check the status of
the connection to database.
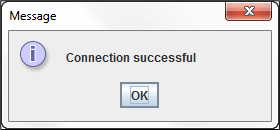
- If the connection is established, the installer displays a message Connection Successful.
- If there is an error in establishing the connection, the system displays the message Invalid DB Credentials.
- If the TNS entry is not proper, the installer displays the message TNS entries are not proper.
Once the connection is established, the following message is displayed.Figure 1-4 Information Message on Successful Connection
- Start the screen and you will find the following buttons and actions.The Apply and Next buttons will not be enabled. On click of the Test Connection, the entered user details will be validated along with the required PDB (root PDB or application PDB) along with necessary user rights. On successful connection, the Apply and Next buttons will get enabled.
Parent topic: Manage Application Utility


