3.9 Process Additional Information Maintenance

This topic provides the systematic instructions to define additional information pertaining to any entities that you set up in the system.

The Oracle® FLEXCUBE Investor Servicing system gives you the facility of defining heads under which you can capture any additional information pertaining to any entities that you set up in the system, especially unit holders and brokers. You can also set up a list of acceptable, valid values for each information head.

Use Additional Information Maintenance screen to define these additional information heads and their valid values.

  1. On Home screen, type UTDADINF in the text box, and click Next.
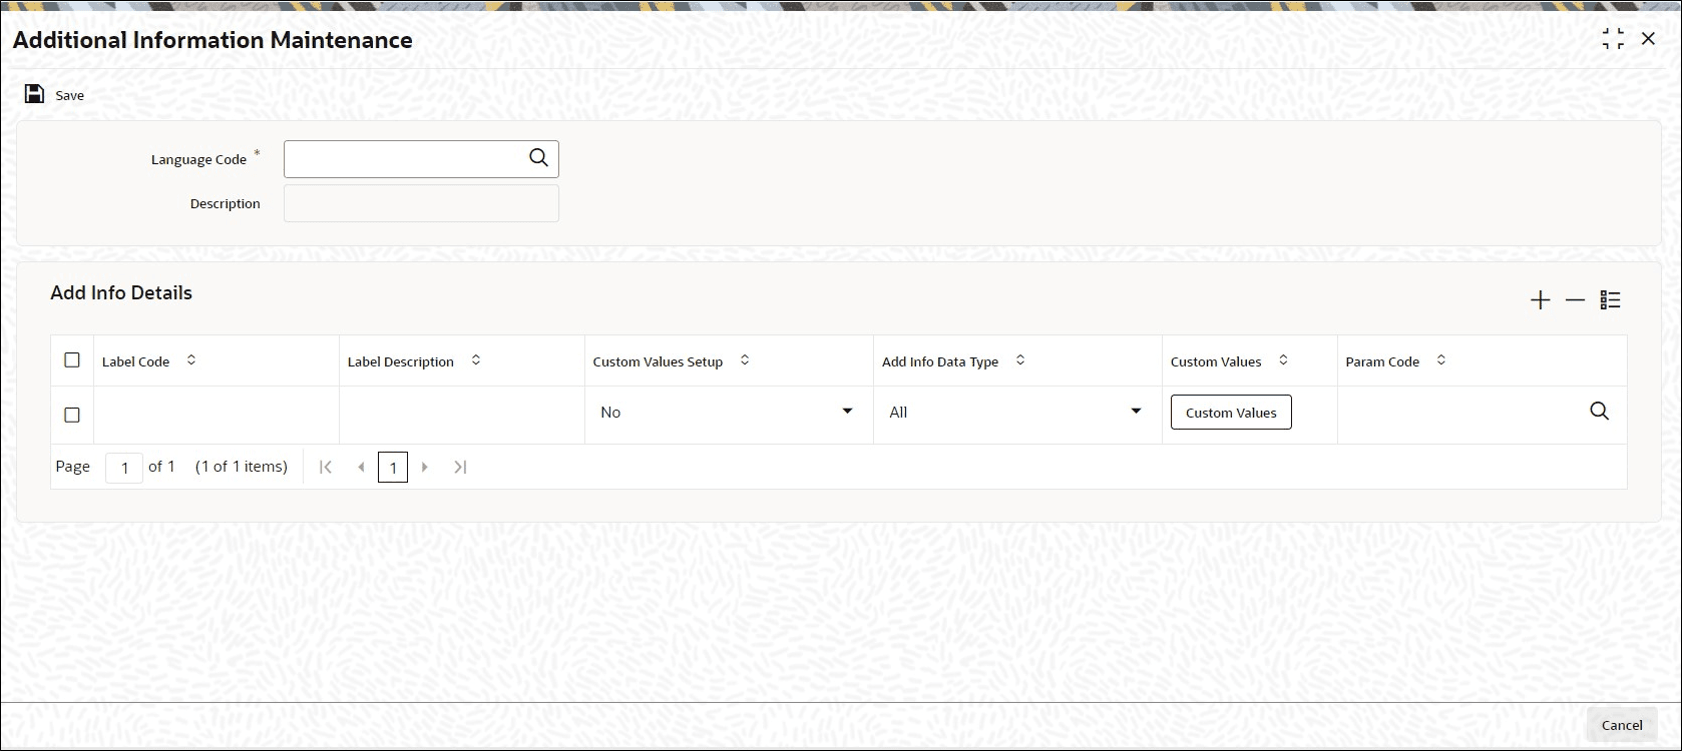
    The Additional Information Maintenance screen is displayed.

    Figure 3-8 Additional Information Maintenance


  2. On Additional Information Maintenance screen, click New to enter the details.
    For more information on fields, refer to the field description table.

    Table 3-7 Additional Information Maintenance - Field Description

    Field Description
    Language Code Alphanumeric; 12 Characters; Mandatory

    Specify the language for which you want to define the additional information heads.

    Description Display

    The system displays the description for the selected language code.

    Add Info Details

    To add a new information head, click the Add link in the Additional Information Maintenance screen. A new row is inserted at the bottom of the list.

    Label Code Alphanumeric; 30 Characters; Mandatory

    Specify the label code.

    Label Description Alphanumeric; 100 Characters; Mandatory

    Specify the description of the selected label code.

    Custom Values Setup Mandatory
    Select the custom values setup status from the drop-down list. The list displays the following values:
    • Yes
    • No
    Add Info Data Type Optional

    Select the type of data that can be entered into the additional information field. This specification can be made only for those additional information heads that are not linked to a system parameter.

    In the system, when a value is entered into the additional information field, the data type of the entered value is validated by the system.

    The list displays the following values:
    • All
    • Alphanumeric
    • Numeric
    • Date
    Param Code Alphanumeric; 25 Characters; Optional

    Specify the param code.

  3. You must also enter the code of the specific system parameter to which the additional information head is linked, if the additional information head being maintained is to be linked to a system parameter that has been maintained for the installation.
    The values maintained for the linked parameter are also applicable for the additional information head.
  4. When you click on the Custom Values button, you can select the system parameter to which the additional information head must be linked.
  5. Click Valid Values button to define set of valid values.
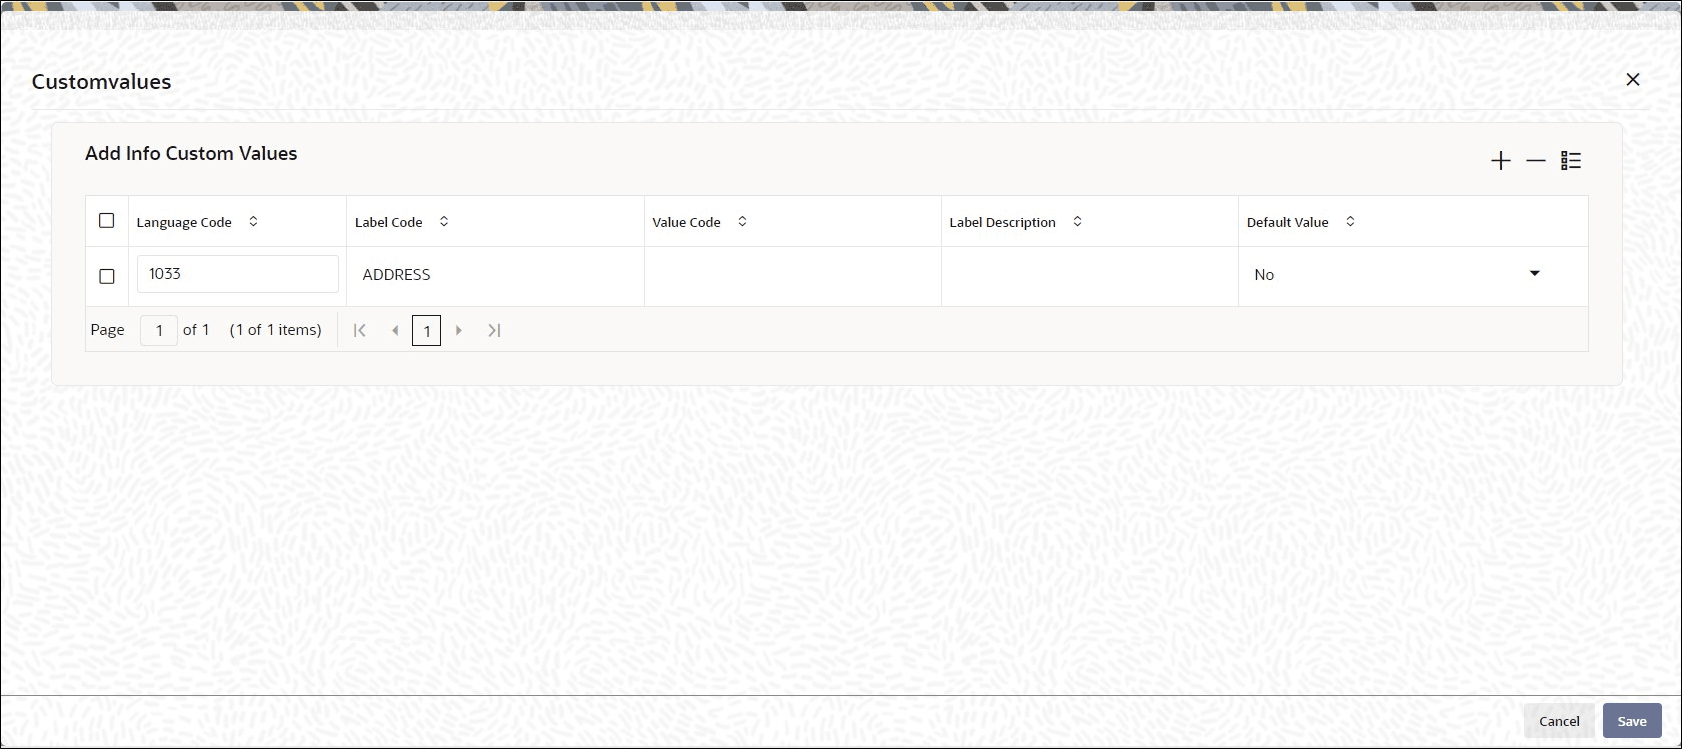
    The following Custom Values window is displayed.

    Figure 3-9 Additional Information Maintenance_Custom Values Button


    Additional Information Maintenance_Custom Values Button

  6. On Custom Values screen, specify the fields.
    For more information on fields, refer to the field description table.

    Table 3-8 Custom values - Field Description

    Field Description
    Language Code Alphanumeric; 12 Characters; Mandatory

    Specify the language for which you want to define the additional information heads.

    Label Code Alphanumeric; 30 Characters; Mandatory

    Specify the label code.

    Value Code Alphanumeric; 30 Characters; Mandatory

    Specify the value code.

    Label Description Alphanumeric; 100 Characters; Mandatory

    Specify the description of the selected label code.

    Default Value Mandatory
    Select if the value is to be shown as default, in the drop down list for this information head, in any maintenance screen in the system. The values available in drop-down list is as follows:
    • Yes
    • No
  7. Click Ok button.
    The changes are saved, the List of Values screen is closed, and you are returned to the main Additional Information Maintenance screen.

Linking an additional information head to a system parameter

  1. You can use Link to Param field to indicate whether the additional information head that is being maintained is linked to a system parameter that has been maintained for the installation.
  2. Check this box to indicate such a linkage.

    If a linkage is indicated, you must also enter the code of the specific system parameter to which the additional information head is linked.

    The values maintained for the linked parameter are also applicable for the additional information head.

  3. When you click on the Valid Values button, you can select the system parameter to which the additional information head must be linked.
  4. You cannot maintain a restrictive list for an additional information head that is linked to a system parameter.
  5. In the system, when the additional information field that is linked to a parameter code is displayed for data entry, a list of values button is provided for selection of the values defined for the linked parameter code.

Specify RPO Code for Account Status as Additional Information Head

When you set up a unit holder account in the system, you can capture the RPO Code that would be used for tracking the status of the account.

The RPO Code is provided as an additional information head in the Additional Information Maintenance, with valid values such as Bankrupt, Deceased, Lien on Holdings, Return Mail and so on, as a pre-shipped maintenance.

Table 3-9 RPO Code and Processing Implications

RPO Code Processing Implications
Normal/Active

No associated RPO Code

Bankrupt

Redemptions, Transfer-In will be allowed. Subscription, Switch-Out, Switch-In, Transfer-Out transactions will not be allowed

Deceased

All transaction types disallowed

Deceased Estate

All transaction types disallowed

Frozen

All transaction types disallowed

Hold

All transaction types disallowed

Blacklist

All transaction types disallowed

Suspicious

All transaction types disallowed

Closed

All transaction types disallowed

The RPO code can be tracked separately for each installation; therefore, the same account could have the BLOCKED status in one installation and ACTIVE in another. To mark a status, an Information Change must be used.

  1. Provide an additional information head RPO Effective Date with the data type as Date Type to capture the effective date for the RPO status.
    The format for the date is picked up from the Parameter Code DATEFORMATFORADDINFO, which is a pre-shipped maintenance. These additional information heads are provided at your installation only if specifically requested for.