1 Create Property File
This topic describes steps to create property files for Scheduler Application.
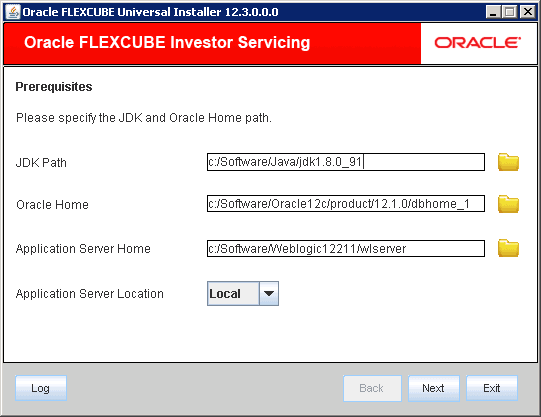
- Start Oracle FLEXCUBE Universal
Installer.The Oracle FLEXCUBE Universal Installer is displayed.
Figure 1-1 Oracle FLEXCUBE Universal Installer
- On Oracle FLEXCUBE Universal Installer
screen, enter the following details.Refer to the table for JDK and Oracle Home path.
Table 1-1 JDK and Oracle Home path
Field Description JDK Path Provide Home folder path of JDK1.8.
Oracle Home Provide home folder path of Oracle Client or Database.
Application Server Home Provide home folder path of Application Server.
Application Server Location Select location of the application server either local or remote.
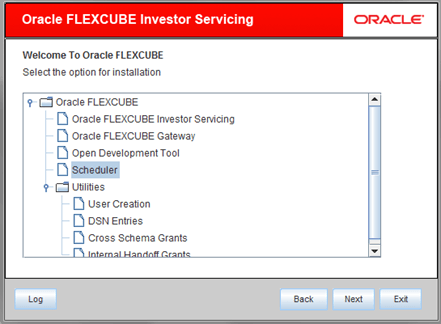
- Click Next to select the option for installation.
- Select Scheduler from the lists of
Oracle FLEXCUBE
options.The available options for installation are displayed.
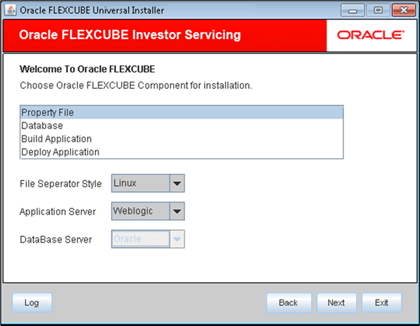
- Click Next to choose Oracle FLEXCUBE component for installation.
- Select Property File.The available options Property File, Database, Build Application, and Deploy Application are displayed.
Figure 1-3 Choose Property File for Installation
- Specify the operating system in which you are creating the property file. Choose the appropriate one from the drop-down list.
- Specify the application server in which you are creating the property file. Choose the appropriate one from the drop-down list.
- The system displays the database server in which you are creating the property file.
- Click Next after the Oracle
FLEXCUBE component details are
specified.The following screen is displayed.
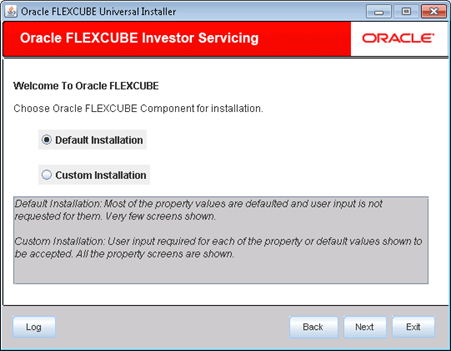
- Choose either Default Installation or
Custom Installation.Default Installation will need only the minimum list of details. Insulation plugin is deselected and SSO is by default No for this.
- Click Next if you select
Default Installation
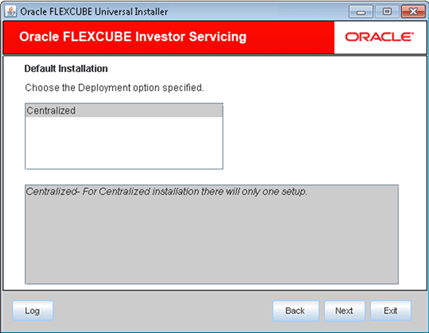
option.The following screen is displayed.
- Choose the Deployment option specified in the Default Installation screen and click Next.
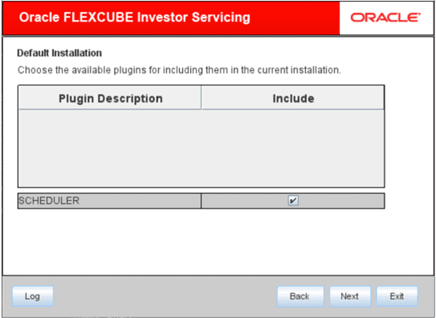
- Choose the available plugins for including them in the current
installation.The following screen is displayed.
- Select the Custom Installation option if
there are any issues with the default values chosen and
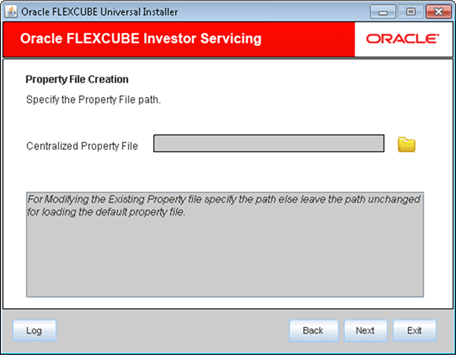
click Next.Load the property file created and correct it. The property file needs to be built before the EAR file.The Property File Creation screen is displayed.
- On Property File Creation screen, specify the property file
path in the Centralized Property
File.If you create a new property file, leave the field blank. If you modify an existing property file, specify the location of the property file manually.
- Specify the security key for the Encryption, here in this case it is oraclefinancials.
- Select the Platform Security for weblogic the symmetric key is
not stored in the property file for security reasons.If Platform Security is unchecked the symmetric key is available in the property file and a warning message is displayed to the user.If Platform Security is not enabled, the Installer will pop-up a window.
- Set Up Common Properties
This topic describes the process of setting common properties of Scheduler. - Configure Scheduler
This topic describes the method to configure scheduler data source. - Set Up EMS Properties
This topic describes the process of setting EMS Properties. - Save Property File
This topic describes the steps to save Property File.
