9.1 Create JavaMail Session
This topic explains the steps to create JavaMail Session.
- Start the Administration Console of WebLogic Application server.You can start the Application by opening the Oracle
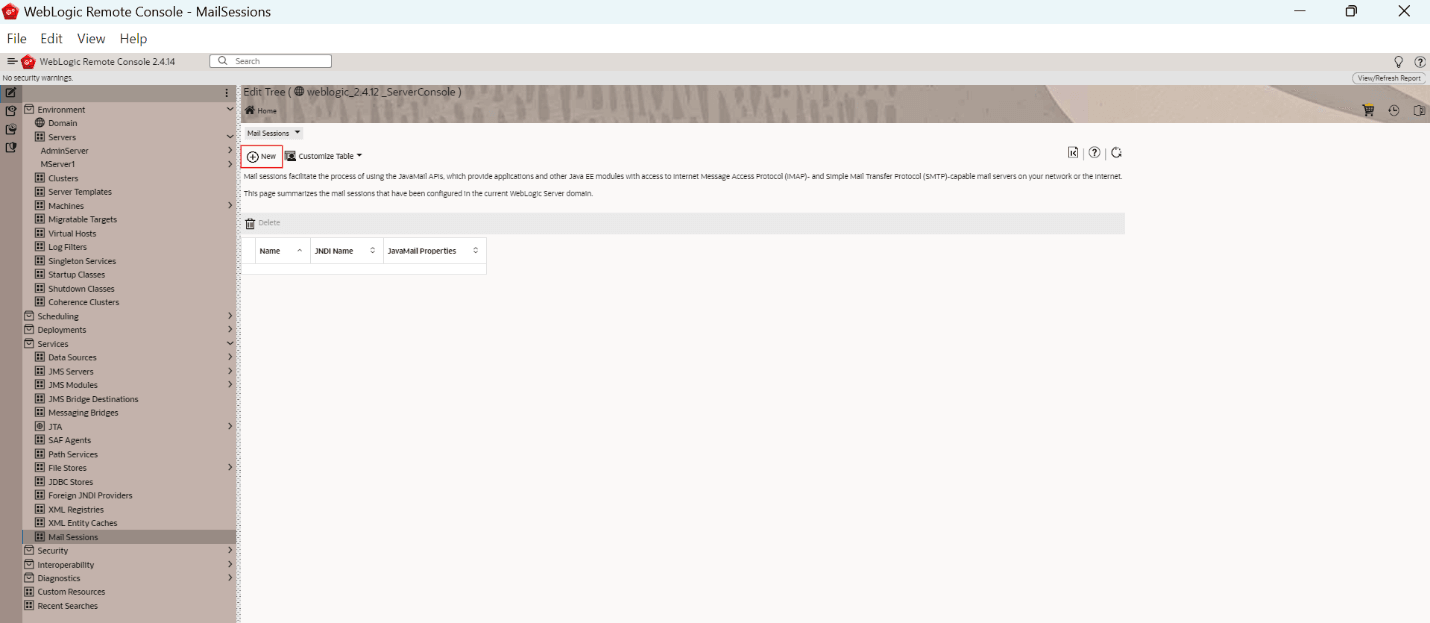
Weblogic Remote Consoleapplication post installing the application from the linkhttps://github.com/oracle/weblogic-remote-console/releases.The WebLogic Remote Console screen is displayed. - Go to Services and then select Mail
Sessions.The Mail Sessions screen is displayed.
- Click New to create a new Mail Session.
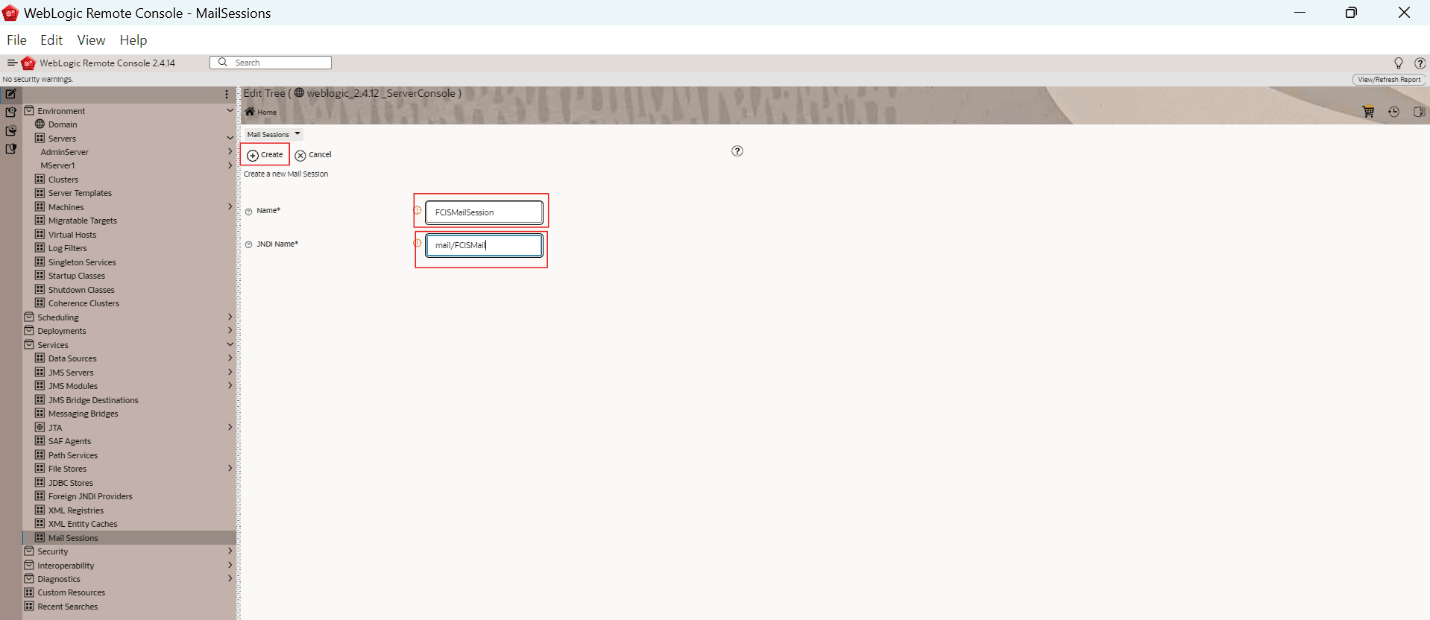
- Click Create.The following screen is displayed.
- Specify the Name and JNDI Name. Examples:Name as FCISMailSession and JNDI Name as mail/FCISMail.
Note:
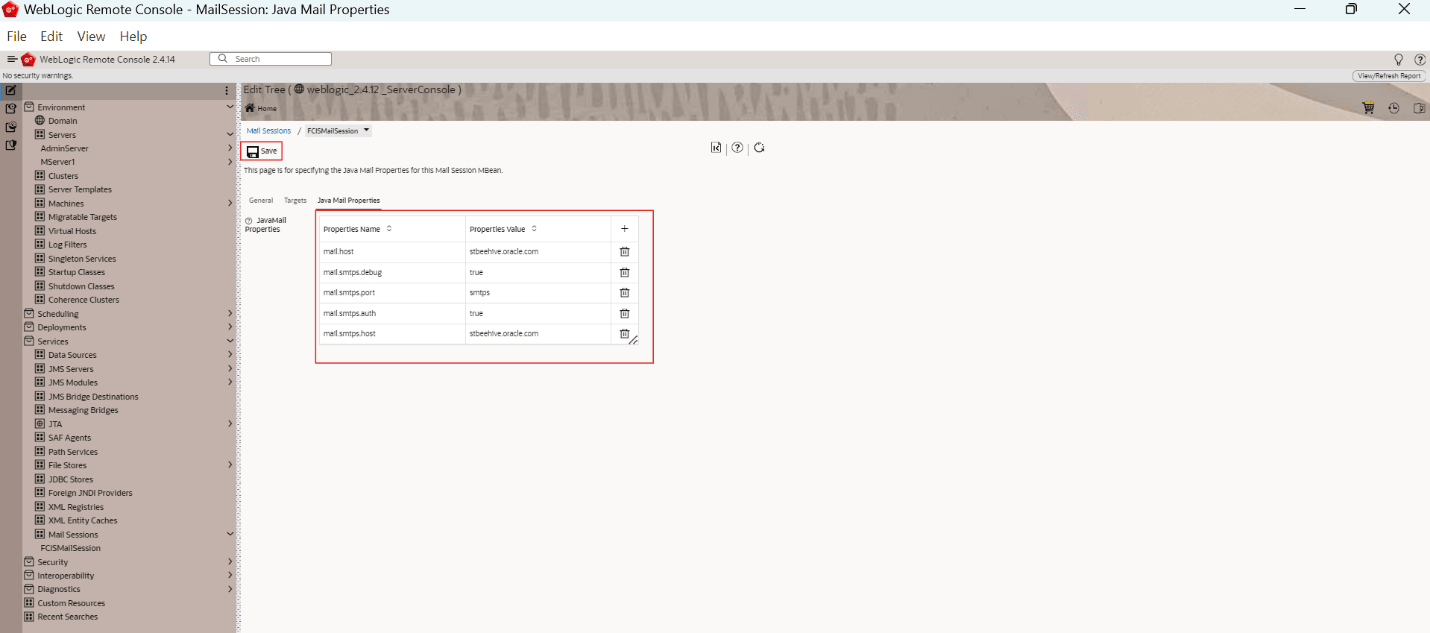
This JNDI name needs to be maintained in fcubs.properties file with encrypted format. - On the Java Mail Properties tab, specify the details and
save.
Java Mail Properties
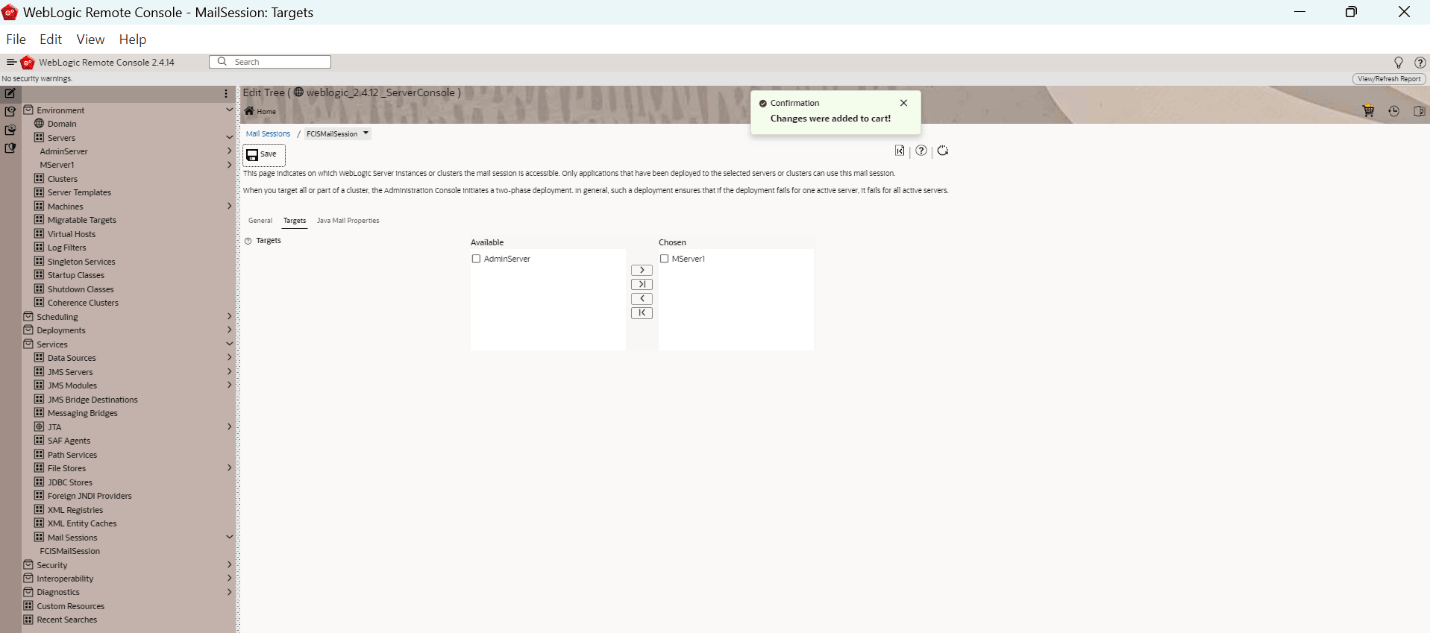
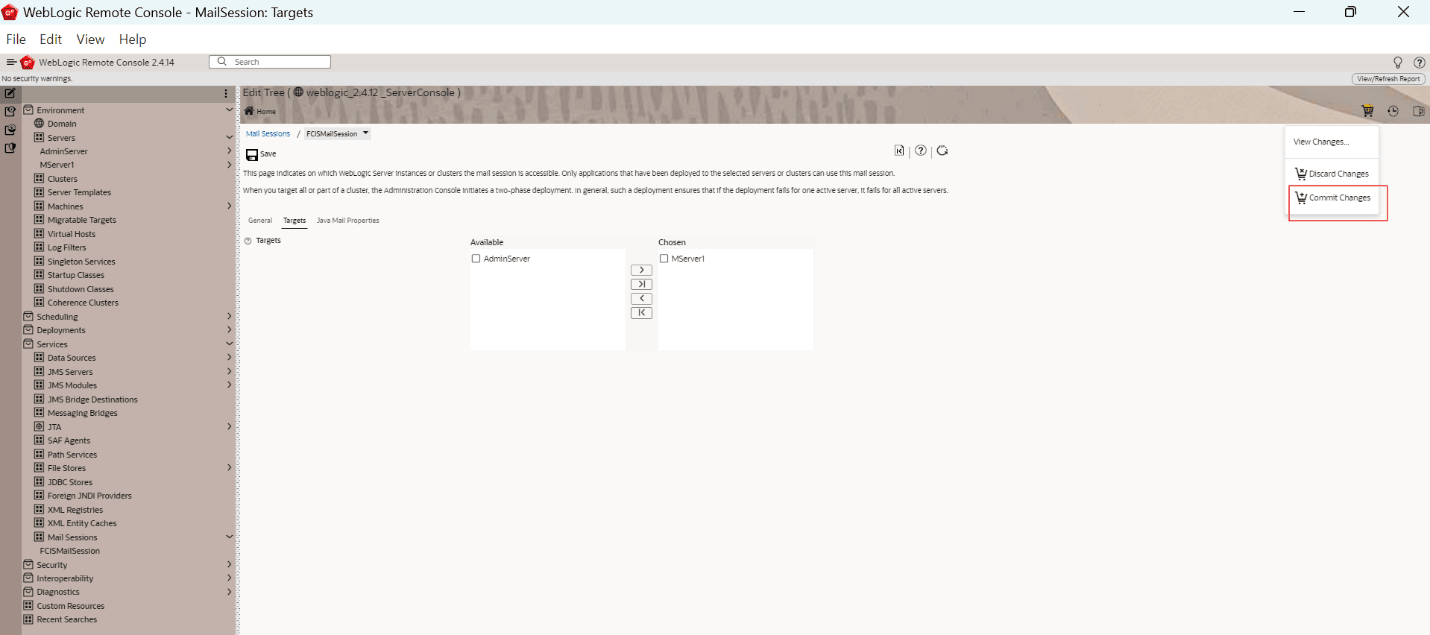
mail.host=<HOST_MAIL_SERVER>Eg: samplenamemail.smtps.port=<SMTPS_SERVER_PORT>Eg: 1010mail.transport.protocol=<MAIL_TRANSFER_PROTOCOL>Eg: smtpsmail.smtps.auth=truemail.smtps.host==<HOST_SMTPS_MAIL_SERVER>Eg: samplename - Click the Targets tab.The following screen is displayed.
- Select the required servers and click Save.
fcubs.propertiesfile needs to be updated with the encrypted values of:- SMTP_HOST
- SMTP_USER
- SMTP_PASSWORD
- SMTP_JNDI
- Click the Cart icon to view, commit, or discard the
changes.The following screen is displayed.
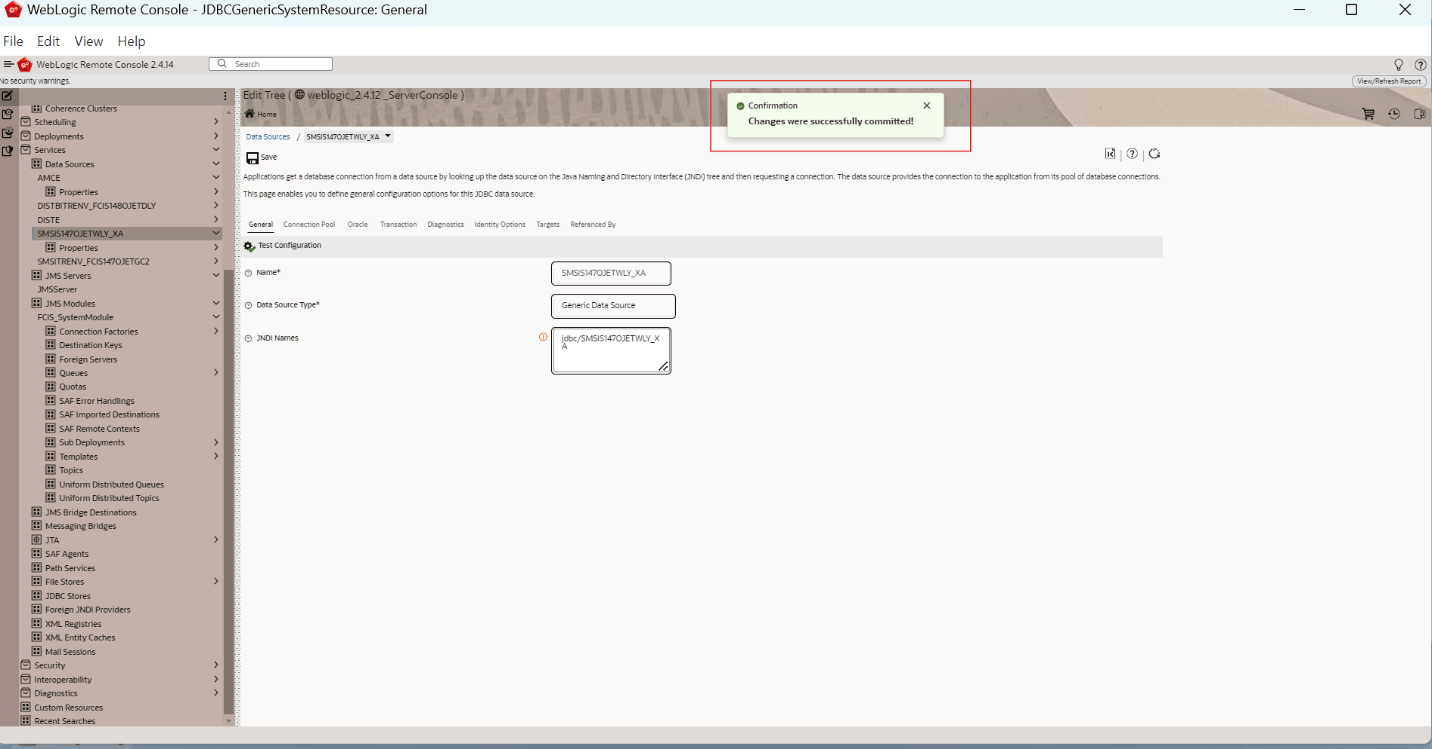
- Select Commit Changes option to apply the changes.The Changes were successfully committed is displayed on committing the changes.
Parent topic: Setup/Configure Mail Session in WebLogic
