- Oracle Banking Common Core User Guide
- Core Maintenance
- Validation Model
- Create Validation Model
1.46.1 Create Validation Model
This topic describes the systematic instructions to create Validation model based on the various input.
- On Home screen, click Core Maintenance. Under Core Maintenance, click Credit Decision.
- Under Credit Decision, click Maintenance. Under Maintenance, click Validation Model.
- Under Validation
Model, click Create
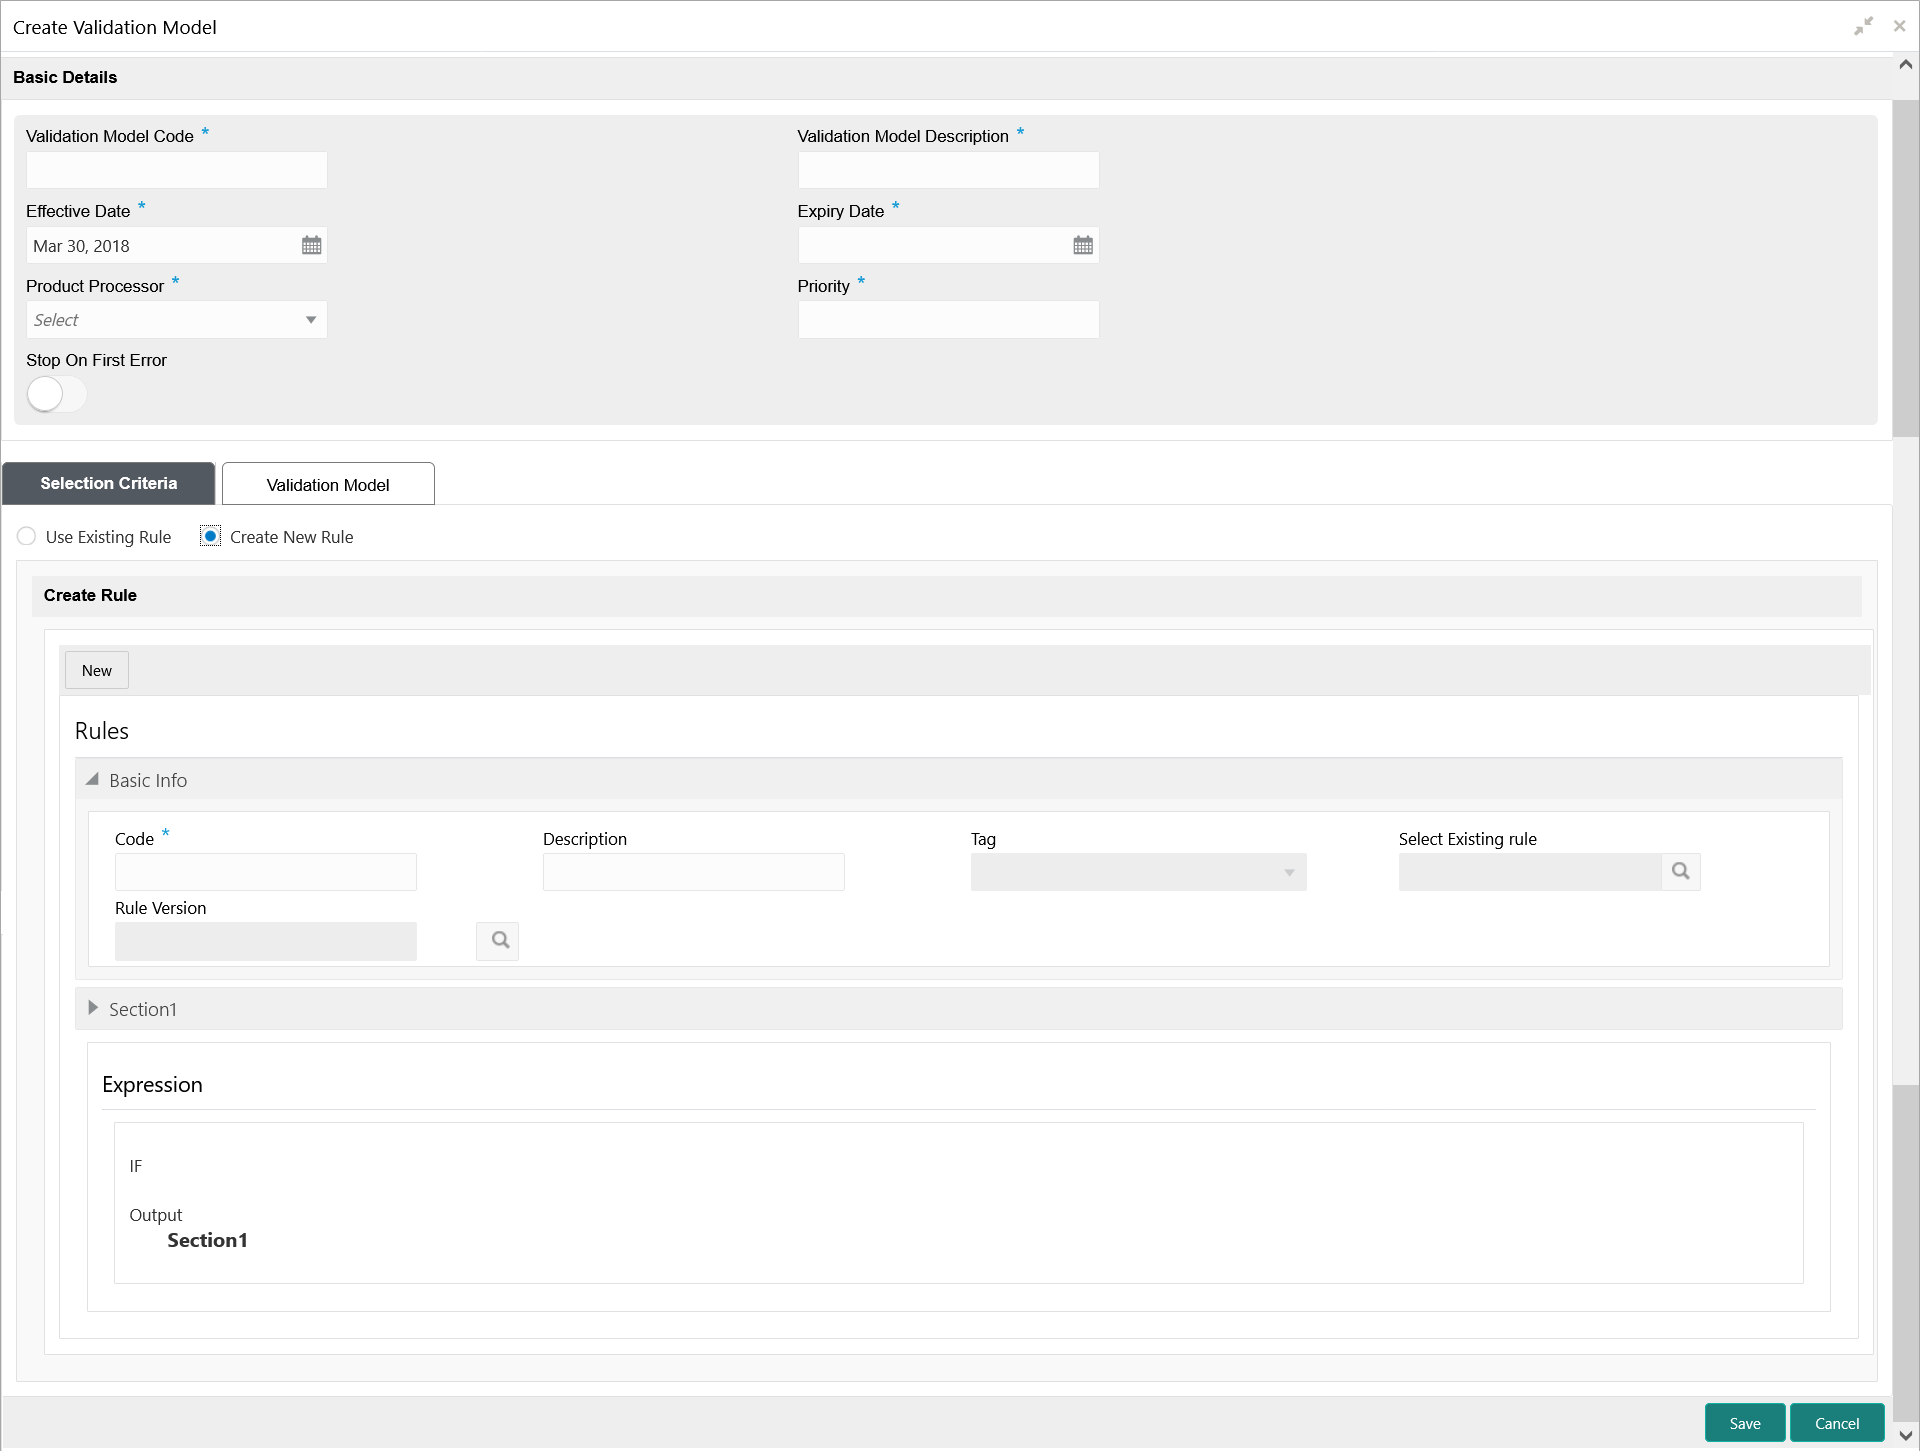
Validation Model.The Create Validation Model screen displays.
- On Create Validation
Model screen, specify the
fields.For more information on fields, refer to the field description table.
Note:
The fields, which are marked with an asterisk, are mandatory.Table 1-119 Create Validation Model - Field Description
Field Description Validation Model Code Specify the unique Validation model code. Validation Model Description Specify a short description for the Validation model. Effective Date Specify the effective date. Expiry Date Specify the expiry date. Product Processor Specify the product processor for which the Validation model is being created. Priority Specify the priority of the pricing. - Click the Selection
Criteria to define selection criteria
rules for Validation model.
Table 1-120 Create Validation Scoring Model - Selection Criteria - Field Description
Field Description Use Existing Rule By default, this option is enabled. Indicates if the existing rule is linked. Rule Code Select the rule code from the drop down list. 
Click this icon to get the information about the rule. Rule Name Displays the rule name of the rule code. Create New Rule Select this option to create new rule. Code Specify the rule code. Description Specify the rule description. + icon Click this icon to add new expression. Fact / Rules Select the fact or rule from the drop-down list. Once the user selects the fact/rules, one more field opens adjacent to the output, update the same based on the selected output option.
Operator Select the comparison operator from the drop-down list. The available options are:- <
- >
- +
- =
- %
- !=
- -
- >=
- <=
- *
- /
- Contains
- In
- Like
- Matches
- NotMatches
- NotContains
- Notin
Data Type Select the data type for the fact or rule. Once the user select the data type, one more field opens adjacent to the output, update the same based on the selected output option.
The available options are:- Text
- Number
- Boolean
- Date
- Fact
- Rules
The below option displays if the Data Type is selected as Boolean.- True
- False
Output Select the output from the drop-down list. Once the user select the data type, one more field opens adjacent to the output, update the same based on the selected output option.
The available options are:- Text
- Number
- Boolean
- Date
- Fact
- Rules
The below option appears if the Data Type is selected as Boolean.- True
- False
Expression Displays the expression updated in the expression builder. - Click the Validation
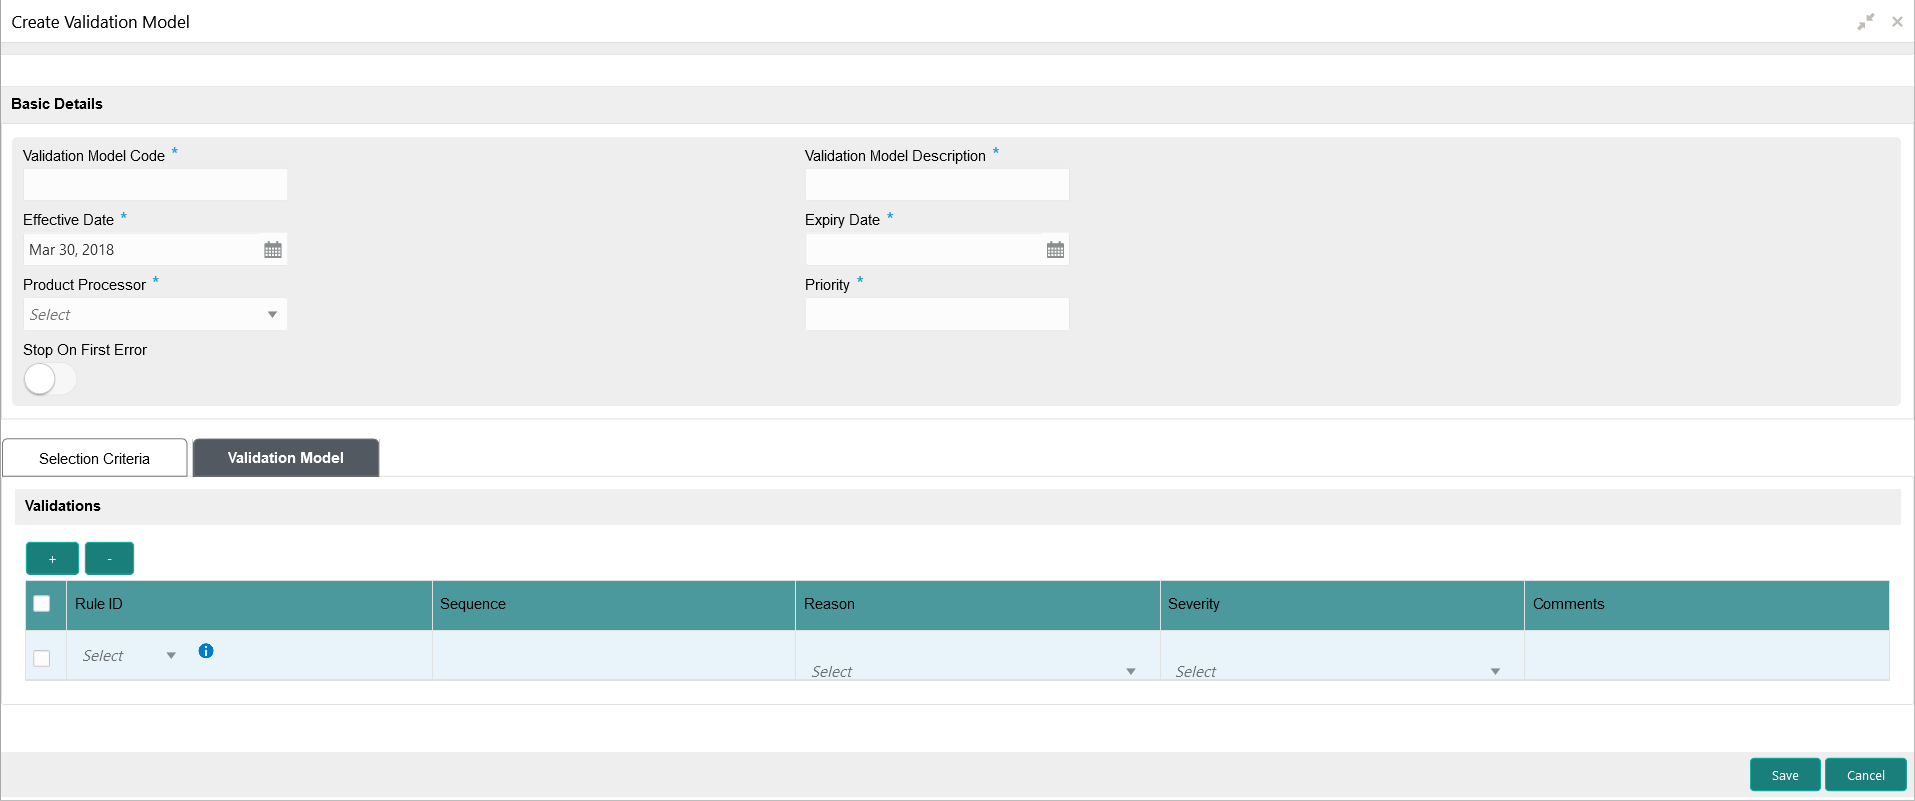
Model to define the pricing.The Create Validation Model – Validation Model screen displays.For more information on fields, refer to the field description table.
Figure 1-168 Create Validation Model – Validation Model
Table 1-121 Create Validation Model – Validation Model - Field Description
Field Description + icon Click this icon to add a new row. - icon Click this icon to delete a row, which is already added. Rule ID Select the rule ID from the drop down list. All rules configured in the rule engine for the selected product processor are obtained.

Click this icon to get the information about the rule. Sequence Specify the sequence of execution of rules. Reason Select the reason from the drop down list. Comments Specify the comments. - Click Save to save the details.The Validation model is successfully created and can be viewed using the View Validation Model screen.
Parent topic: Validation Model

