1.4 KYC Check
KYC check for the retail customer is populated based on the product selected by that customer. The banks can directly perform the KYC check by themselves or reach external agencies for the KYC Information.
For successful retail onboarding, the customer must be compliant with all the necessary KYC checks.
Note:
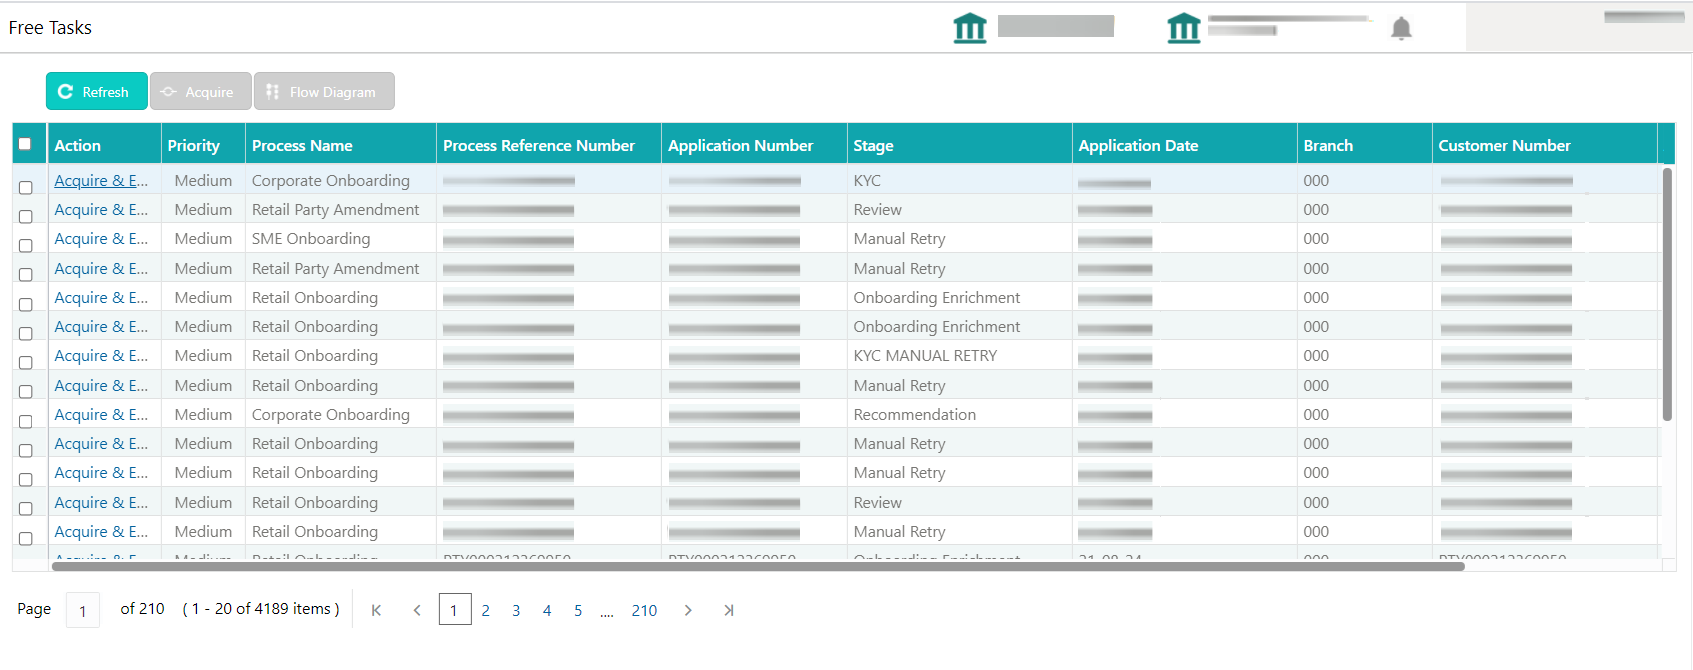
The fields, which are marked with an asterisk, are mandatory.- To acquire and edit the KYC task, click Tasks. Under
Tasks, click Free Task.
The system displays the Free Tasks screen.
- Click Acquire and Edit in the Free
Tasks screen for the application for which KYC
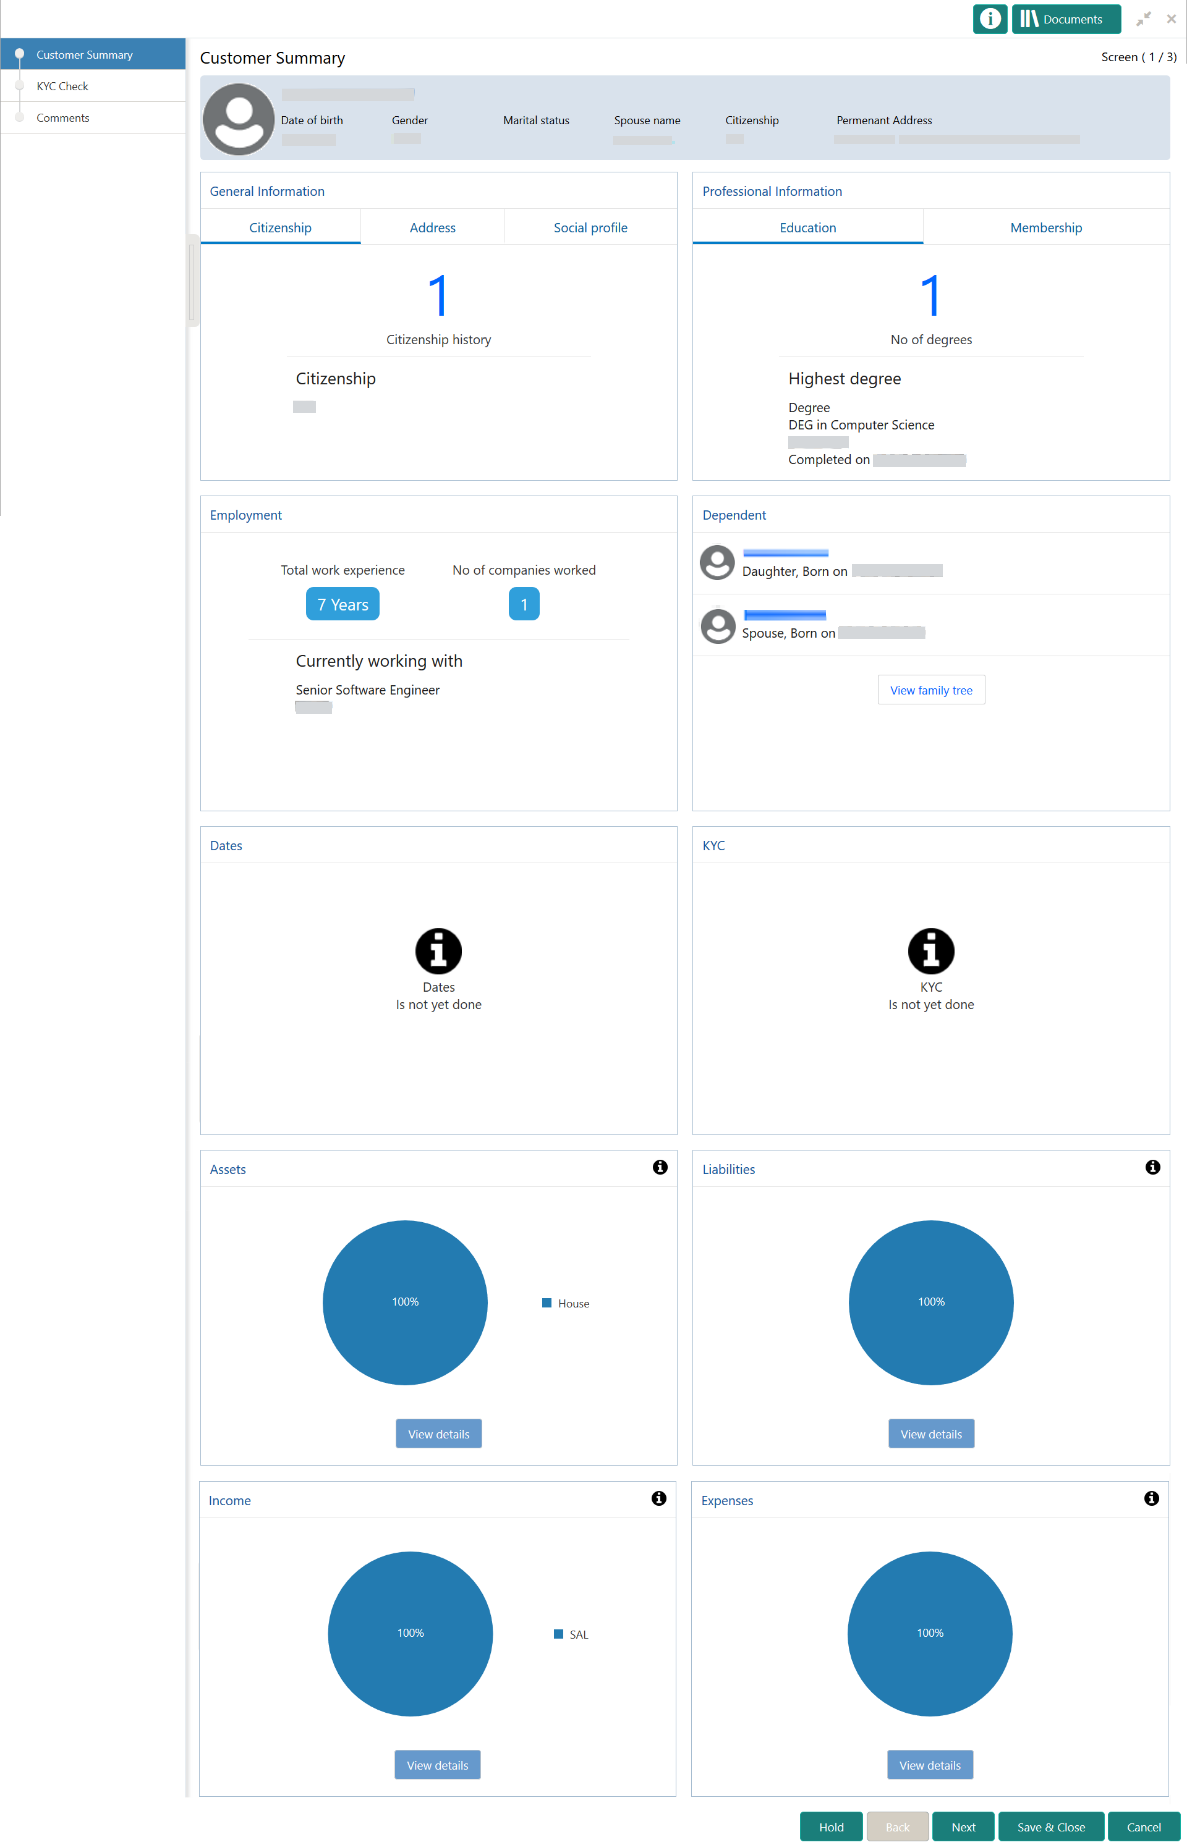
Check stage has to be acted upon.The Customer Summary screen displays.
- On the Customer Summary screen, verify the details that
are displayed in tiles.For more information on fields, refer to the field description table.
Table 1-44 Customer Summary - Tile Description
Tile Description General Information In this tile, the following details are displayed: - Citizenship
- Address
- Social Profile
Professional Information In this tile, the following details are displayed: - Education
- Membership
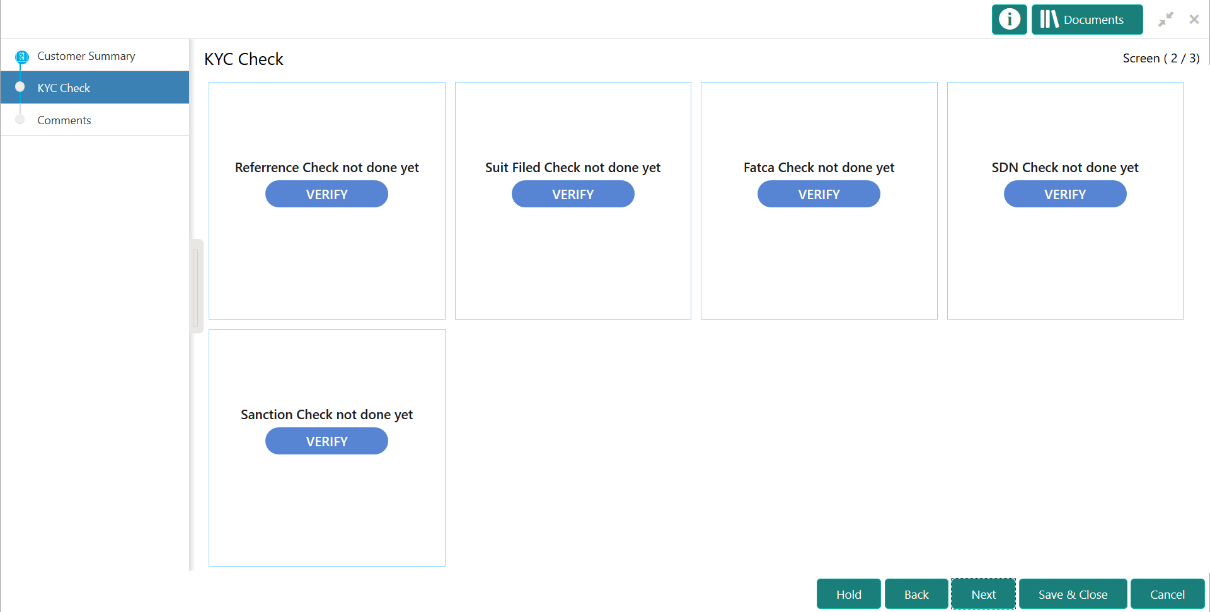
Employment Displays the employment details of the customer. Dependent Displays the dependent details of the customer. Dates Displays the details of the dates. KYC Displays the KYC details. Assets Displays the assets details. Liabilities Displays the liabilities details. Income Displays the income details. Expense Displays the expense details. View details In the corresponding tile, click this icon to view the detailed information. - Click Next.The KYC Check screen displays.OBPY support 13 different KYC check as follows
- Address Check
- Identity Check
- Police DB Check
- Credit Score Check
- Education Qualification
- Field Verification
- Reference Check
- Suit Filed
- PEP Identification
- AML Check
- FATCH Check
- SDN Check
- Sanction Check
KYC Checks are listed during KYC stage, based on the Mandatory and Optional KYC check configuration except PEP Identification. PEP Identification check is displayed, if customer is determined as Politically Exposed Person (PEP) during Enrichment Stage > Additional Info.
For more information about Mandatory and Optional KYC check configuration, refer Party Onboarding Configuration User Guide.
- Verify all the KYC Checks listed for the selected product.
- Click Verify.
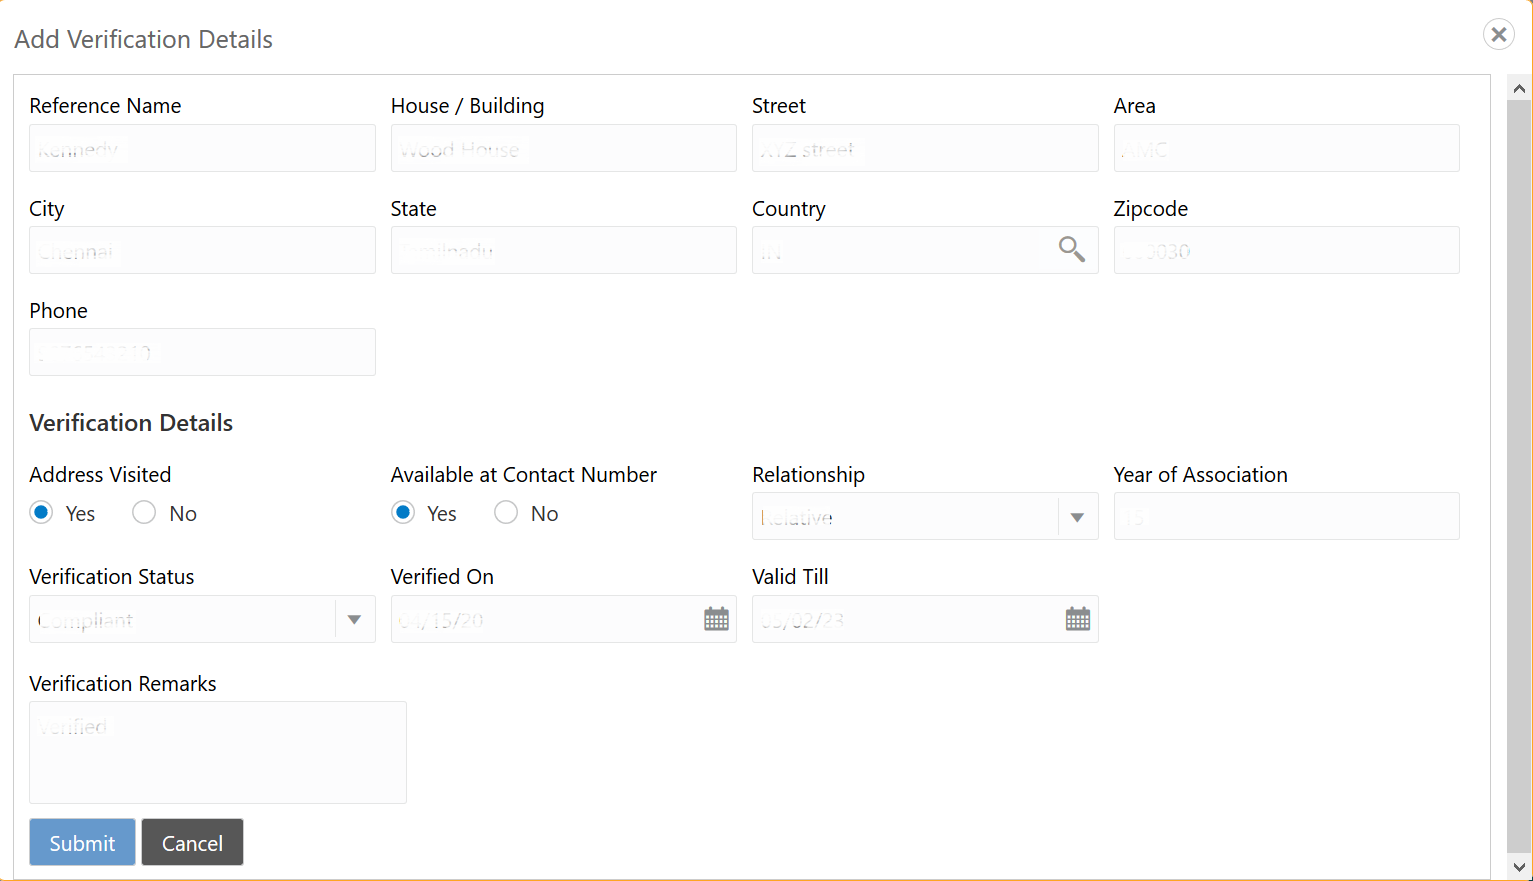
The Add Verification Details screen displays.
- On the Add Verification Details screen, specify the
details.For more information on fields, refer to the field description table.
Table 1-45 Add Verification Details - Field Description
Field Description Reference Name Specify the name of the reference person. House/Building Specify the house/building number. Street Specify the street name. Area Specify the area of the reference person. City Specify the city of the reference person. State Specify the state of the reference person. Country Click search icon and select the country from the list of values. Zip Code Specify the zip code of the address. Phone Specify the phone number of the reference person. Verification Details Specify the fields under this section. Address Visited If the reference person’s address is verified, select Yes. Otherwise, select No. Available at Contact Number If the reference person is available at the contact number provided, select Yes. Otherwise, select No. Relationship Select the relationship type from the drop-down list. Year of Association Specify the customer’s year of association with the reference person. Verification Status Select the status of verification from the drop-down list The available options are:- Compliant
- Non-compliant
- Not Verified
Verified On Click the calendar icon and select the date of the verification. Note:
This field is applicable if the Verification Status is selected as Compliant or Non-compliant.Valid Till Click the calendar icon and select the last date of the validity. Note:
This field is applicable if the Verification Status is selected as Compliant or Non-compliant.Verification Remarks Specify the verification remarks. - Click Submit.On the KYC Check screen, the verification details are updated in the corresponding tile.
- Verify all the KYC checks listed for the selected product.
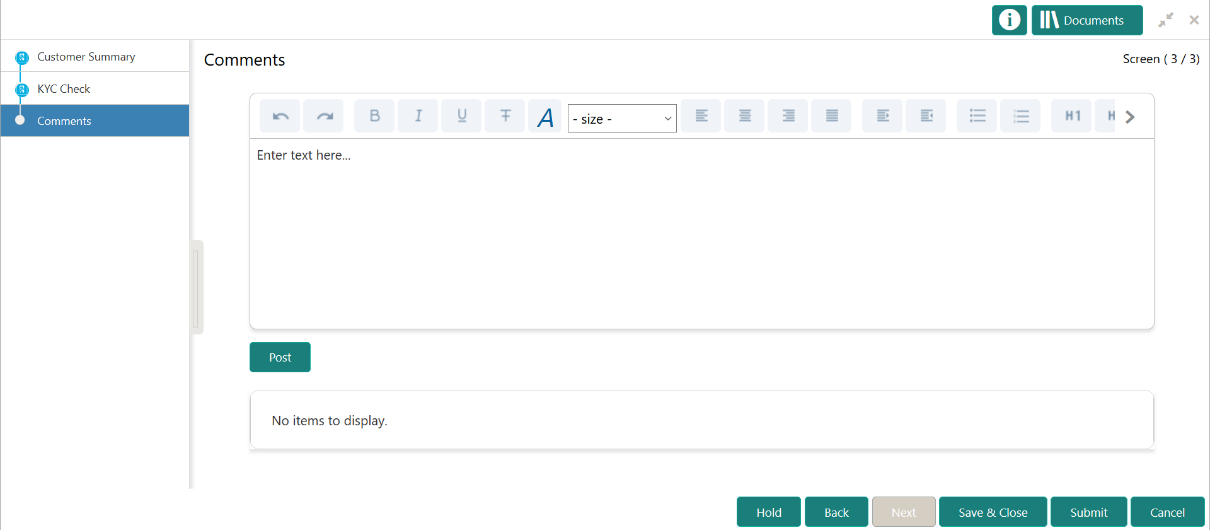
- Click Next.The Comments screen displays.
- Specify the overall comments for the KYC stage.
- On the Comments screen, perform the following
actions:
Table 1-46 Actions - Description
Actions Description Post Click Post. The comments are posted below the text box. Submit Click Submit. The Checklist window is displayed. Outcome On the Checklist window, select the Outcome as Approve or Reject and click Submit. Based on the value selected for the outcome, the following conditions apply: -
If Approve is selected, the task is moved to the Recommendation stage.
- If Reject is selected, the task is terminated.
-
Parent topic: Retail Onboarding
