- Small and Medium Business Onboarding User Guide
- SMB Onboarding
- Onboarding Enrichment
- Onboarding Enrichment - Financial Profile
1.3.4 Onboarding Enrichment - Financial Profile
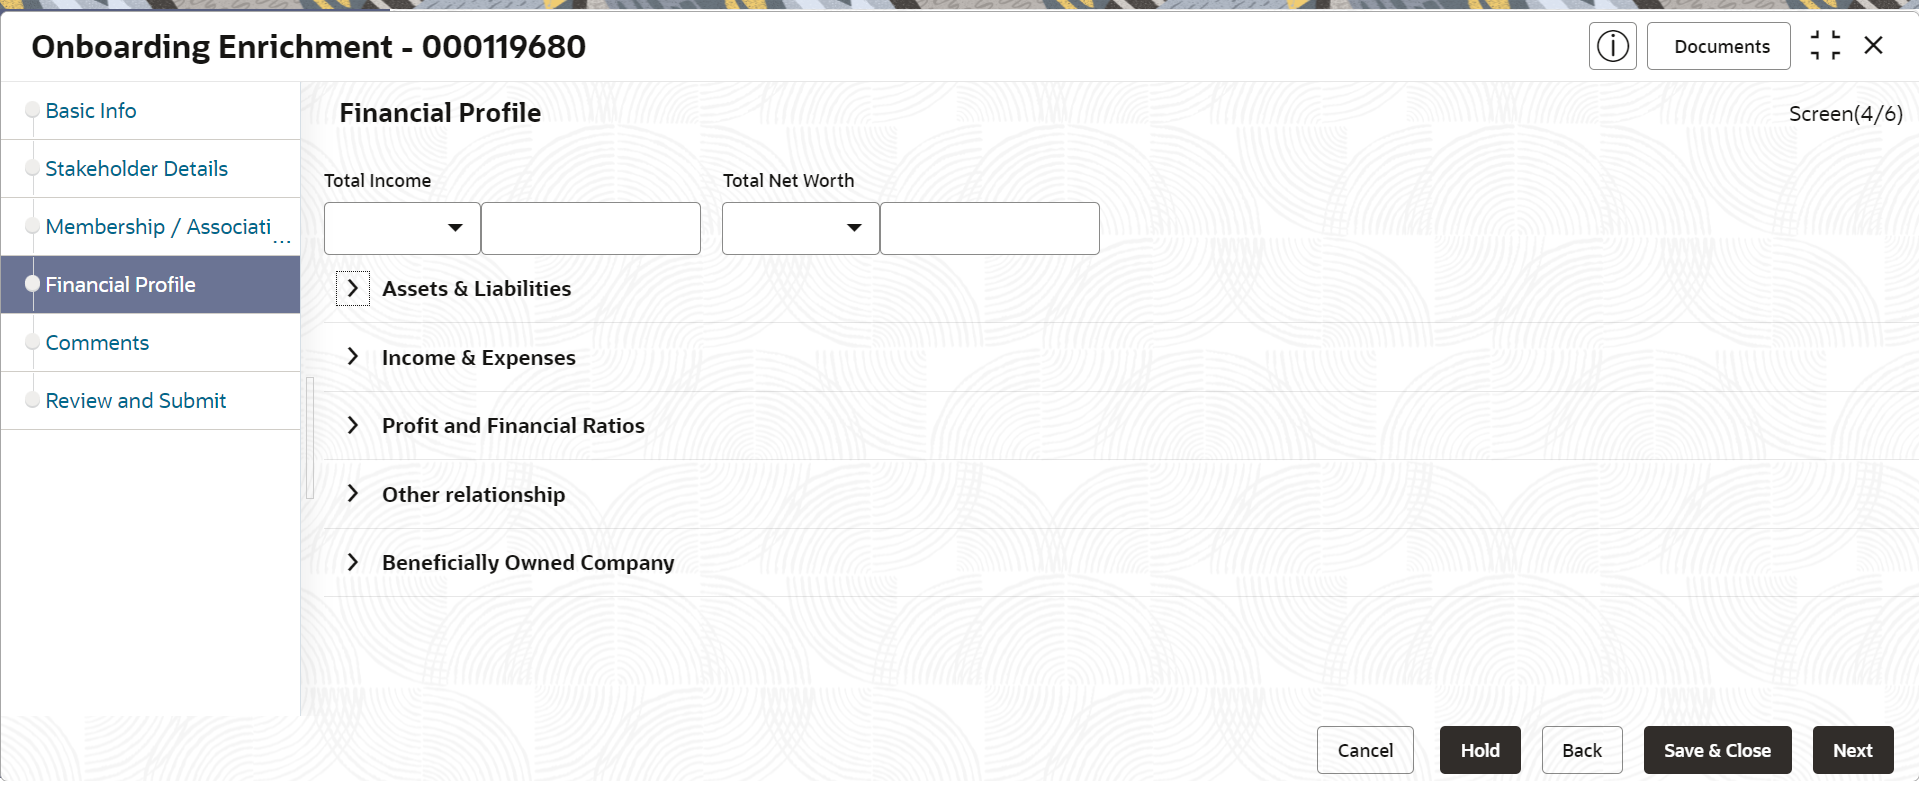
The RMs can further enrich the customer’s financial information in the Financial Profile screen, by adding income details, expense details, and details about the relationship with other banks.
Note:
The fields marked as Required are mandatory.- Click Next in the Onboarding Enrichment -
Membership / Association screen.The Onboarding Enrichment - Financial Profile screen displays.
Figure 1-36 Enrichment – Financial Profile
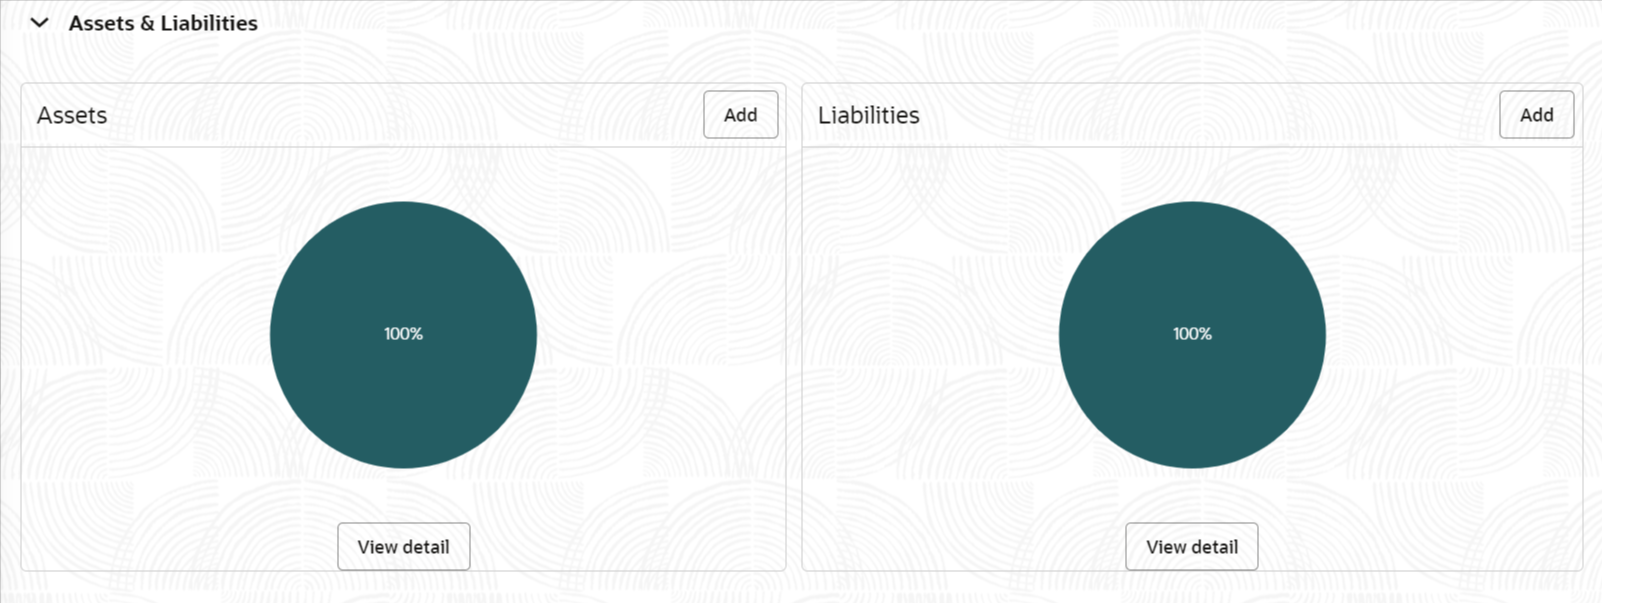
- On the Financial Profile screen, click View detail in the corresponding tiles to change the chart view of asset and liabilities details to the list view.The Assets and Liabilities Detail screen displays.
- Click the configure icon in the corresponding tile.
The following options are displayed in the assets and liabilities details:
- Add
- Modify
- Delete
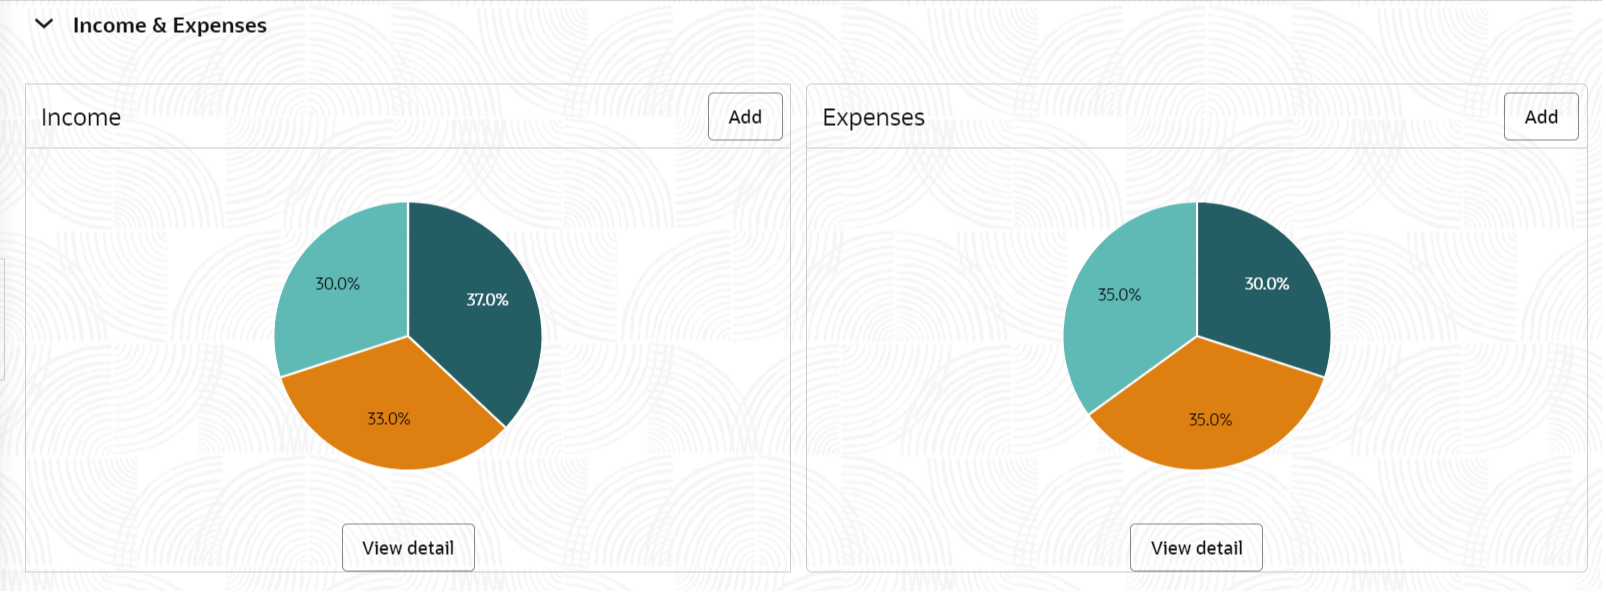
- Click and expand the Income & Expenses
section.
Figure 1-38 Financial Profile – Income and Expense
- Click Add in the Income & Expenses segment.The Add Income screen displays.
- On the Add Income screen, specify the fields.For more information on fields, refer to the field description table.
Table 1-22 Add Income – Field Description
Field Description Income Type Select the income type from the drop-down values. Frequency Select the frequency of income from the drop-down list. Currency Click the search icon and select the currency from the list. Amount Specify the amount. - Click Add to save the details.
Note:
You can also select the required item from the list, and click Edit/Delete icon to modify/delete the added membership details. - Click
 icon to exit the Income window.
 - Click Add in the Income & Expenses segment.The Add Expenses screen is displayed.
- On the Add Expense screen, specify the fields. For more information on fields, refer to the field description table.
Table 1-23 Add Expenses - Field Description
Field Description Expense Type Select expense type from the drop-down list. Frequency Select the frequency from the drop-down list. Currency Click the search icon and select the currency from the list. Expense Value Specify the expense value. - Click Add to save the details.
Note:
You can also select the required item from the list, and click Edit/Delete to modify/delete the added membership details. - Click
 icon to exit the Income window.
 - Click and expand the Profit and Financial Ratios
section.
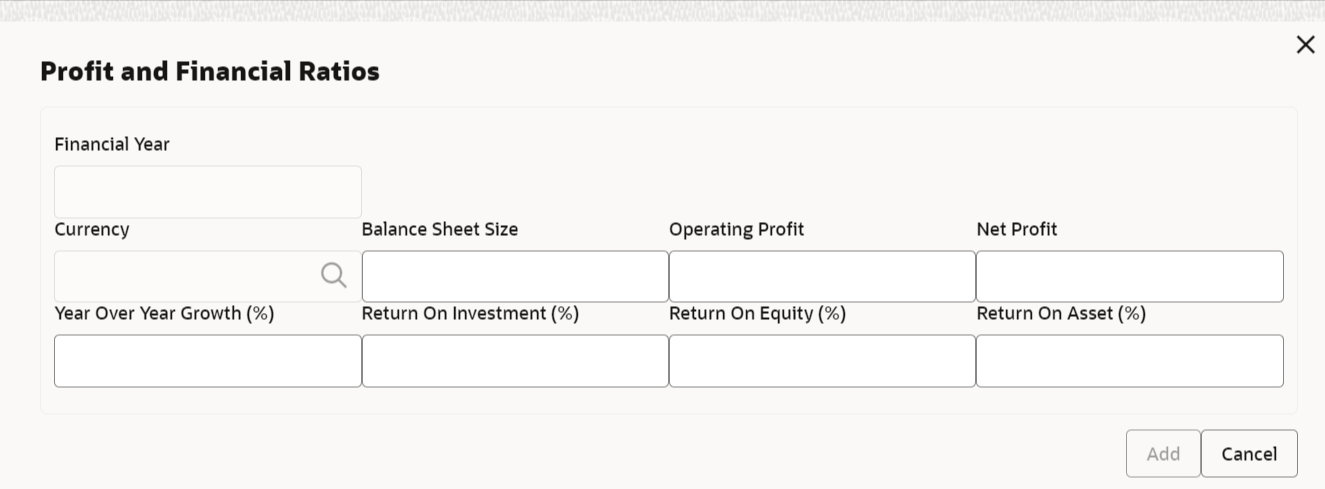
- Click Add to add the profit and financial ratios.The Profit and Financial Ratios screen displays.
Figure 1-42 Profit and Financial Ratios - Add
- On the Profit and Financial Ratios window, specify the
fields. For more information on fields, refer to the field description
table.For more information on fields, refer to the field description table.
Table 1-24 Profit and Financial Ratios – Field Description
Field Description Financial Year Specify the financial year. Currency Click the search icon and select the currency from the list of values. Balance Sheet Size Specify the balance sheet size. Operating Profit Specify the operating profit. Net Profit Specify the net profit. Year Over Year Growth Specify the year-over-year growth value. Return On Investment Specify the return value on investment. Return On Equity Specify the return value on equity. Return On Asset Specify the return value on the asset. - Click and expand the Other Relationship section.The Other Relationship screen displays.
- Click Add to add details about the customer’s
relationship with other banks.The Relationship with other financial institutions screen displays.
Figure 1-44 Relationship with other financial institutions
- On the Relationship with other financial institutions
screen, specify the fields.For more information on fields, refer to the field description table.
Table 1-25 Relationship with other financial institutions - Field Description
Field Description Institution Name Specify the name of the institution where the customer is a member. Relationship Type Select the relationship type from the drop-down list. Relationship Worth Select a currency from the drop-down values, and specify the relationship worth amount. Relationship Since Click the calendar icon and select the start date of the customer’s relationship. - Click Add to save the details.The system adds and lists the relationship details in the Other relationship section.
Note:
You can also select the required item from list and click the edit/delete icon to modify/delete the other relationship details.
- Click Next to move to the Onboarding Enrichment - Comments segments.
Parent topic: Onboarding Enrichment


