- Oracle Banking Common Core User Guide
- Core Maintenance
- Checklists
- Checklists Linkage Maintenance
1.7.1 Checklists Linkage Maintenance
This topic describes the systematic instructions to view the list and configure the checklists linkage maintenance.
Specify User ID and Password, and login to Home screen.
- On Home screen, click Core Maintenance. Under Core Maintenance, click Checklists.
- Under Checklists, click Checklists Linkage
Maintenance.The Checklists Linkage Maintenance screen displays.
Figure 1-14 Checklists Linkage Maintenance
For more information on fields, refer to the field description table.
Table 1-14 Checklists Linkage Maintenance – Field Description
Field Description Process Code Displays the process code. Application Category Code Displays the application category code Stage Code Displays the stage code. Authorization Status Displays the authorization status of the record. The options are:- Authorized
- Rejected
- Unauthorized
Record Status Displays the status of the record. The options are:- Open
- Closed
Modification Number Displays the number of modification performed on the record. - Click
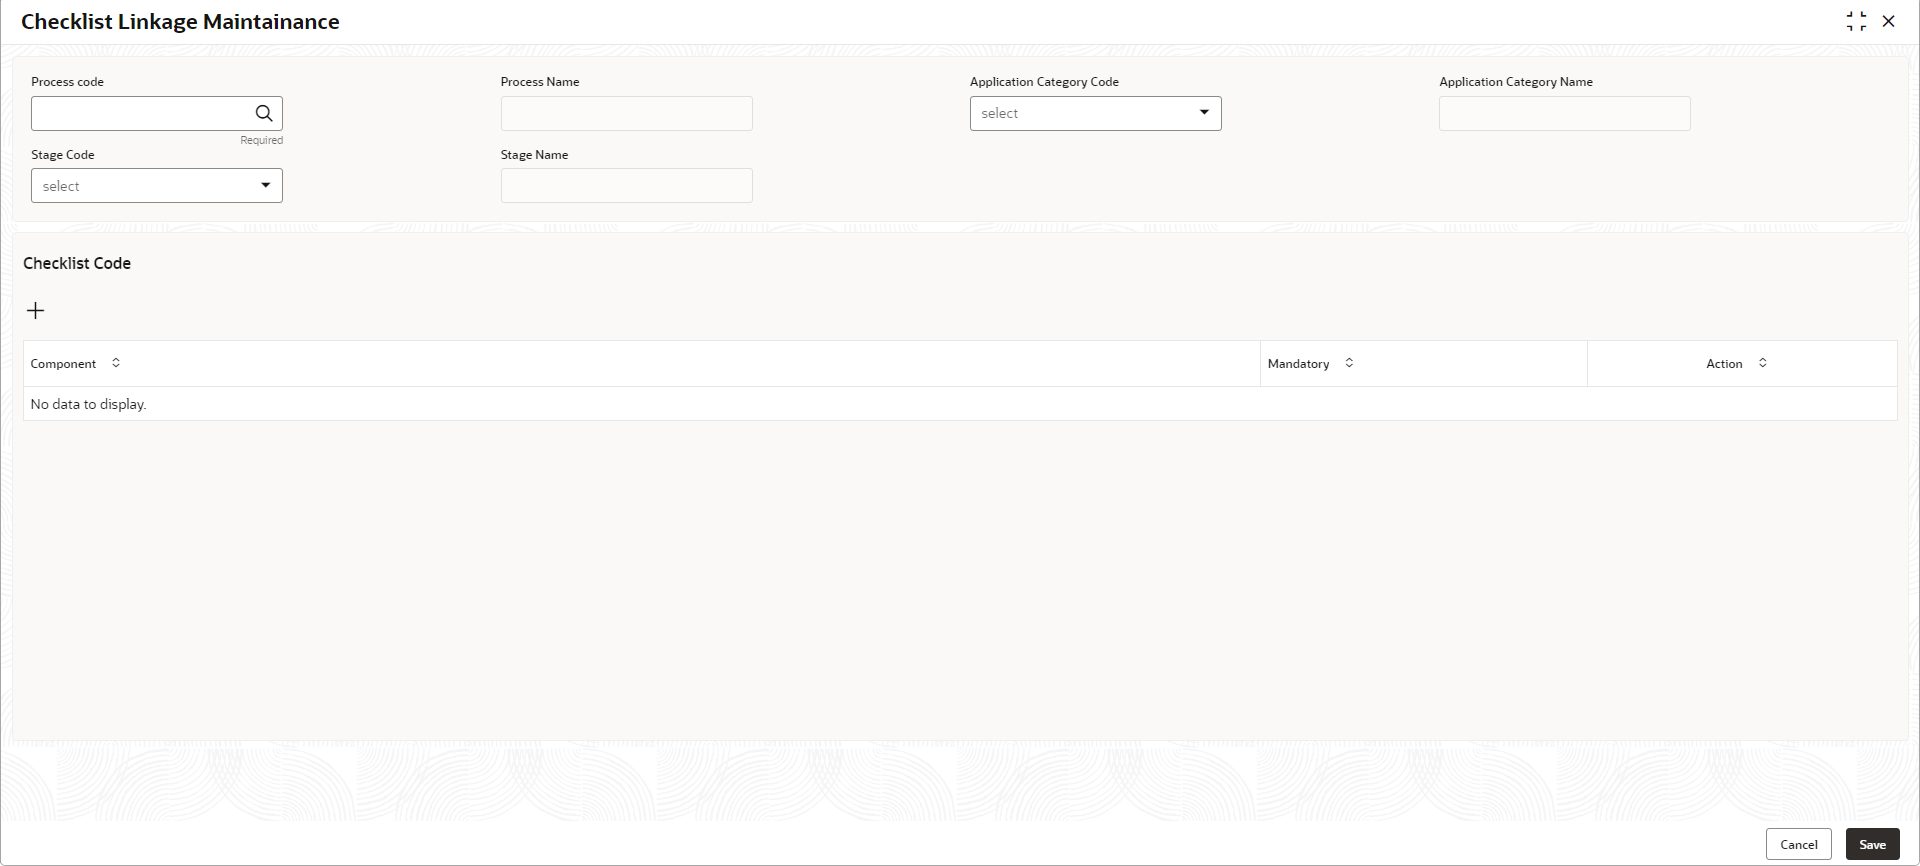
 to configure the new checklists linkage maintenance.The Checklists Linkage Maintenance screen displays.
Figure 1-15 Checklists Linkage Maintenance
For more information on fields, refer to the field description table.Note:
The fields marked as Required are mandatory.Table 1-15 Checklists Linkage Maintenance – Field Description
Field Description Process Code Click Search and select the process code to maintain the checklists. Process Name Displays the name of process based on the process code selection. Application Category Code Select the application category code from the drop-down list. Application Category Name Displays the name of the application category. Stage Code Select the stage code from the drop-down list. Stage Name Displays the name of the stage selected. - Click
 to add a row and provide the checklist code details.
 - Click Save to save the details.
- Click Cancel to discard the changes and close the screen.
Parent topic: Checklists

