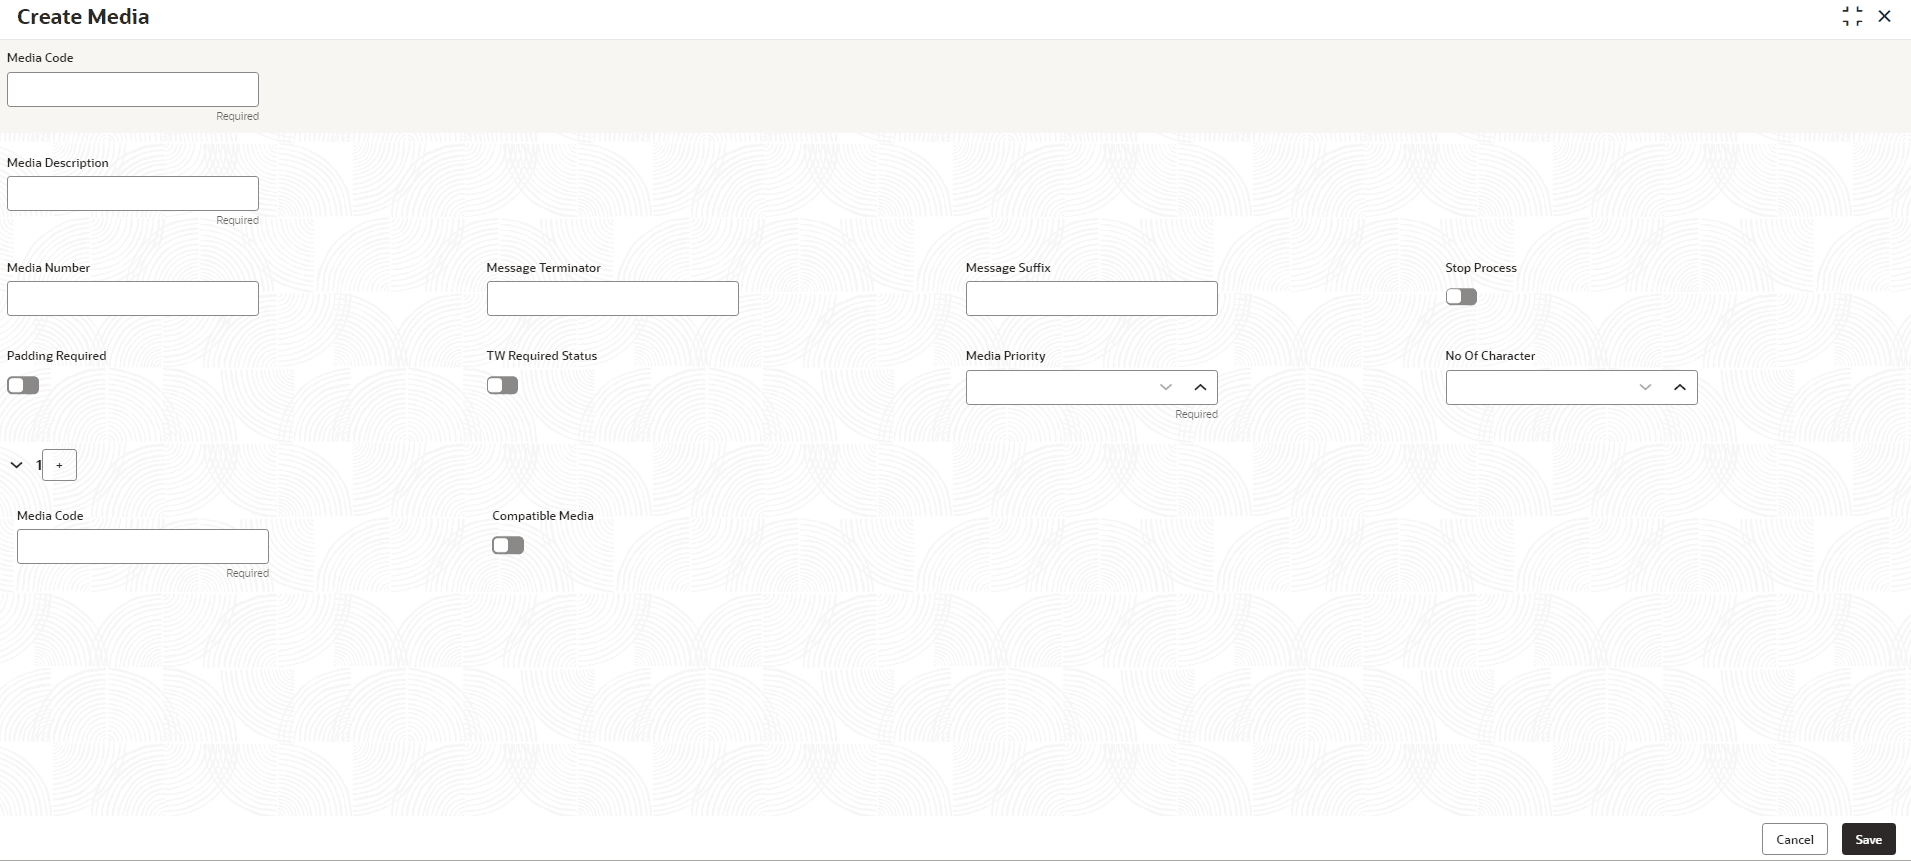
1.34.1 Create Media
This topic describes the systematic instructions to configure media.
- From Home screen, click Core Maintenance. Under Core Maintenance, click Media.
- Under Media, click Create Media.The Create Media screen is displayed.
- Specify the fields on the Create Media screen.For more information on fields, refer to the field description table.
Note:
The fields marked as Required are mandatory.Table 1-77 Create Media – Field Description
Field Description Media Code Specify a unique media code to identify while associating with an advice. Media Description Specify additional information about the media. Media Number Specify a unique number for the media type. Message Terminator Specify the padded characters to mark the end of an incoming messages. Message Suffix Specify the padding characters to mark the end of an outgoing messages. Stop Process Click the toggle status to enable halting the processing of incoming and outgoing messages.
By default, this option is disabled.Padding Required Click the toggle status to enable padding for characters in all outgoing messages.
By default, this option is disabled.TW (Test Word) Required Status Click the toggle status to enable word testing.
By default, this option is disabled.Media Priority Specify the media priority from the spin box. When a message is dispatched to the customers, the media type used for sending the messages will be the one that is on high priority. Number of Character Specify the number the padding characters should be repeated for the advice from the spin box. Media Code Specify the unique media code to identify while associating with an advice. Compatible Media Click the toggle status to indicate media compatibility.
By default, this option is disabled. - Click + to add media details.
- Perform one of the following action:
- Click Save to save the details.
The media is successfully created and can be viewed using the View Media screen.
- Click Cancel to discard the changes and close the screen.
- Click Save to save the details.
Parent topic: Media
