- Oracle Banking Common Core User Guide
- Decision Service
- Counter
- Create Counter
3.16.1 Create Counter
This topic describes the systematic instructions to create counter by updating various details.
Specify User ID and Password, and login to Home screen.
- On Homescreen, click Core Maintenance, under Core Maintenance, click Credit Decision.
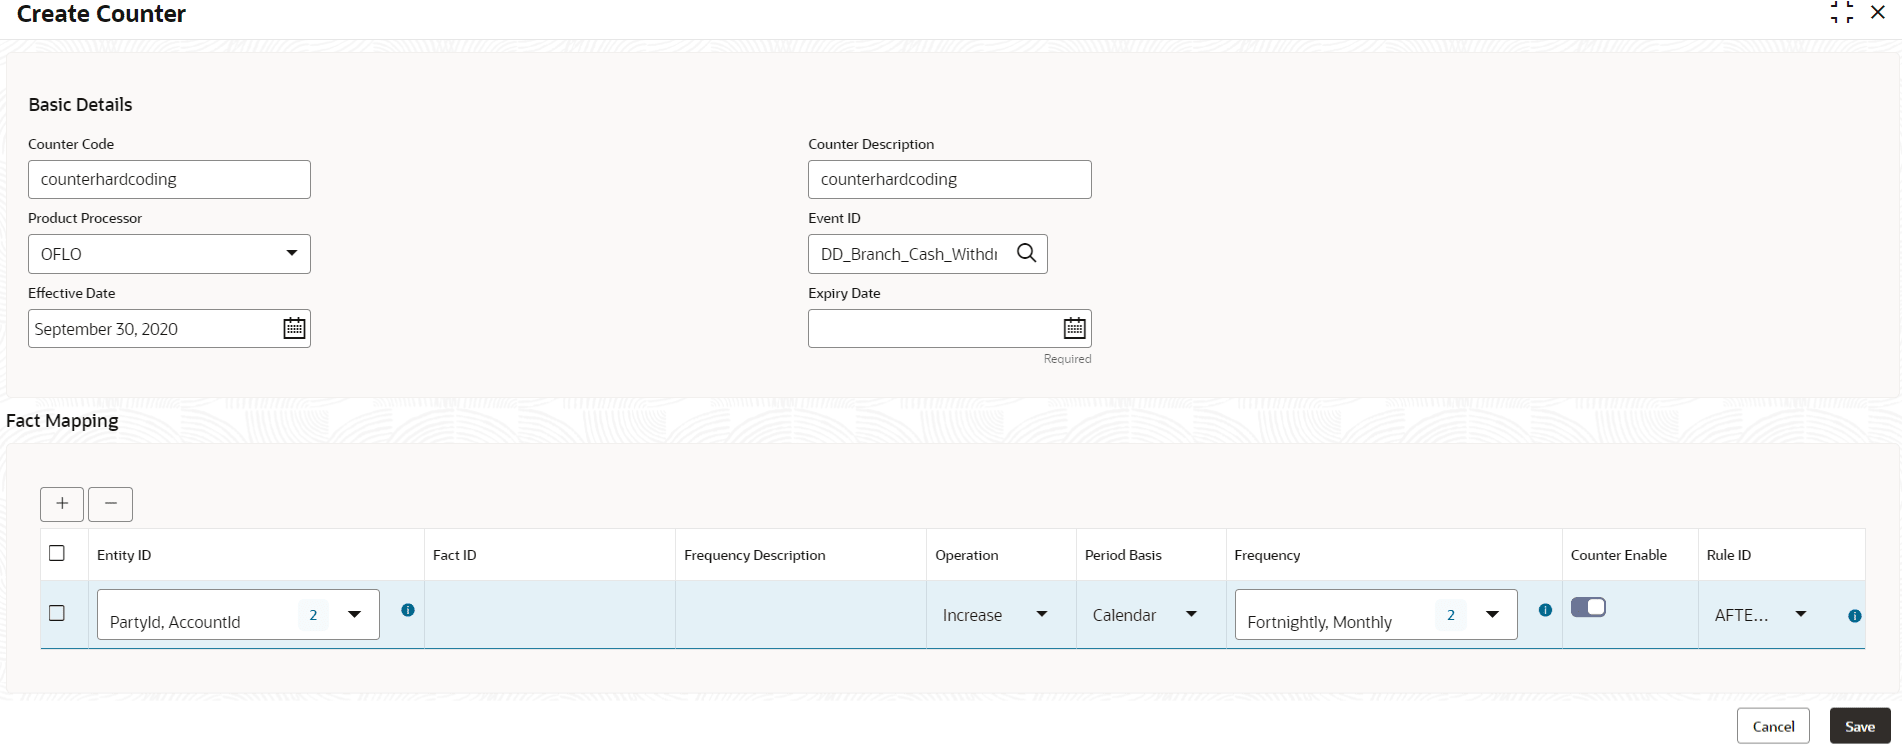
- Under Credit Decision, click Maintenance, under Maintenance, click Counter, under Counter, click Create Counter.The Create Counter screen displays.
- On Create Counter screen, Specify the fields.For more information on fields, refer to the field description table.
Note:
The fields marked as Required are mandatory.Table 3-87 Create Counter - Field Description
Field Description Counter Code Specify the unique counter code. Counter Description Specify the description for the counter. Product Processor Select the product processor from the drop-down list for which code is being created Event ID Click on 
icon and select the id from the list.Effective Date Specify the effective date. Expiry Date Specify the expiry date. Entity ID Select the options from the drop-down list. The available options are: - PartyID
- AccountID
- CollateralID

Click this icon to get the information about the rule. Fact ID Specify the fact ID for the selected entity. Frequency Description Specify the description of the fact ID selected. Operation Select the value from the drop-down list. The available options are: - Increase
- Decrease
Period Basis Select from the drop-down list The available options are: - Calendar
- Anniversary
Frequency Select the value from the drop-down list. The available options are: - Daily
- Weekly
- Monthly
- Quarterly
- Half Yearly
- Yearly

Click this icon to get the information about the rule. Counter Enable Click the toggle status to enable the counter. Rule ID Select the rule Id from the drop-down list. 
Click this icon to get the information about the rule. - Click Save to save the details.The Create Counter is successfully created and can be viewed using the View Counter screen.
Parent topic: Counter
