- Oracle Banking Common Core User Guide
- Core Maintenance
- Resource Class
- Create Resource Class
1.39.1 Create Resource Class
This topic describes the systematic instructions to configure the resource class.
Specify User ID and Password, and login to Home screen.
- On Home screen, click Core Maintenance. Under Core Maintenance, click Resource Class.
- Under Resource Class, click Create Resource
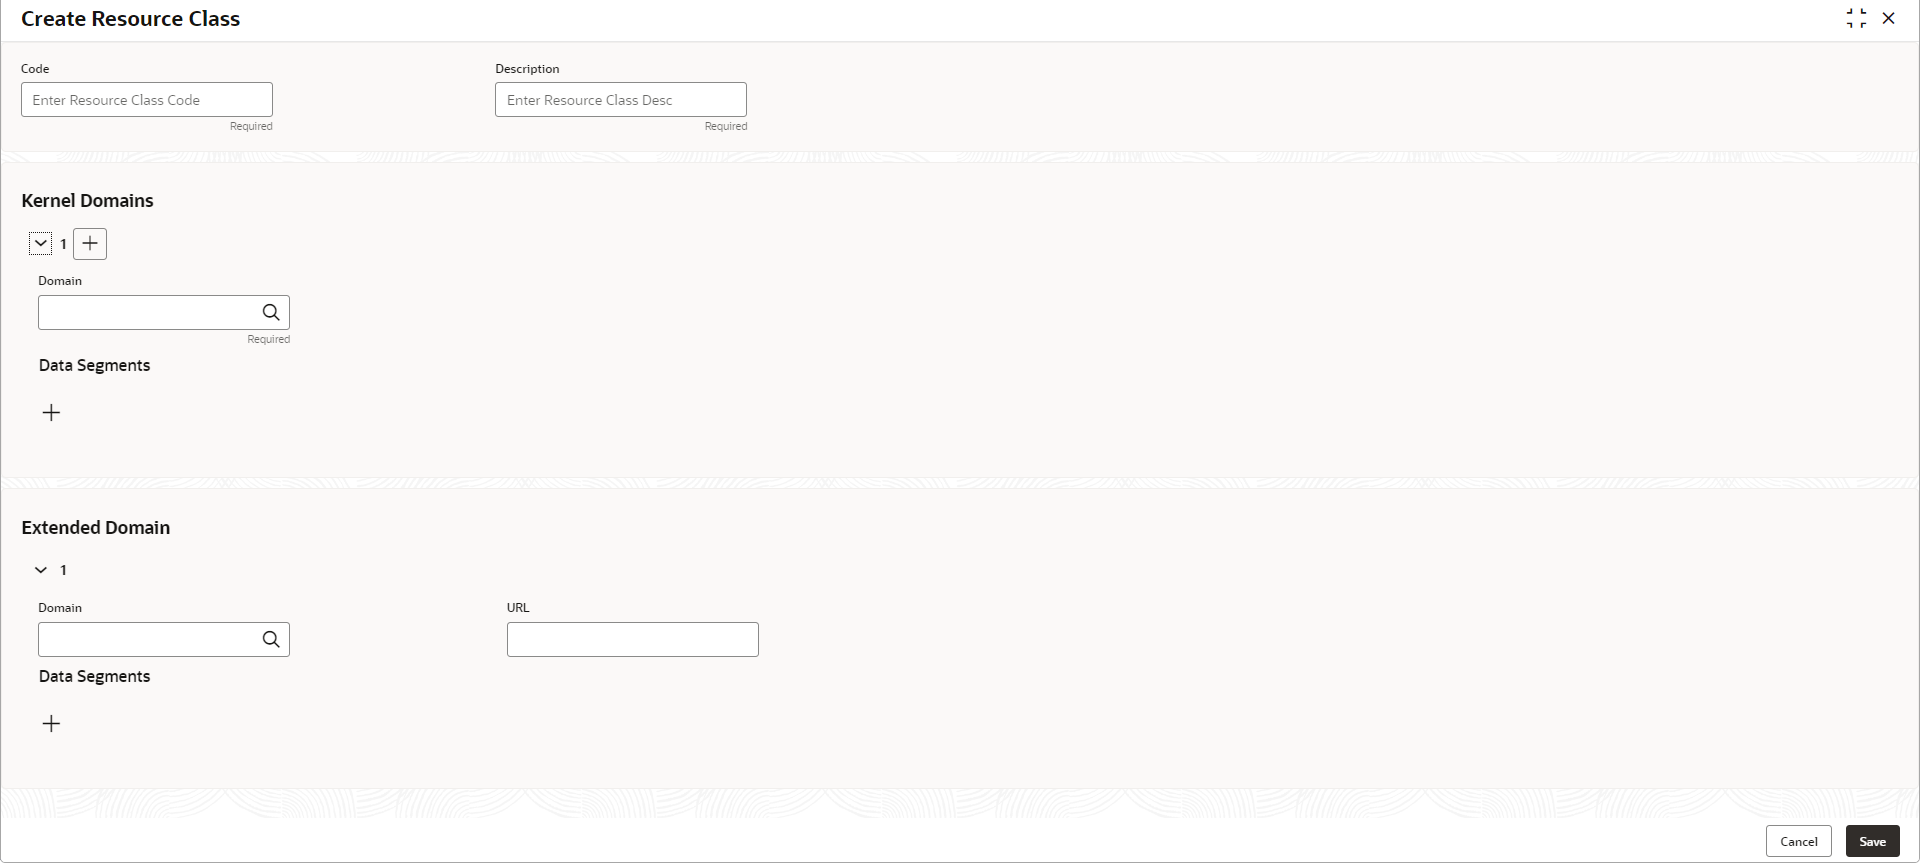
Class.The Create Resource Class screen displays.
- Specify the fields on Create Resource Class screen. For more information on fields, refer to the field description table.
Note:
The fields marked as Required are mandatory.Table 1-88 Create Resource Class – Field Description
Field Description Code Specify the code of the resource class being created. Description This field indicates the description of the resource class code. Kernel Domains This section provides the information related to kernel domains. 
Click this icon to add the new kernel domain. Domains Click Search and select the domain product from the list. This list is factory shipped from the SMS services.add Data segments The data segments for the selected domain can be configured by clicking on the + sign. This list is fetched from the datasegments available in the core maintenance Extended Domain This section provides the information related to extended domains. 
Click this icon to add the new extended domain. Domains Click Search and select the extended domain product from the list. This list is factory shipped from the SMS services. URL Specify the URL of the selected extended domain. Data segments The data segments for the selected domain can be configured by clicking on the + sign. This list is fetched from the datasegments available in the core maintenance - Click Save to save the details.The resource class is successfully created and can be viewed using the View Resource Class screen.
- Click Cancel to discard the changes and close the screen.
Parent topic: Resource Class
