3.5 Create Environments
This topic provides the instructions to create environment for cloud service application.
Once a cloud account is created and active, administrators can create an environment. As an Administrator, perform the following steps to create an environment for your application.
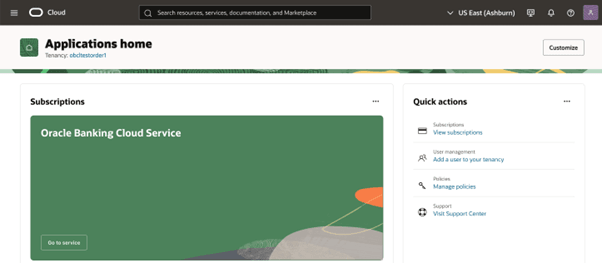
- Log into Oracle Cloud Infrastructure Console using the Username and Password, click Sign In. The Oracle Banking Cloud Service Applications(OBCS) home screen is displayed.
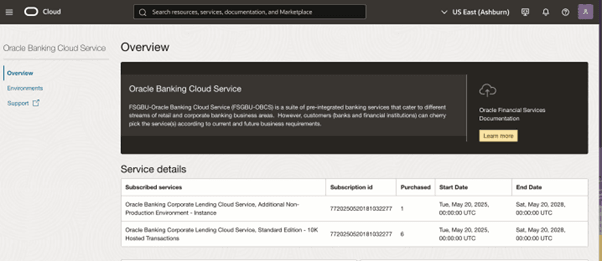
- Click Go to service. The Overview screen is displayed.
The Service Details section shows the list of products purchased by user.
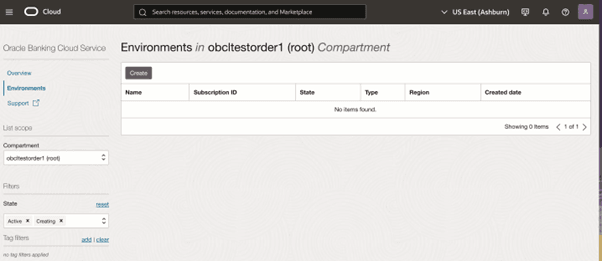
- From the Applications Console, under My Applications, click Environments to create an environment for the application.
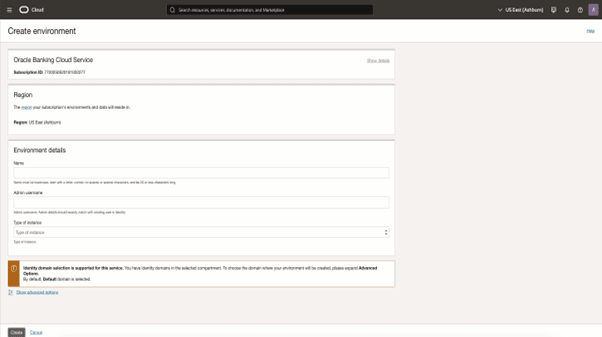
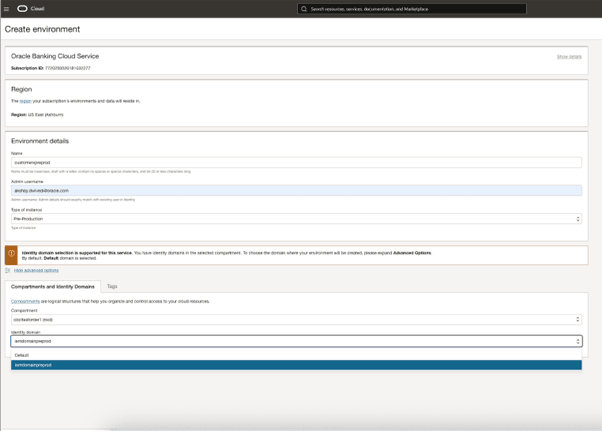
- Click Create. The Create Environment screen is displayed. For more information on fields, refer to the field description table.
Table 3-2 Create Environment - Field Description
Field Description Subscription ID Displays the single subscription details if a cloud account has only one subscription. Note: If more than one subscription is attached to this cloud account, a drop-down list will appear, allowing you to select the Subscription ID to provision.
Region Specify region from the drop-down list or confirm the default region. Note: The region is where an environment is geographically located. The region can't be changed after you create an environment.If this is the first environment that you are creating for this subscription, you can choose a different region from the list.
If you have already created environments for this subscription, this field can't be updated. All environments associated with a single subscription must be located in the same region. For more information, refer Choosing a Region for an Environment section.
Name Enter a Name for the environment. Note: The name can't be changed later.
Admin username Enter the admin's username. Note: The username may be either an Email ID or a User ID. The administrator added here will be assigned the default Administrator role for this environment's applications.
Type of instance Select the type of instance. The options are:- Production environment
- Pre-Production environment
- Non-Production environment
- Additional non-prod, <OBCS Product name>
Note:- The menu lists the environment types that are available for provisioning.
- The Additional non-prod, <OBCS Product name> option is available only if customer has additionally purchased additional non-prod instances of specific OBCS product.
- Specify the fields on the Create environment screen.
- Click Show advanced options to configure additional settings for new environment.For more information on fields, refer to the field description table.
Figure 3-14 Create Environment- Compartment and identity Domains tabs
Table 3-3 Create Environment- Compartment and identity Domains tabs - Field Description
Field Description Compartment and identity Domains tab This tab allows you to select the compartment and Identity Domain for environment creation. Compartment Click to select a different compartment in which to create the environment. The compartment selection defaults to the compartment that you last selected when you started the create environment flow. If you have not created any compartments in your tenancy, the root compartment is the only compartment available. For more information, refer Choosing a Compartment section.
Identity Domain Identity domain selection is supported if you want to choose separate domain apart from default. The drop-down lists the Identity domains in the selected compartment. To choose the domain where your environment will be created.For more information on creation an Identity domain, refer Creating an Identity Domain section.
By default, Default domain is selected.
Tags tab This tab allows you to add tags to the environment. Note: If you have permission to create a resource, you also have permission to apply free-form tags to it. To apply a defined tag, you must have permission to use its tag namespace. For more information on tagging, refer to the Resource Tags section.If you're unsure about applying tags, you can skip this option or ask an administrator. Tags can be applied later.
- Click Create. The environment is gets created and will be displayed on the Environments screen. You can track the progress of the environment creation by viewing the status.
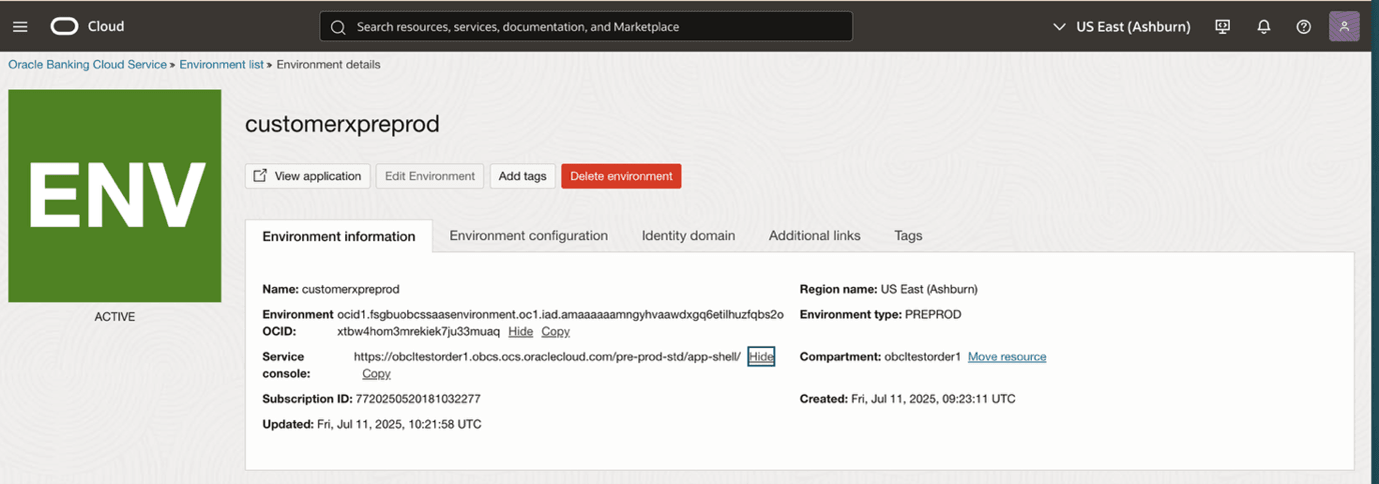
Once environment Provisioning completed, it will show status as Active.
Figure 3-16 Successful creation of environment
- Click on the environment Name to view its details.
- Click on the View application tab to access OBCS application login screen. The Oracle Banking Cloud Service Applications(OBCS) login screen is displayed.
Parent topic: Getting Started with Oracle Banking Cloud Service
